
>>

Skip the boxed mix and make thick, chewy, fudgy brownies with deep cocoa flavor and a shiny, crackly top. Simple ingredients, big payoff.
This is my go-to cocoa fudge brownie, the one I turn to when I want something reliably fudgy, deeply chocolatey, and impossibly simple. I discovered this method during a weekend when a last-minute craving collided with a sparse pantry; no fancy couverture chocolate, just cocoa powder, butter, eggs, sugar, and faith that technique would do the rest. The first pan I pulled from the oven had a glossy, slightly cracked top and a dense, chewy interior that made everyone ask, 'Who made these?' I signed my name—Ashley Manila—and have been making them ever since.
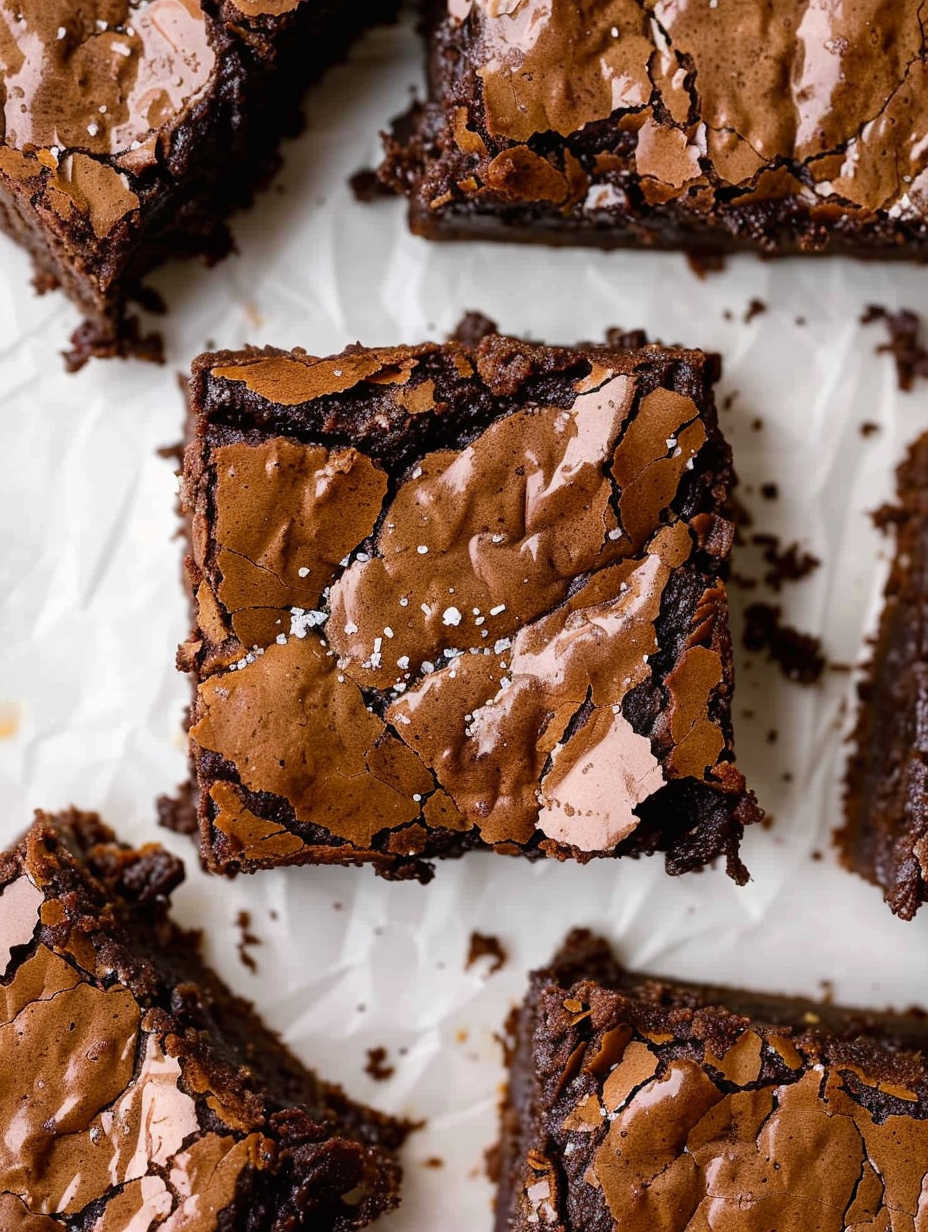
What sets these apart is the texture: thick, almost brownie-bar dense, with a moist center that pulls away cleanly when sliced after a full cool-down. There’s a short, satisfying bite from cocoa and a faint espresso note if you choose to add it. The crust forms quickly in the oven while the interior remains fudgy because the batter is mixed minimally and baked just long enough. These pans have become my emergency dessert for potlucks, school events, and weeknight treats—always disappearing faster than I can box them up.
I remember bringing a pan to a family picnic and watching strangers ask for seconds; the glossy top and deep cocoa color were the first things people noticed. My little sister declared them 'restaurant brownies'—that kind of compliment stuck with me and kept me perfecting this technique.
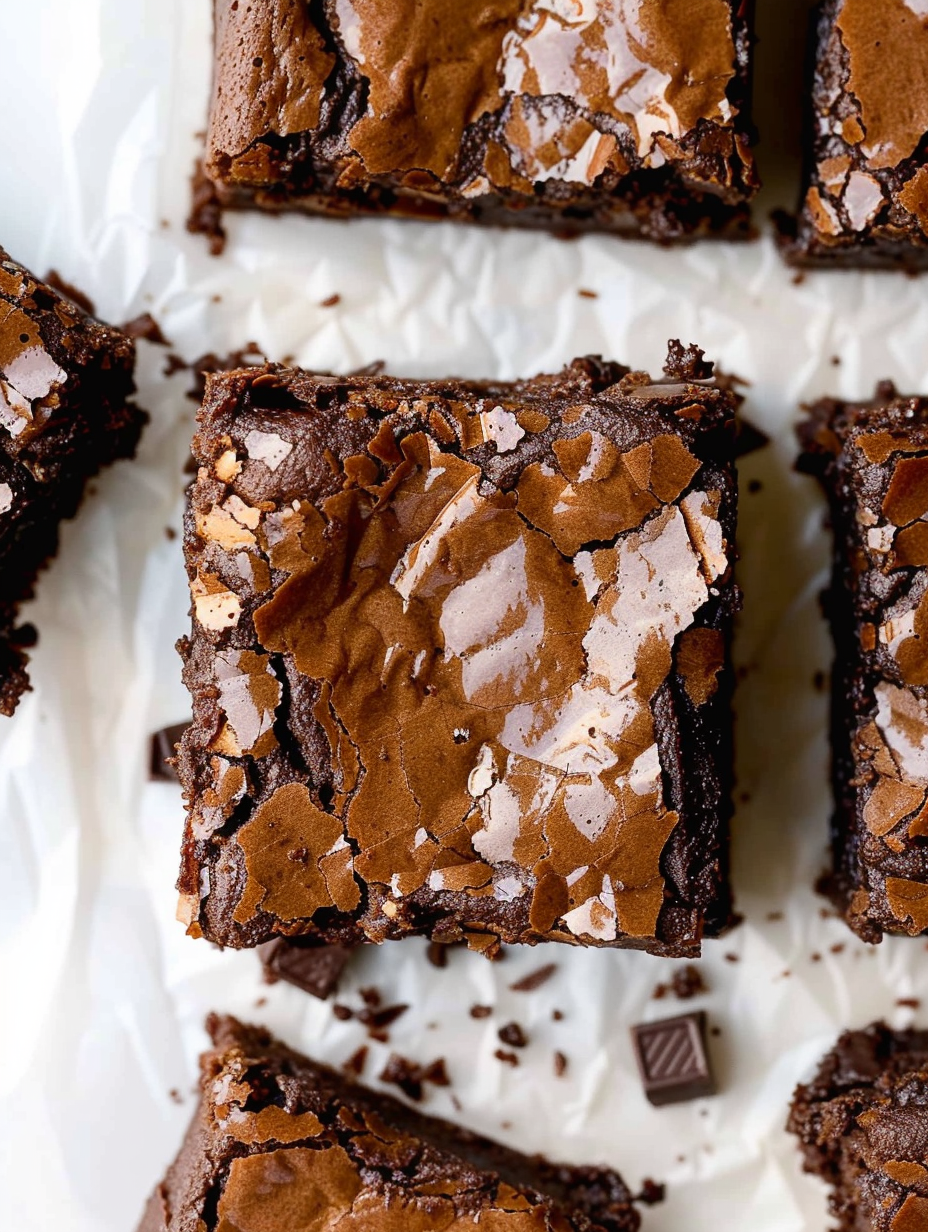
My favorite part is the shiny, slightly cracked top that forms when the sugar and fat marry correctly—it's a telltale sign the chemistry of the batter worked. I once tested three batches in one afternoon varying only the bake time; watching family members debate which was best taught me that texture preference is personal. These brownies are forgiving: adjust bake time for gooey versus more set centers and trust the minimal mixing rule.

Store brownies at room temperature in an airtight container for up to 3 days to retain softness; separate layers with parchment to prevent sticking. For longer storage, wrap the cooled pan tightly in plastic wrap and freeze for up to 3 months—slice while frozen or thaw overnight in the fridge before serving. To refresh slightly dried edges, warm individual slices in a 300°F oven for 6–8 minutes or microwave for 10–15 seconds for a warm, gooey bite. Avoid refrigerating for long periods if you want to keep a tender texture, as refrigeration can firm them excessively.
If you don't have unsalted butter, use salted butter but reduce added salt by half. Swap vegetable or canola oil with melted coconut oil for a subtle fragrance, but be mindful of coconut's flavor. For a gluten-free option, replace the all-purpose flour with a 1-to-1 gluten-free baking blend; expect a slightly different crumb. To make them dairy-free, use dairy-free margarine or vegan butter and dairy-free chocolate chips—texture will be similar but flavor shifts slightly. Darker cocoa or higher-quality chips intensify chocolate depth.
Serve slices warm with a scoop of vanilla ice cream and a sprinkle of flaky sea salt for contrast. For a simple presentation, dust with powdered sugar or top with toasted chopped pecans. These are great plated with a dollop of whipped cream or a drizzle of salted caramel for special occasions. Mini squares work well for dessert platters or alongside coffee for brunch—cut into bite-size portions and arrange on a platter for easy sharing.
Fall and winter: fold in 1/2 cup chopped toasted pecans and a pinch of cinnamon for holiday warmth. Spring and summer: top warm squares with fresh berries or a spoonful of raspberry compote to cut richness. For a festive twist, stir in 1/2 cup peppermint chips or drop a few teaspoons of orange zest into batter for a chocolate-orange pairing. These seasonal swaps keep the core technique intact while introducing bright or cozy flavors appropriate to the moment.
Make a double batch and freeze portions individually wrapped in plastic and foil for quick desserts. To pack for lunches, place slices in parchment-wrapped stacks in a rigid container to avoid squishing. If preparing ahead for a party, bake the day before and refrigerate; bring to room temperature or warm briefly before serving. Keep a small serrated knife on hand for cleaner slices, and wipe the blade between cuts for tidy portions.
Readers and family members always tell me these brownies are 'just like bakery'—one neighbor requested them as a consolation after a cancelled trip and said the brownies lifted everyone's mood. I once tested the recipe at a bake sale and the pan sold out within the first hour; customers told me they could taste the difference between these and boxed mixes. Those small moments—kids licking melted chocolate from spoons, friends texting me photos of their perfect crackled tops—are why I keep returning to this simple, reliable method.
These brownies combine technique and humble ingredients for a result that feels special every time. Make them your own by adjusting bake time and mix-ins, and don't be afraid to experiment—this base can handle it. Enjoy sharing a pan with people you love.
Fold dry ingredients in until you see the last trace of flour to avoid overmixing and cakey texture.
Temper the eggs by slowly whisking in warm butter to prevent scrambling and create a glossy batter.
Use parchment paper with an overhang to lift brownies from the pan for clean edges and easy slicing.
Chill the pan for 30–60 minutes if you want very clean, uniform slices before serving or packaging.
This nourishing the best cocoa fudge brownies - ashley manila recipe is sure to be a staple in your kitchen. Enjoy every moist, high protein slice — it is perfect for breakfast or as a wholesome snack any time.
Pull brownies earlier (around 27 minutes) for very gooey centers; bake up to 30 minutes for a firmer slice.
Cool completely before slicing or chill 30–60 minutes to cut cleaner. Use parchment overhang to lift the pan out.
This The Best Cocoa Fudge Brownies - Ashley Manila recipe makes perfectly juicy, tender, and flavorful steak every time! Serve with potatoes and a side salad for an unforgettable dinner in under 30 minutes.
Preheat oven to 350°F. Line a 9x9-inch pan with parchment paper, leaving an overhang, and lightly spray the parchment with non-stick spray.
Sift or whisk together flour, baking powder, salt, cocoa powder, and espresso powder in a large bowl and set aside.
In a medium saucepan over medium heat, combine butter, oil, and one-third cup sugar. Heat until butter is melted and sugar begins to dissolve, then remove from heat.
Whisk the remaining sugar with the eggs, extra yolk, and vanilla for about 30 seconds until smooth.
Slowly pour the warm butter mixture into the egg mixture a little at a time, whisking constantly to avoid scrambling, until fully combined.
Add the dry mixture and chocolate chips, then fold gently with a rubber spatula until the last streak of flour disappears—do not overmix.
Scrape batter into prepared pan, smooth the top, and bake 28 to 30 minutes until edges are set and top is shiny with slight cracks. Cool completely on a rack before slicing.
Last Step: Please leave a rating and comment letting us know how you liked this recipe! This helps our business to thrive and continue providing free, high-quality recipes for you.
Leave a comment & rating below or tag
@platemint on social media!

Saucy, cheesy baked ziti with ricotta and basil tastes like lasagna in half the effort, perfect for weeknights or crowds.

Quick, crowd-pleasing cheeseburger sliders baked golden with melty cheddar and savory beef. Ready in 30 minutes, great for parties and easy meal prep.

Crispy air fryer sweet potato fries with tender centers, fast-food flavor without deep frying. Ready in minutes and irresistibly snackable.
Leave a comment & rating below or tag @platemint on social media!
Enjoyed this recipe? Share it with friends and family, and don't forget to leave a review!
This recipe looks amazing! Can't wait to try it.
Comments are stored locally in your browser. Server comments are displayed alongside your local comments.

Join to receive our email series which contains a round-up of some of our quick and easy family favorite recipes.
