
>>

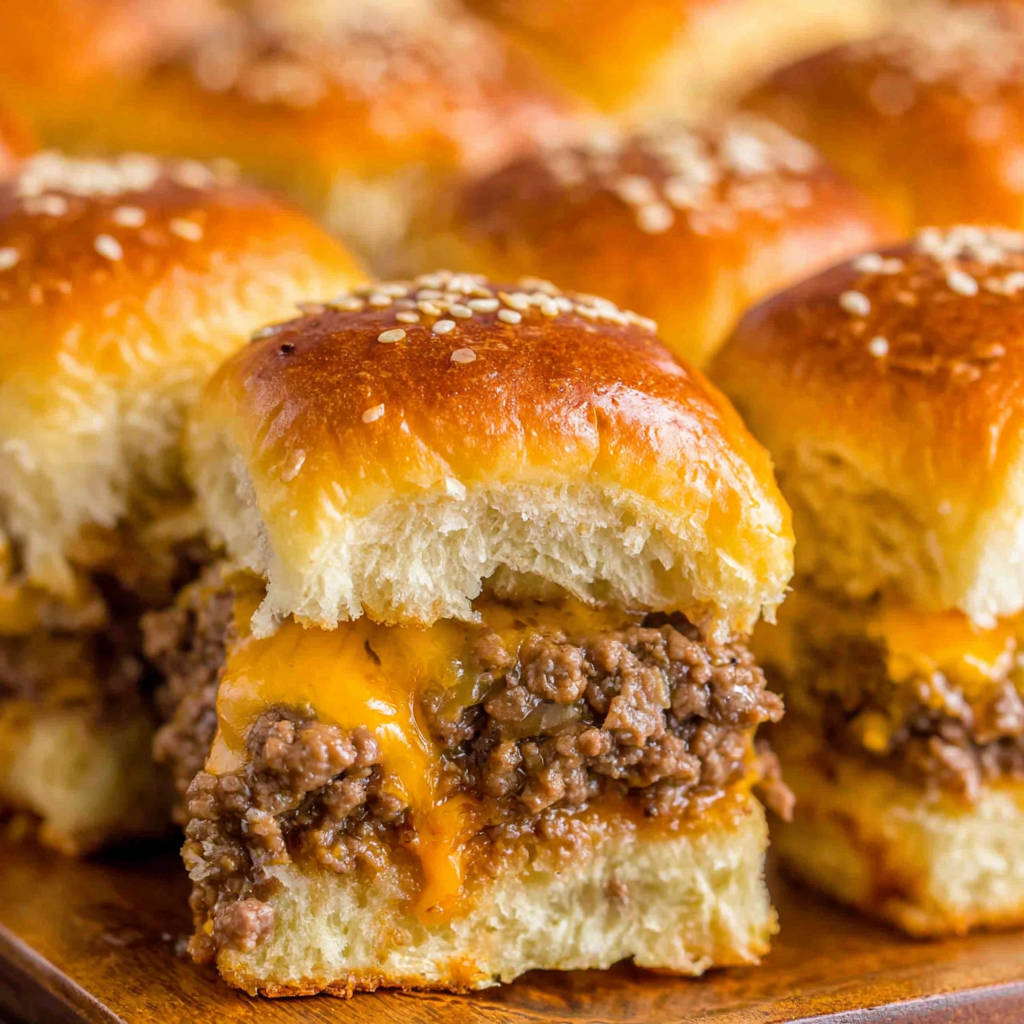
Quick, crowd-pleasing cheeseburger sliders baked golden with melty cheddar and savory beef. Ready in 30 minutes, great for parties and easy meal prep.

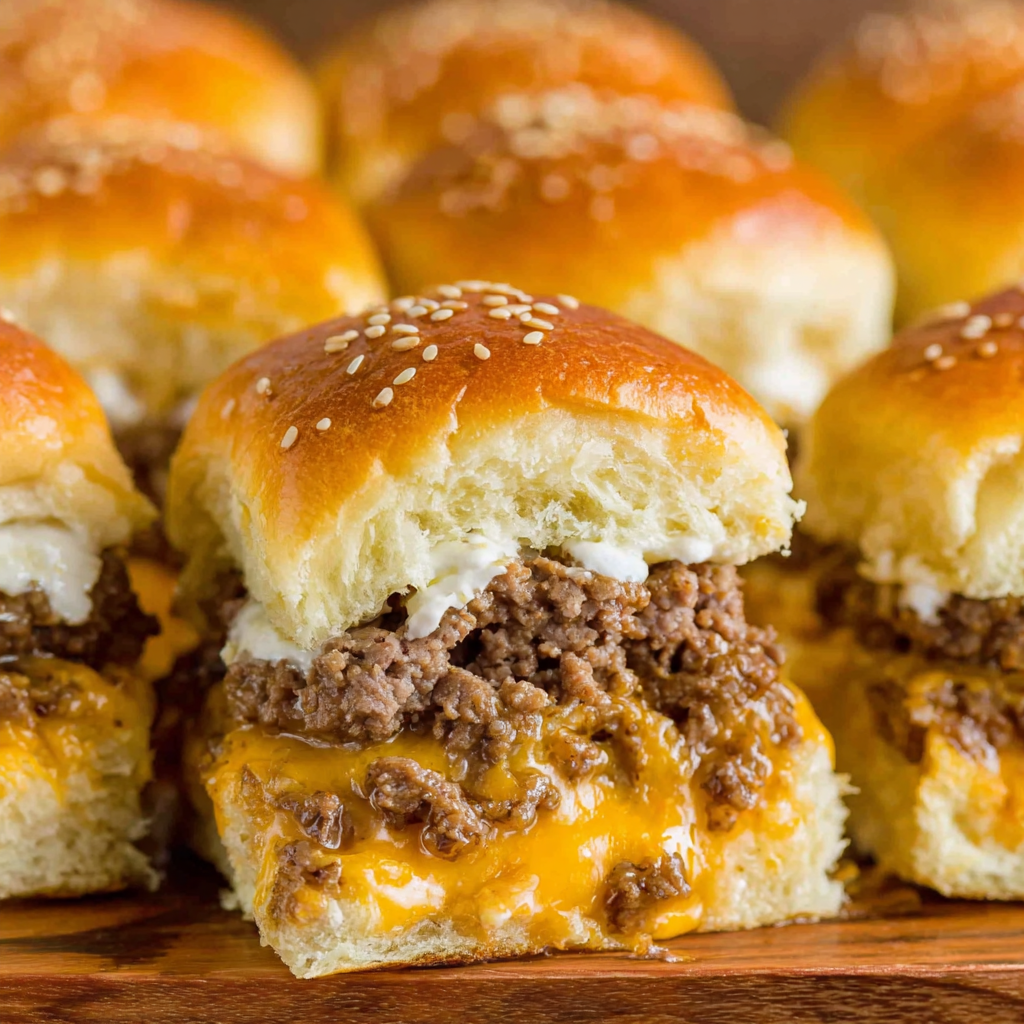
When I served these at a family birthday, my nephew called them “mini diner burgers” and went back for thirds. I have experimented with different cheeses and buns, but classic cheddar and soft dinner rolls always win. The sesame-seed finish adds just enough crunch and aroma to make them feel special without extra effort.
My favorite part is the first pull-apart, when a little cheese stretches and the buttery tops crackle. These have been the centerpiece of more than one movie night and after-practice dinner. I have learned to keep a batch ready-to-bake in the fridge when we host game day, because they are usually gone before halftime.
Cool sliders to room temperature, then wrap the entire slab tightly in foil or store in an airtight container. Refrigerate for up to 3 days. For freezing, wrap the slab in plastic, then foil, or pack individual sliders in freezer-safe zip bags to make reheating simpler. Reheat refrigerated sliders at 325°F, covered, for 8 to 10 minutes, then uncover 2 minutes to re-crisp the tops. From frozen, thaw overnight in the refrigerator, then reheat as directed. Signs of quality include soft, moist interiors and lightly crisp tops; if the bread feels dry, add a very light brush of butter before reheating.
Swap the beef with 2 lb ground turkey or chicken and add 1 tablespoon Worcestershire for richness. For a bolder bite, mix half beef and half pork. If cheddar is not your style, try Colby Jack for milder melt, pepper jack for heat, or American slices for ultra-smooth texture. Use Hawaiian rolls for a sweeter profile or brioche for a richer crumb. No sesame seeds on hand? Use poppy seeds or everything bagel seasoning. For a lighter option, brush with olive oil instead of butter and use light mayo. Gluten-free rolls work well; just toast the bottoms 3 minutes before assembly to help them hold up.
Set out a slider bar with dill pickle chips, thinly sliced tomatoes, shredded lettuce, ketchup, mustard, and a quick burger sauce made from equal parts mayo and ketchup plus a splash of pickle juice. Pair with oven fries, a crisp salad, or crunchy slaw. For parties, serve alongside veggie sticks and ranch, buffalo wings, or a simple tomato-cucumber salad for contrast. Garnish the tray with extra sesame seeds and a sprinkle of chopped chives for a fresh, bistro-style look. These sliders travel well; keep them wrapped in foil in a warm oven until ready to serve.
Sliders trace their heritage to early 20th-century American diners where bite-sized burgers became iconic, especially through griddled onions and soft buns. Baking a full pan of sliders at once is a modern twist that streamlines the process for home cooks and parties. The sesame-seed finish nods to classic fast-casual burgers, while the double-cheese technique mirrors diner cooks who layer cheese for both moisture control and gooey melt. Today, sliders have become a staple for tailgates, potlucks, and holiday gatherings because they are easy to serve, share, and customize.
In summer, add thinly sliced garden tomatoes and shredded lettuce after baking for a fresh crunch. For fall tailgates, swap cheddar with smoked gouda and add a swipe of barbecue sauce. Winter parties call for caramelized onions and a dash of Dijon for cozy depth. In spring, brighten with quick-pickled red onions and snipped chives. Holiday spreads love a sprinkle of everything bagel seasoning on top and a tray of crisp pickles on the side. Adjust baking time by 1 to 2 minutes based on how full your rolls are and how dark you want the tops.
Assemble the sliders completely, cover tightly with foil, and refrigerate up to 24 hours. Bake straight from the fridge, adding 2 to 3 minutes to the time if needed. For weekly lunches, portion into reusable containers with a small cup of pickles and a side salad. Reheat covered at 325°F for 8 minutes or microwave one slider for about 25 seconds, then finish 2 minutes in a toaster oven for a crisp top. If packing for a picnic, bake, cool slightly, and keep wrapped in foil; they stay warm and soft for about 30 minutes.
There is a special kind of joy in bringing a hot tray of sliders to the table and watching everyone immediately reach for one. Keep this simple, satisfying formula on hand, make it your own with easy add-ins, and enjoy how effortlessly it turns any gathering into a mini celebration.
Use lean beef to keep buns from getting soggy.
Create a cheese layer under the beef to protect the bread and ensure maximum melt.
Brush tops right before baking so sesame seeds adhere and brown evenly.
Rest the sliders 3 minutes after baking for cleaner slices.
Square off the beef layer with a spatula so every slider has an even filling.
This nourishing juicy cheeseburger sliders bake recipe is sure to be a staple in your kitchen. Enjoy every moist, high protein slice — it is perfect for breakfast or as a wholesome snack any time.
Yes. Assemble the sliders, cover tightly with foil, and refrigerate up to 24 hours. Bake at 350°F for 12 to 15 minutes, adding 2 minutes if baking straight from the fridge.
Reheat covered at 325°F for 8 to 10 minutes in the oven, then uncover 2 minutes to crisp the tops. For a single slider, microwave 25 seconds and finish in a toaster oven for 2 minutes.
Yes. Use your favorite gluten-free rolls and toast the cut sides for 3 minutes before assembly to help them hold up. Check labels on mayo and seasonings.
This Juicy Cheeseburger Sliders Bake recipe makes perfectly juicy, tender, and flavorful steak every time! Serve with potatoes and a side salad for an unforgettable dinner in under 30 minutes.
Preheat oven to 350°F. Lightly butter the bottom of a rimmed baking sheet to prevent sticking and encourage a crisp base.
Heat olive oil in a large skillet over medium-high. Sauté diced onion 1 to 2 minutes until translucent. Add ground beef, season with salt, pepper, and garlic powder, and cook 6 to 8 minutes, breaking it up until no pink remains.
Tilt skillet to remove excess fat. Off heat, stir in mayonnaise until fully combined to lock in moisture and bind the filling.
Slice rolls horizontally. Arrange the bottoms on the prepared sheet and line with sliced cheddar to create a protective, melty layer.
Spread beef mixture evenly over the cheese, pressing and squaring edges. Sprinkle shredded cheddar evenly across the top.
Place tops over the filling. Brush with melted butter and sprinkle sesame seeds. Bake 12 to 15 minutes until cheese melts and tops are golden. Rest 3 minutes, then slice into 24 sliders.
Last Step: Please leave a rating and comment letting us know how you liked this recipe! This helps our business to thrive and continue providing free, high-quality recipes for you.
Leave a comment & rating below or tag
@platemint on social media!

Saucy, cheesy baked ziti with ricotta and basil tastes like lasagna in half the effort, perfect for weeknights or crowds.
Quick, crowd-pleasing cheeseburger sliders baked golden with melty cheddar and savory beef. Ready in 30 minutes, great for parties and easy meal prep.

Crispy air fryer sweet potato fries with tender centers, fast-food flavor without deep frying. Ready in minutes and irresistibly snackable.
Leave a comment & rating below or tag @platemint on social media!
Enjoyed this recipe? Share it with friends and family, and don't forget to leave a review!
This recipe looks amazing! Can't wait to try it.
Comments are stored locally in your browser. Server comments are displayed alongside your local comments.

Join to receive our email series which contains a round-up of some of our quick and easy family favorite recipes.
