
>>

Made-from-scratch red velvet squares with a tender, fudgy crumb and a cloud-like cream cheese topping — a nostalgic American dessert perfect for holidays and everyday treats.
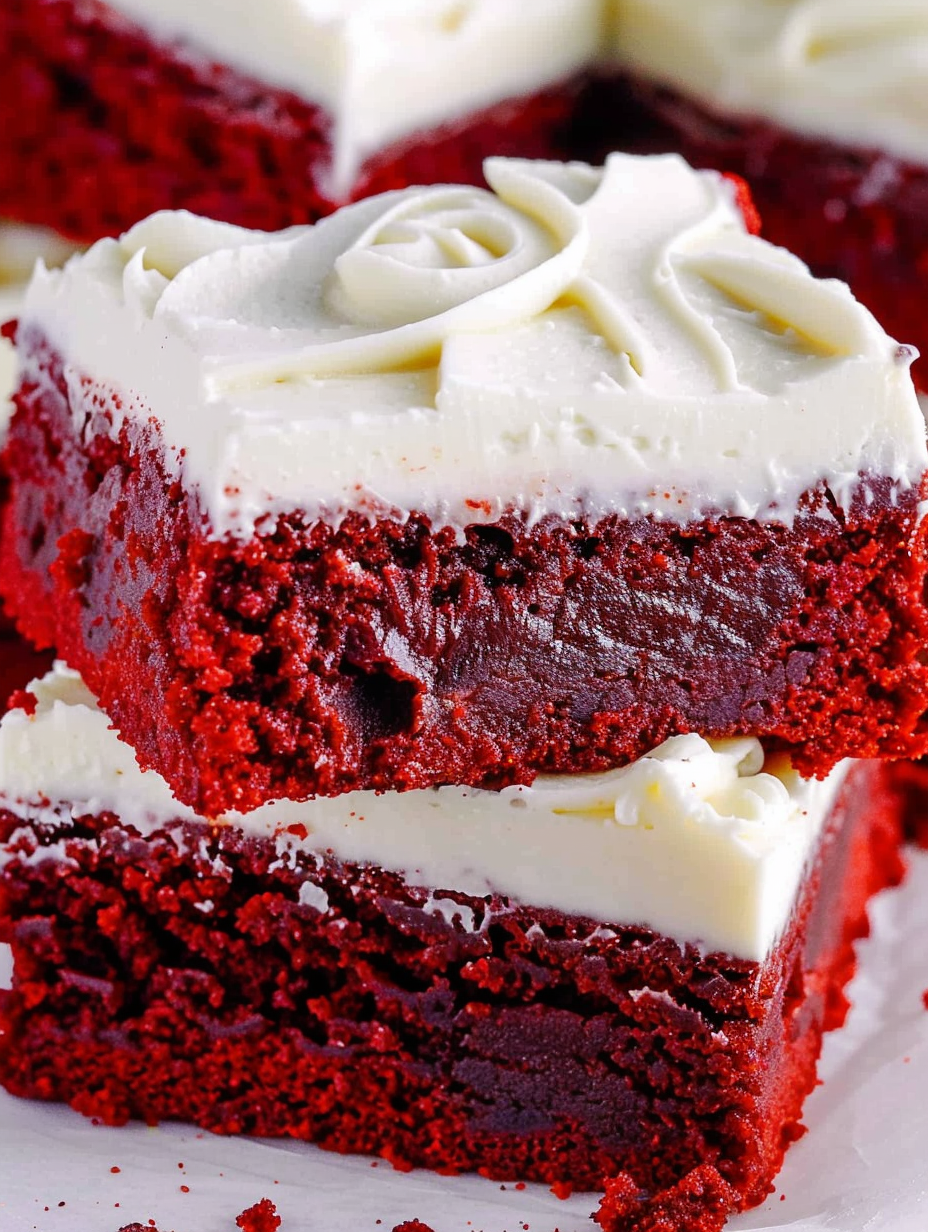
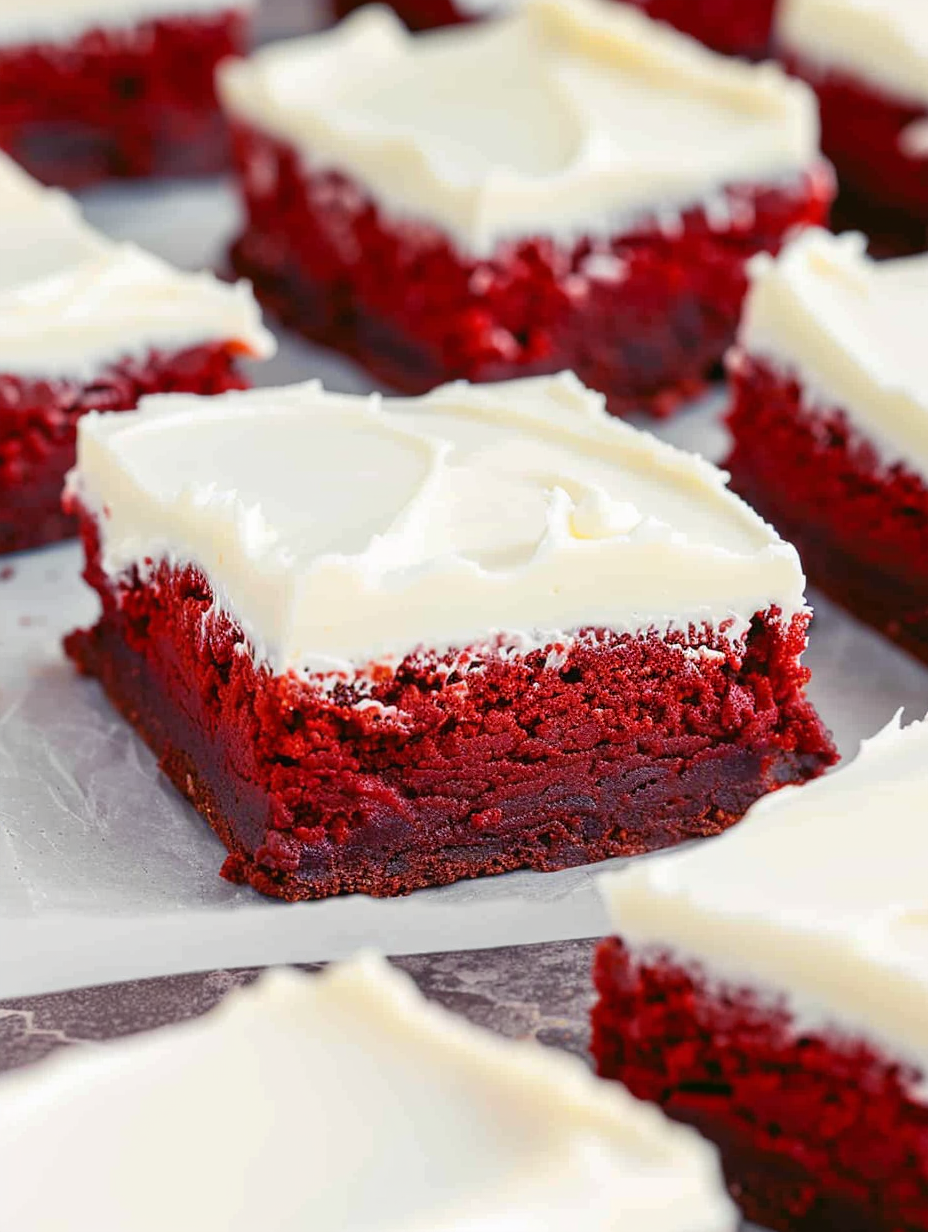
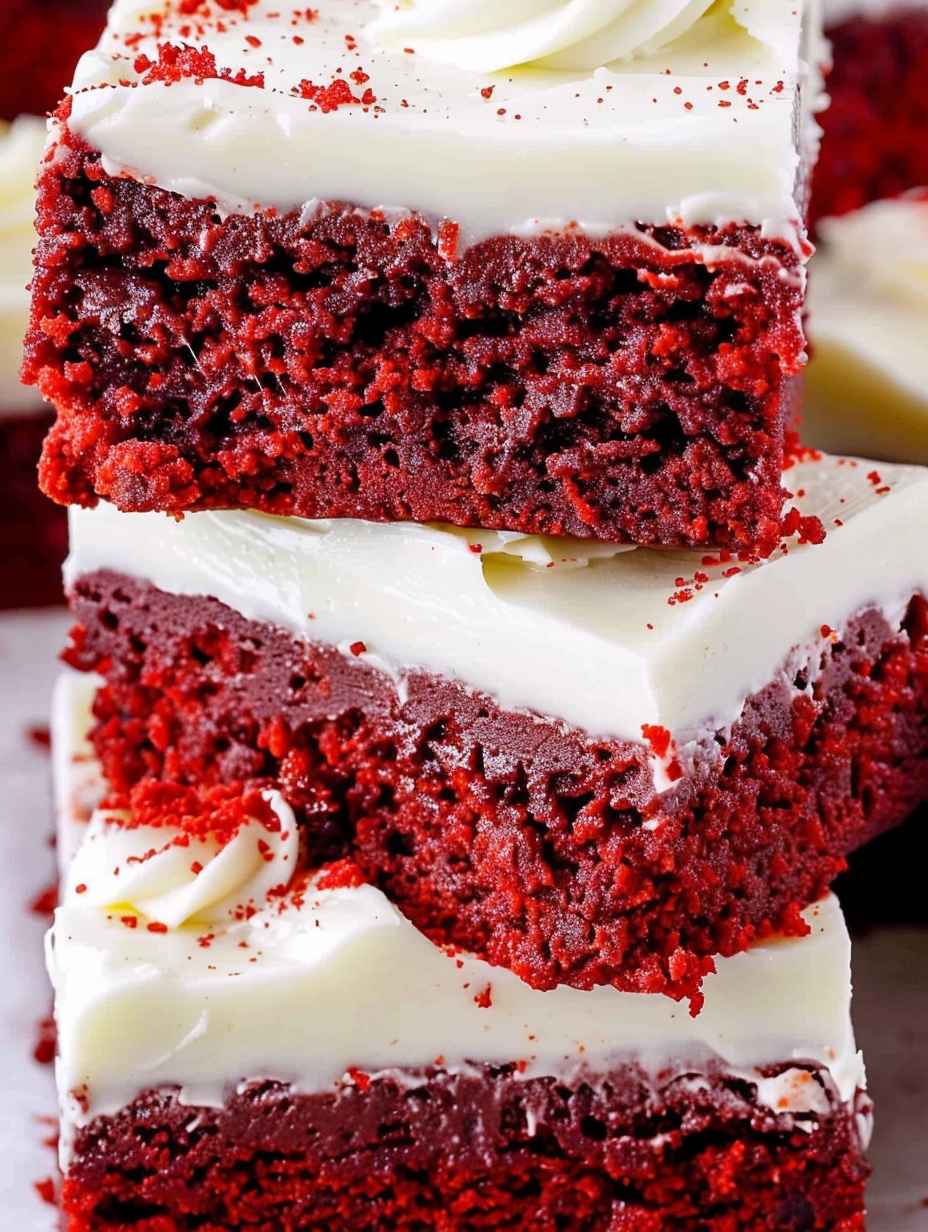
This batch of red velvet squares has been a small obsession in my kitchen ever since I first combined pantry staples with a generous dose of red food coloring for a special birthday dessert. I discovered the balance between a fudgy brownie base and a tangy, silky cream cheese topping on a rainy afternoon when I wanted something richer than a cake but more elegant than a plain bar. The result is a moist, slightly dense base with a subtle cocoa background and a gentle tang from the cream cheese that keeps the sweetness in check.
I make these when I want an easy, crowd-pleasing dessert that travels well and keeps its character even a day after baking. They are especially welcome at family gatherings where someone always asks for 'just one more.' The combination of texture and flavor makes them memorable: a tender, almost brownie-like bite with a glossy, slightly whipped frosting that melts into each corner. This is the kind of dessert that sparks small conversations and big smiles.
In my family these bars became a holiday favorite the very first time I served them — my niece declared them 'pretty and perfect,' and my father complimented the balance between rich butter and the tang of cream cheese. They’ve shown up at picnics, potlucks and quiet Sunday tea over the past few years, and every time someone asks for the recipe I smile because it’s so simple and reliably delicious.
My favorite thing about these bars is how dependable they are. I’ve taken them to potlucks and wrapped individual squares for long car rides — the texture holds up and the frosting mellows to a pleasant creaminess that everyone seems to love. Watching family members debate whether the center is brownie or cake is always a highlight; both camps are happy by the end of the night.
Store finished squares in a single layer or stacked with parchment between layers in an airtight container. Refrigeration is recommended because of the cream cheese layer; the bars will keep their ideal texture for about four days chilled. For longer storage, freeze uncut bars on a baking sheet until firm, then wrap each square individually in plastic and place in a freezer-safe container for up to three months. Thaw overnight in the refrigerator before serving, then bring to room temperature for 15–20 minutes for the best mouthfeel. If you want to refresh slightly hardened frosting, let the squares sit at room temperature until softened, or microwave briefly on low power for 8–10 seconds.
To make these without salted butter, use unsalted butter and add 1/4 teaspoon fine salt to the batter. For a slightly lighter texture, substitute half the brown sugar with granulated sugar (measure carefully). If you prefer natural coloring, use beet powder mixed into a tablespoon of warm water, though the color will be subtler. To make the frosting less sweet, reduce powdered sugar by 1/4 cup and add a squeeze of lemon for brightness; the tang balances sweetness nicely. For a gluten-free version, replace the all-purpose flour with a 1:1 gluten-free flour blend and add 1/4 teaspoon xanthan gum if the blend does not already contain it.
Serve squares chilled or at cool room temperature. Garnish with a light dusting of cocoa, shaved dark chocolate, or a few sprinkles for a festive look. Pair with a cup of black coffee or a milky latte to balance the richness, or present alongside fresh berries to add brightness on the plate. These bars are great for holiday dessert trays because they hold their shape and can be made a day ahead; consider cutting into smaller bite-size pieces for cocktail gatherings or leaving larger squares for a plated dessert with whipped cream and a drizzle of raspberry sauce.
Red desserts have long been associated with celebration in the United States, with red velvet cake becoming an iconic indulgence in mid-20th-century American baking. This version pays homage to that tradition by translating the familiar cake into a denser bar form, combining the cocoa undertones of classic velvet cakes with the concentrated texture of a brownie. The cream cheese topping echoes the popular pairing found on velvet cakes, uniting tang and sugar in a way that became mainstream in American bakeries and home kitchens over the last century.
For winter holidays, add a teaspoon of orange zest to the frosting for a bright, festive note. In summer, top chilled squares with lightly macerated strawberries for a refreshing contrast. For fall, sprinkle the frosting with a pinch of ground cinnamon or fold a tablespoon of pumpkin purée into the batter and reduce moisture elsewhere, though that will create a softer, more cake-like texture. Adjust coloring or garnish to suit the season — bright vermilion for Valentine’s Day or a dusting of gold sugar for New Year’s celebrations.
Make the base one day ahead and store it wrapped in the pan at room temperature. Whip the frosting on the day you plan to serve to keep it light and airy, then spread it shortly before guests arrive. If you need grab-and-go breakfasts or snacks, cut bars into smaller portions and store individually wrapped in the refrigerator for quick treats. Use a ruler and a chilled knife for precise, presentable slices when you are preparing them for gifting or entertaining.
These squares are simple to make, forgiving in technique, and full of nostalgic charm. Whether you’re baking for a holiday, a party, or a quiet evening at home, they reward the effort with consistent texture and a bright, creamy finish. I hope they become a favorite in your kitchen too.
Use gel coloring for vibrant red without thinning the batter; add it slowly until you reach the desired hue.
Allow the base to cool completely before frosting to prevent a runny topping and to achieve clean slices.
Measure flour using the spoon-and-level method to avoid a dry, cakey texture; packed flour yields too much.
If frosting is slightly soft, chill for 20 minutes before slicing for neater pieces.
This nourishing red velvet brownies recipe is sure to be a staple in your kitchen. Enjoy every moist, high protein slice — it is perfect for breakfast or as a wholesome snack any time.
Yes. The base can be baked up to 24 hours in advance and frosted before serving. Store frosted bars in the refrigerator.
Freeze uncut bars on a sheet tray, then wrap individually and store for up to 3 months. Thaw overnight in the refrigerator.
This Red Velvet Brownies recipe makes perfectly juicy, tender, and flavorful steak every time! Serve with potatoes and a side salad for an unforgettable dinner in under 30 minutes.
Preheat oven to 350°F and line a 9x9-inch pan with parchment paper, leaving an overhang for easy removal; lightly spray parchment.
Whisk together 3/4 cup flour, 2 Tablespoons cocoa powder and 1/4 teaspoon baking soda in a medium bowl until evenly combined.
Whisk 1 cup packed light brown sugar with 3/4 cup melted butter until smooth, then add 2 eggs and 2 teaspoons vanilla and mix thoroughly.
Whisk in 1 ounce red food coloring gel until uniform, then fold in the dry ingredients until there are no dry streaks.
Smooth batter into the prepared pan and bake 25–30 minutes; a toothpick should come out with a few moist crumbs for a fudgy center.
Beat 4 ounces softened cream cheese with 2 Tablespoons softened butter, add 1 cup powdered sugar gradually, stir in 1 teaspoon vanilla, and whip until light.
Once the base is completely cool, spread frosting evenly, chill briefly to set, then cut into 9 squares and serve.
Last Step: Please leave a rating and comment letting us know how you liked this recipe! This helps our business to thrive and continue providing free, high-quality recipes for you.
Leave a comment & rating below or tag
@platemint on social media!

Saucy, cheesy baked ziti with ricotta and basil tastes like lasagna in half the effort, perfect for weeknights or crowds.

Quick, crowd-pleasing cheeseburger sliders baked golden with melty cheddar and savory beef. Ready in 30 minutes, great for parties and easy meal prep.

Crispy air fryer sweet potato fries with tender centers, fast-food flavor without deep frying. Ready in minutes and irresistibly snackable.
Leave a comment & rating below or tag @platemint on social media!
Enjoyed this recipe? Share it with friends and family, and don't forget to leave a review!
This recipe looks amazing! Can't wait to try it.
Comments are stored locally in your browser. Server comments are displayed alongside your local comments.

Join to receive our email series which contains a round-up of some of our quick and easy family favorite recipes.
