
>>

All the cozy spice of pumpkin pie made into individual, no bake cups. Easy to assemble and perfect for fall parties, holidays, or quick dessert fixes.
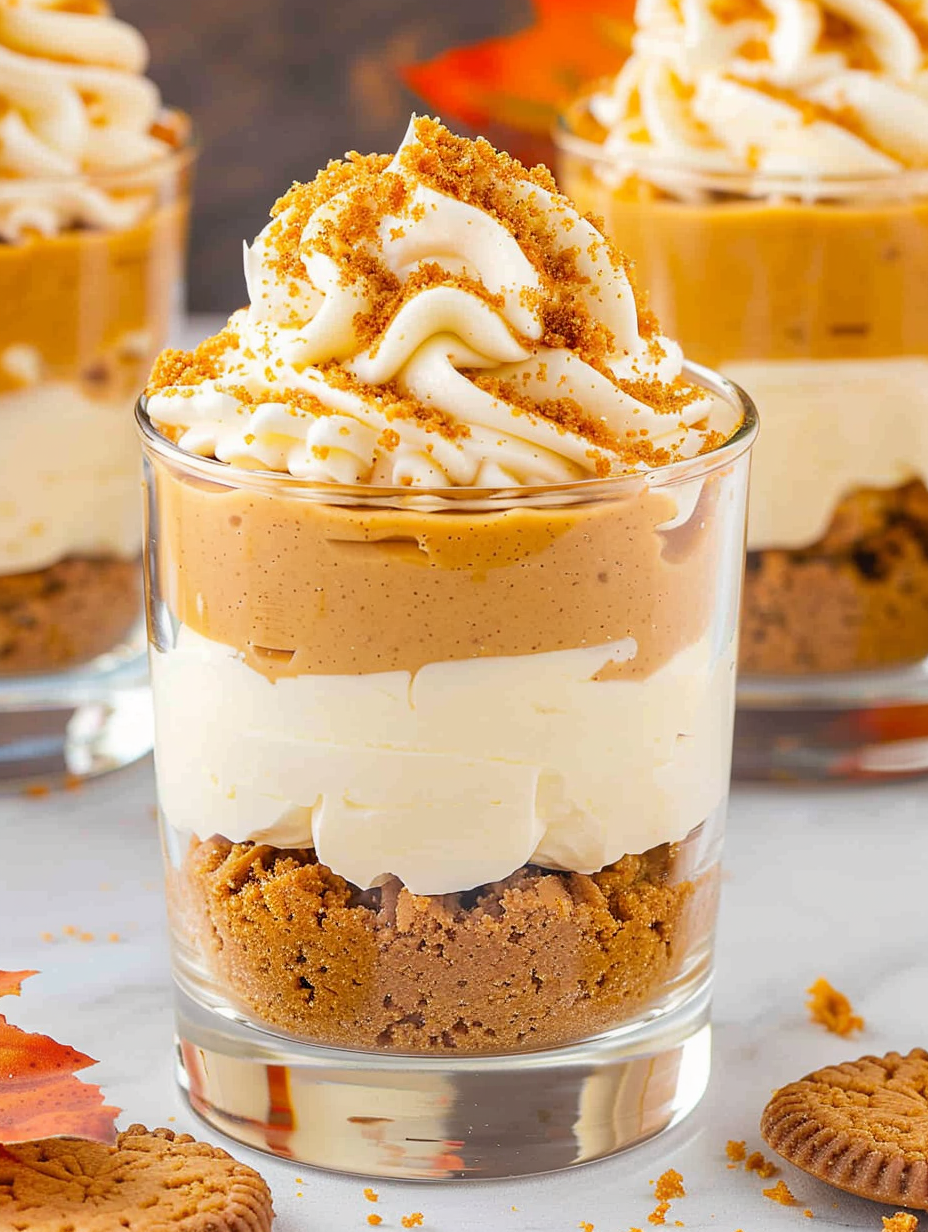
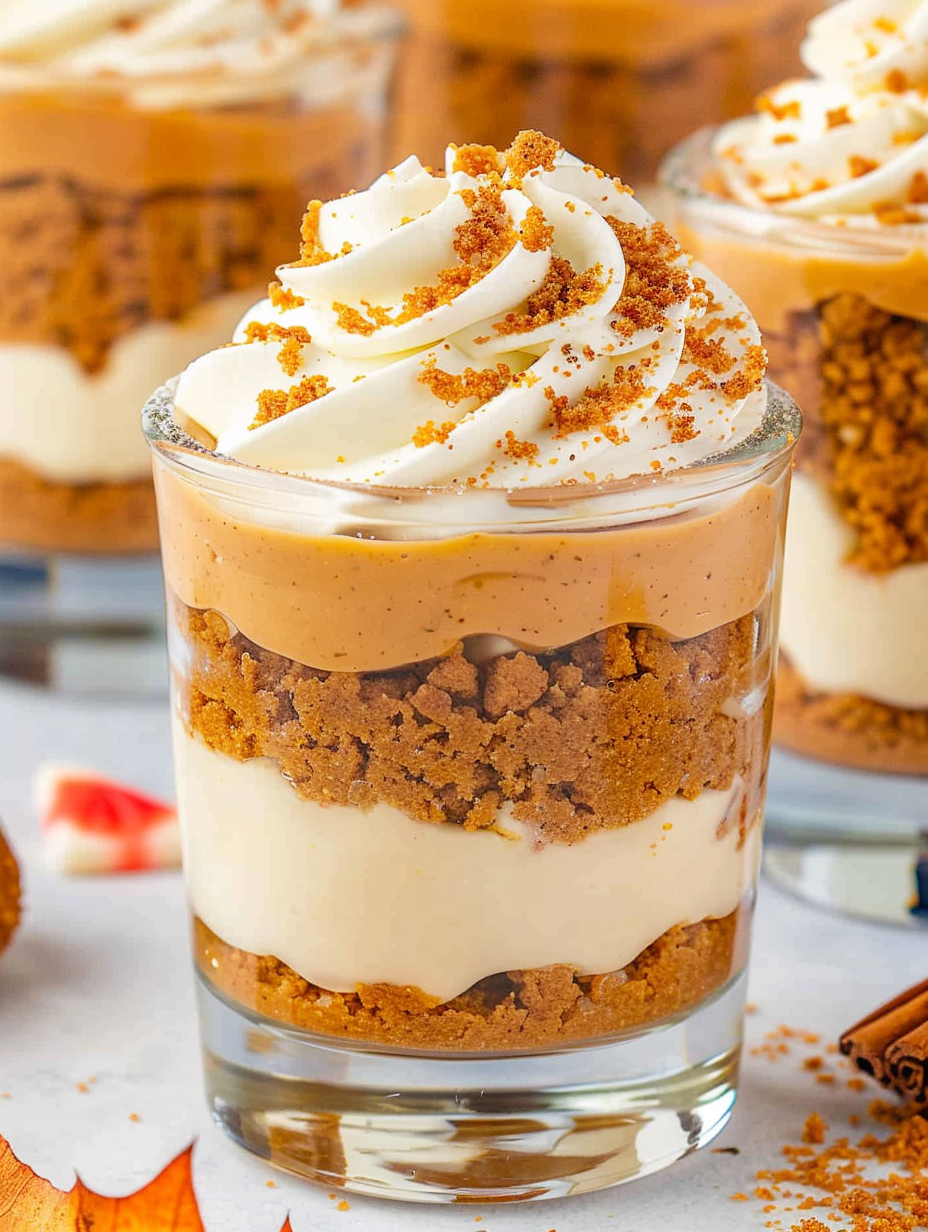
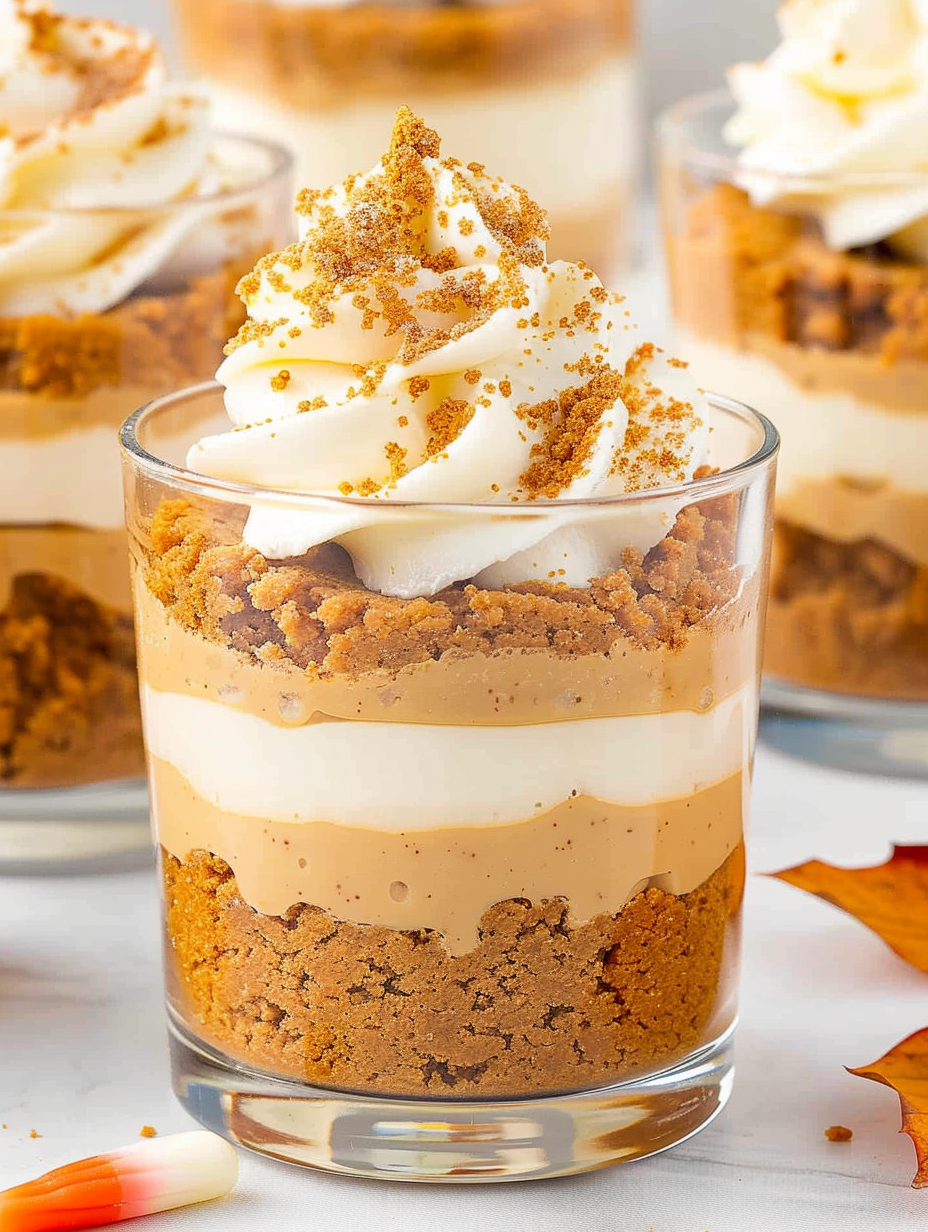
This pumpkin pie in a cup is my favorite way to enjoy the classic autumn flavor without turning on the oven. I first discovered this handheld version during a busy November when I needed an easy dessert for a small family gathering. The texture is creamy and lightly spiced, and the crunchy cookie crumb layers add the perfect contrast. It is a no bake dessert that delivers the familiar pumpkin spice notes in a playful, portable presentation. Each cup looks festive and feels special, yet the recipe comes together in minutes which makes it a go to when time is short.
I remember making these for a Halloween party and watching guests linger around the dessert table because they are so easy to eat while mingling. The filling is luscious and dense like a pumpkin cheesecake but lighter because of the whipped topping. The cookie crumbs are simple to prepare, and I like that Biscoff cookie crumbs bring a caramelized, spiced background that pairs beautifully with pumpkin. These cups are ideal for Thanksgiving when you want dessert that is quick, pretty, and easy to portion.
These cups always get compliments from family and friends. I discovered that piping the filling into the cups makes assembly faster and neater which is handy when serving a crowd. The recipe adapts well to glassware of many shapes and sizes and smaller portions are perfect for sampling a few sweets without overdoing it.
My favorite aspect of this preparation is how easy it is to scale up into a trifle for larger crowds or keep small for an intimate gathering. I once prepared a tray of these for a potluck and everyone kept asking for the recipe. The simplicity makes this dessert approachable for inexperienced bakers yet impressive for guests.
Store finished cups in the refrigerator covered with plastic wrap or in an airtight container for up to one day. For transport, place lids or cling film over each cup and keep chilled on ice packs. Avoid freezing because the whipped topping will separate and the cream cheese may change texture. When reheating is desired, these are meant to be served cold so remove from the refrigerator 10 minutes before serving to take off some chill and bring out spice aromas.
If you cannot find Biscoff cookies use graham crackers, gingersnaps, or shortbread cookies to alter the flavor profile. For a gluten free option use certified gluten free cookie crumbs and check labels on whipped topping and pumpkin puree. Replace frozen whipped topping with freshly whipped heavy cream sweetened lightly for a fresher dairy taste. For a lower sugar version reduce sugar by a quarter cup and note the filling will be less sweet and slightly tangier from the cream cheese.
Serve these cups on a dessert tray with small spoons for gatherings. Garnish each cup with a swirl of additional whipped topping and a sprinkle of cookie crumbs or chopped toasted pecans. Add a dusting of cinnamon or a small cinnamon stick for a rustic look. These pair well with coffee or a warm spiced cider. For a festive spread include a few cups with chopped candied pecans or caramel drizzle for variety.
Pumpkin desserts trace back to early American home cooking when pumpkins provided a preserved source of flavor and nutrition. This cup style takes inspiration from layered desserts and modern convenience, combining pumpkin spice flavors with cookie crumbs similar to graham crusts found in traditional pies. The adaptation into single serve cups reflects contemporary entertaining trends where portability and portion control are valued.
For winter holidays add a tablespoon of molasses to the filling for a deeper flavor. In early fall brighten the cups with a touch of orange zest. For Thanksgiving try a pecan praline topping and for Halloween add chocolate candy accents. Warm spice variations with extra ginger or cloves make the cups taste even more autumnal as the season progresses.
Prepare the crumb mixture and the pumpkin cheese filling separately and keep them chilled in airtight containers. Assemble cups up to the night before and add final garnishes just before serving. Use a piping bag to pipe the filling into cups quickly and evenly. Label containers with the day and time prepared and consume within 24 hours for best quality.
This dessert is perfect for sharing. It captures the familiar taste of pumpkin pie while remaining playful and easy to serve. I encourage you to tweak the toppings and presentation to make it your own and enjoy the smiles around the table when you bring out these little cups of fall.
Soften cream cheese at room temperature for about 30 minutes to avoid lumps and ensure a silky filling.
Use a piping bag to fill cups for a neater presentation and faster assembly when serving a crowd.
Add any crunchy toppings just before serving to maintain texture contrast between crumbs and filling.
This nourishing pumpkin pie in a cup recipe is sure to be a staple in your kitchen. Enjoy every moist, high protein slice — it is perfect for breakfast or as a wholesome snack any time.
This Pumpkin Pie in a Cup recipe makes perfectly juicy, tender, and flavorful steak every time! Serve with potatoes and a side salad for an unforgettable dinner in under 30 minutes.
In a small mixing bowl combine 2 cups of Biscoff cookie crumbs and 6 tablespoons melted butter. Mix until combined and the crumbs hold together when pressed. Set aside.
In a large mixing bowl beat 8 ounces softened cream cheese and 1/2 cup granulated sugar with an electric mixer until smooth. Add 1 cup pumpkin puree and 1 teaspoon pumpkin pie spice and mix until completely combined. Fold in 6 ounces thawed whipped topping until light and uniform.
Layer cookie crumbs and pumpkin cheese filling into individual cups starting with crumbs then filling and repeating. Use a piping bag for neater results. Press layers gently to keep them centered.
Refrigerate assembled cups at least 1 hour to firm the filling. Add additional whipped topping and a sprinkle of cookie crumbs just before serving. Store covered in the refrigerator for up to 24 hours.
Last Step: Please leave a rating and comment letting us know how you liked this recipe! This helps our business to thrive and continue providing free, high-quality recipes for you.
Leave a comment & rating below or tag
@platemint on social media!

Saucy, cheesy baked ziti with ricotta and basil tastes like lasagna in half the effort, perfect for weeknights or crowds.

Quick, crowd-pleasing cheeseburger sliders baked golden with melty cheddar and savory beef. Ready in 30 minutes, great for parties and easy meal prep.

Crispy air fryer sweet potato fries with tender centers, fast-food flavor without deep frying. Ready in minutes and irresistibly snackable.
Leave a comment & rating below or tag @platemint on social media!
Enjoyed this recipe? Share it with friends and family, and don't forget to leave a review!
This recipe looks amazing! Can't wait to try it.
Comments are stored locally in your browser. Server comments are displayed alongside your local comments.

Join to receive our email series which contains a round-up of some of our quick and easy family favorite recipes.
