
Peppermint Snowball Cookies

Easy, beautiful peppermint snowball cookies — soft, buttery rounds speckled with peppermint chips and dusted in powdered sugar for a festive holiday treat.
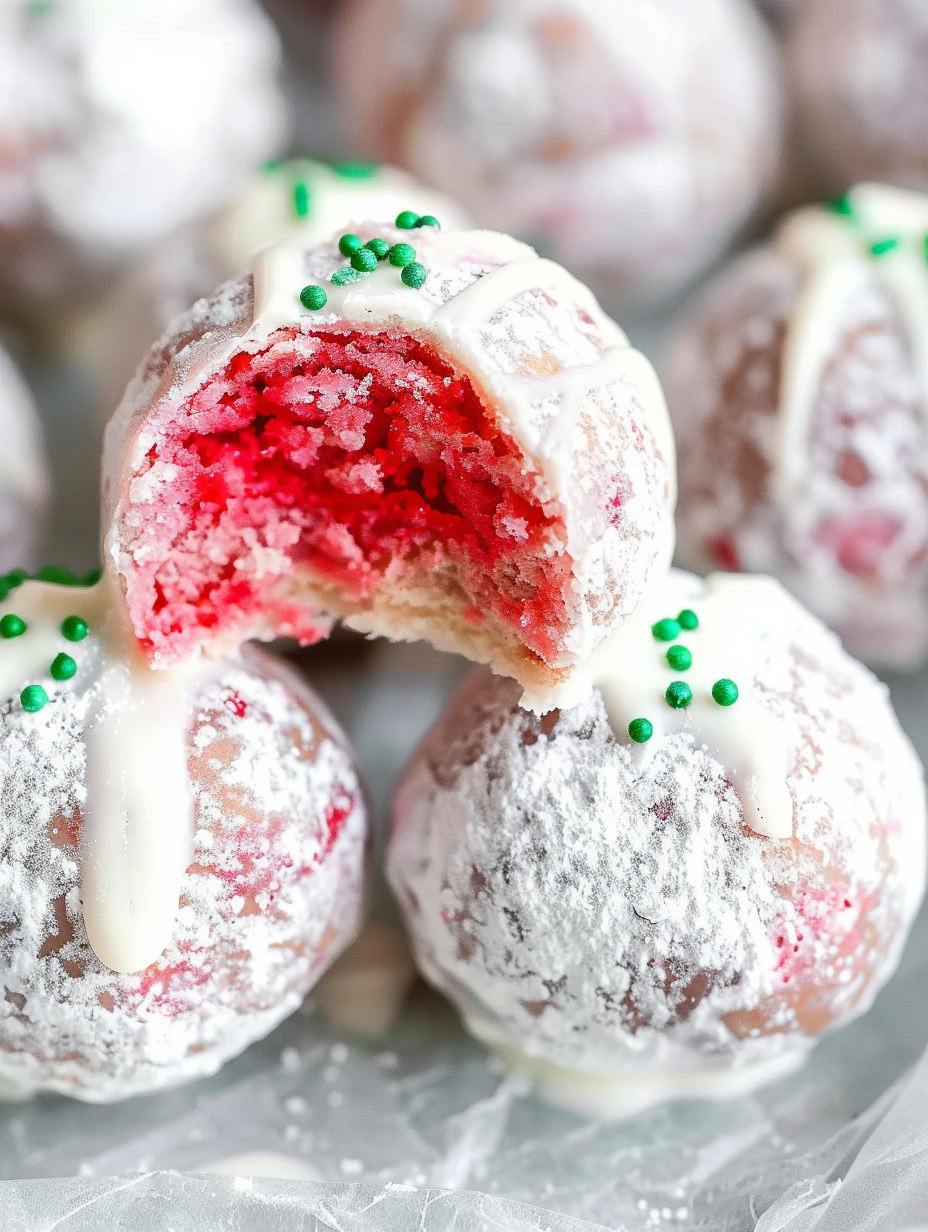
These Peppermint Snowball Cookies are everything a Christmas cookie should be: pretty, buttery, and bright with cool peppermint flavor. I first made this version one holiday season when I wanted something a little different from the traditional walnut snowball. I had a bag of Andes peppermint baking chips on the counter and thought their gentle mint would pair wonderfully with a classic shortbread-style cookie. The result was an instant family favorite. The cookies are tender and crumbly, with tiny pockets of peppermint that melt slightly, and the powdered sugar coating gives them that snowball look that makes them perfect for holiday platters.
I discovered how versatile these are after serving them at a neighborhood cookie swap — they disappeared first. They slice through tea cups, travel well in tins, and delight both adults who love the minty edge and kids who adore the pink tones. The texture is delicate but forgiving; if you underbake slightly they stay soft, if you bake them until the bottoms show very light color they get a gentle snap. This version balances buttery richness and peppermint without being overpowering, and adding a touch of red or pink food coloring makes them festive without changing the flavor.
Why You'll Love This Recipe
- Fast and forgiving: Active prep is about 15 minutes and the cookies bake in 7 to 8 minutes, making it ideal for a last-minute holiday bake.
- Uses pantry-friendly ingredients: All-purpose flour, butter, powdered sugar and peppermint chips are easy to source and easy to scale.
- Make-ahead friendly: Dough chills well for at least 30 minutes and can be refrigerated overnight for convenience.
- Crowd-pleaser: Bright peppermint flavor and a snowy powdered sugar coat make them visually appealing and universally loved.
- Kid-friendly decorating: Add a few drops of red or pink food coloring for a festive presentation without extra work.
I remember the first time I wrapped a tin of these for a neighbor — she called me the next morning to ask for the recipe. My kids love rolling the dough and coating the cookies in powdered sugar, which makes baking a family activity. Over the years I’ve learned the trick of chilling the dough so the cookies keep their shape and how a gentle bake time preserves that tender crumb.
Ingredients
- Unsalted butter: 1 cup softened (2 sticks). Use a good European-style butter if you want extra richness; make sure the butter is softened but not greasy to achieve a light, tender texture.
- Powdered sugar: 2/3 cup sifted for the dough plus additional for coating. Sifting prevents lumps and gives the exterior a delicate, snowy finish; use a fine confectioners sugar for best results.
- All-purpose flour: 2 1/4 cups spooned and leveled. Measuring by spooning into the cup avoids compacting the flour which keeps the dough light.
- Salt: 1/2 teaspoon. Balances the sweetness and enhances the butter flavor; if using salted butter reduce added salt slightly.
- Peppermint extract: 1 teaspoon. This gives a clear mint note; opt for pure peppermint extract rather than imitation for a cleaner flavor.
- Red or pink food coloring: A few drops to achieve a subtle holiday hue. Gel coloring is more concentrated and won’t thin the dough.
- Andes peppermint baking chips: 3/4 cup. These are great because they hold their shape while imparting a creamy mint bite; you can chop regular peppermint baking chips if needed.
- Additional powdered sugar for coating: About 1 to 1 1/2 cups to create the classic snowball finish and to double-coat for maximum visual effect.
Instructions
Cream butter and sugar: In a large bowl, beat 1 cup softened unsalted butter and 2/3 cup sifted powdered sugar with a hand mixer or stand mixer fitted with the paddle attachment until light and fluffy, about 2 minutes. Properly creamed butter traps air which helps create a tender, shortbready texture. Incorporate dry ingredients: Add the 2 1/4 cups all-purpose flour and 1/2 teaspoon salt to the butter mixture and mix on low until just combined. Overmixing develops gluten and toughens the cookie; stop when the dough forms a cohesive mass. Add flavor and chips: Stir in 1 teaspoon peppermint extract. Add food coloring a few drops at a time until you reach a soft pink/red tint; mix gently. Fold in 3/4 cup Andes peppermint baking chips so they are evenly distributed without breaking them up too much. Chill the dough: Cover the bowl with plastic wrap and refrigerate for at least 30 minutes. Chilling firms the fat and prevents excessive spreading in the oven, giving each cookie a rounded, snowball shape. Preheat oven and prepare sheet: Preheat oven to 375 degrees F. Line a large baking sheet with parchment paper or a silicone baking mat to encourage even browning and easy removal. Shape into balls: Using a tablespoon or small cookie scoop, portion dough into 1 tablespoon portions and roll into smooth balls. Place them evenly spaced on the prepared sheet — they do not spread much. Bake: Bake for 7 to 8 minutes. The goal is a very light color on the bottom without significant browning. If they begin to brown, reduce the time by 30 seconds to preserve the tender crumb. Initial cooling: Let cookies cool on the baking sheet for 5 minutes off the heat. This allows them to set so they won’t break when transferred for coating. Powdered sugar coating: Line another baking sheet with parchment and dust liberally with powdered sugar. Place slightly cooled cookies on this sheet and dust. Then drop each cooled cookie into a shallow bowl of powdered sugar and roll to coat completely for that classic snowball finish. Store: Store cooled cookies in an airtight container for up to 4 days. Layer parchment between cookies to protect the powdered sugar coating.
You Must Know
- These are best enjoyed within four days when stored in an airtight container at room temperature; they soften slightly over time but retain flavor.
- Dough can be chilled overnight; if it gets very firm, let it sit 10 minutes at room temperature for easier scooping.
- Because of the powdered sugar coating, layering them in tins requires parchment paper to avoid smearing the sugar.
- High in simple carbohydrates and fats — each cookie is about 82 calories with roughly 8 grams carbs and 5 grams fat.
My favorite part is the ritual of rolling and dusting. It became a family tradition that the youngest gets to do the final coating, and the tiny smudges of pink on small fingers are part of the memory. I’ve learned that a light, patient touch with the powdered sugar keeps the surface looking like fresh snow rather than a messy paste.
Storage Tips
Store cooled cookies in an airtight container at room temperature for up to four days. For longer storage, freeze individual cookies in a single layer on a baking sheet until firm, then transfer to a freezer-safe container with parchment between layers for up to three months. To thaw, let them sit at room temperature for 30 to 60 minutes; if the powdered sugar has become damp, give each cookie a quick roll in sifted powdered sugar to refresh the appearance. Avoid refrigeration which can dry them out.
Ingredient Substitutions
If you can’t find Andes peppermint chips, chop mint baking chips or even peppermint bark into small pieces and fold them in. For a nut-free alternative to traditional snowballs, simply omit any nuts; the texture remains tender. To make them gluten-free, replace the all-purpose flour with a 1-to-1 gluten-free flour blend and add 1/4 teaspoon xanthan gum if the blend lacks binding agents. For a dairy-free version, use a vegan butter stick and ensure the peppermint chips are dairy-free; texture will be slightly different but still enjoyable.
Serving Suggestions
Serve these with hot cocoa, coffee, or a peppermint hot chocolate for a mint-forward pairing. Arrange on a festive platter with sprigs of rosemary or holly for a classic holiday presentation. For cookie exchanges, stack in tins layered with parchment and add a ribbon. They also make attractive edible gifts when placed in cellophane bags tied with baker’s twine and a small tag indicating allergens.
Cultural Background
Snowball-style confections have a long tradition in many baking cultures, often appearing around winter holidays in variations such as Russian tea cakes, Mexican wedding cookies, and Italian ricciarelli. The peppermint twist is a modern American adaptation that combines the snowy aesthetic with holiday flavors. Peppermints and mint-chocolate became especially popular in American holiday baking during the 20th century when commercial peppermint candies and baking chips became widely available.
Seasonal Adaptations
In winter keep them classic with pink or red tint and peppermint chips. For a spring version swap peppermint extract for vanilla and the peppermint chips for white chocolate chips, and tint pale pastel colors. For Valentine’s Day, add a pinch of freeze-dried raspberry powder to the dough for a pink hue and a bright fruit note. Holiday variations include adding a small chopped candy cane piece for extra crunch, sprinkled on top after the first powdered sugar dusting.
Meal Prep Tips
For large batches, portion the dough into tablespoon scoops and arrange them on a tray to chill; once firm, transfer scoops to a zip-top bag and freeze. When you want freshly baked cookies, bake from semi-frozen for an extra few minutes. This method is perfect for cookie swaps or meal prep for holiday gatherings — you can bake the morning of an event while keeping the rest stored in the freezer.
These peppermint snowball cookies are simple to make, delightfully festive, and a reliable crowd-pleaser. Make a double batch for parties, involve the kids in rolling and dusting, and enjoy the merry memories that come with every snowy bite.
Pro Tips
Sift powdered sugar before measuring to avoid lumps and ensure even coating.
Chill the dough for at least 30 minutes to prevent spreading and to preserve round shape.
Use a tablespoon scoop for uniform cookies so baking time is consistent.
If powdered sugar gets damp, recoat cookies by rolling them again in dry sugar after cooling.
This nourishing peppermint snowball cookies recipe is sure to be a staple in your kitchen. Enjoy every moist, high protein slice — it is perfect for breakfast or as a wholesome snack any time.
FAQs about Recipes
Can I make the dough ahead?
Yes. Dough can be chilled overnight; let it rest at room temperature 10 minutes before scooping if too firm.
How long do these freeze?
Freeze baked cookies in a single layer until firm, then store in a freezer-safe container for up to 3 months. Thaw at room temperature.
Tags
Peppermint Snowball Cookies
This Peppermint Snowball Cookies recipe makes perfectly juicy, tender, and flavorful steak every time! Serve with potatoes and a side salad for an unforgettable dinner in under 30 minutes.
Ingredients
Main
Instructions
Cream Butter and Sugar
Beat 1 cup softened unsalted butter and 2/3 cup sifted powdered sugar until light and fluffy, about 2 minutes. Proper creaming traps air and creates a tender texture.
Add Dry Ingredients
Mix in 2 1/4 cups all-purpose flour and 1/2 teaspoon salt on low speed until just combined. Stop as soon as the dough forms to avoid gluten development.
Flavor and Color
Stir in 1 teaspoon peppermint extract. Add a few drops of red or pink food coloring until desired hue is reached, then fold in 3/4 cup peppermint baking chips evenly.
Chill Dough
Cover and refrigerate dough for at least 30 minutes. Chill longer if needed; colder dough is easier to scoop and holds shape in the oven.
Preheat and Prepare Pan
Preheat oven to 375 degrees F. Line a large baking sheet with parchment paper or a silicone mat for even baking and easy removal.
Shape Cookies
Scoop tablespoon-sized portions of dough and roll into smooth balls. Place them on the prepared sheet spaced evenly as they do not spread much.
Bake
Bake 7 to 8 minutes until bottoms are very lightly browned. Avoid overbaking to preserve a tender, shortbread-like texture.
Cool and Coat
Cool on the baking sheet 5 minutes, transfer to a sugared sheet and dust with powdered sugar, then roll each cookie in powdered sugar for a full coating.
Store
Store in an airtight container at room temperature up to 4 days, separating layers with parchment to protect the coating.
Last Step: Please leave a rating and comment letting us know how you liked this recipe! This helps our business to thrive and continue providing free, high-quality recipes for you.
Nutrition
Did You Make This?
Leave a comment & rating below or tag
@platemint on social media!
Categories:
You might also like...

Cheesy Baked Ziti Casserole
Saucy, cheesy baked ziti with ricotta and basil tastes like lasagna in half the effort, perfect for weeknights or crowds.

Juicy Cheeseburger Sliders Bake
Quick, crowd-pleasing cheeseburger sliders baked golden with melty cheddar and savory beef. Ready in 30 minutes, great for parties and easy meal prep.

Air Fryer Sweet Potato Fries
Crispy air fryer sweet potato fries with tender centers, fast-food flavor without deep frying. Ready in minutes and irresistibly snackable.
Did You Make This?
Leave a comment & rating below or tag @platemint on social media!
Rate This Recipe
Share This Recipe
Enjoyed this recipe? Share it with friends and family, and don't forget to leave a review!
Comments (1)
This recipe looks amazing! Can't wait to try it.
Comments are stored locally in your browser. Server comments are displayed alongside your local comments.

Hi, I'm Wendie!
What's Popular

30-Minute Meals!
Join to receive our email series which contains a round-up of some of our quick and easy family favorite recipes.