
>>

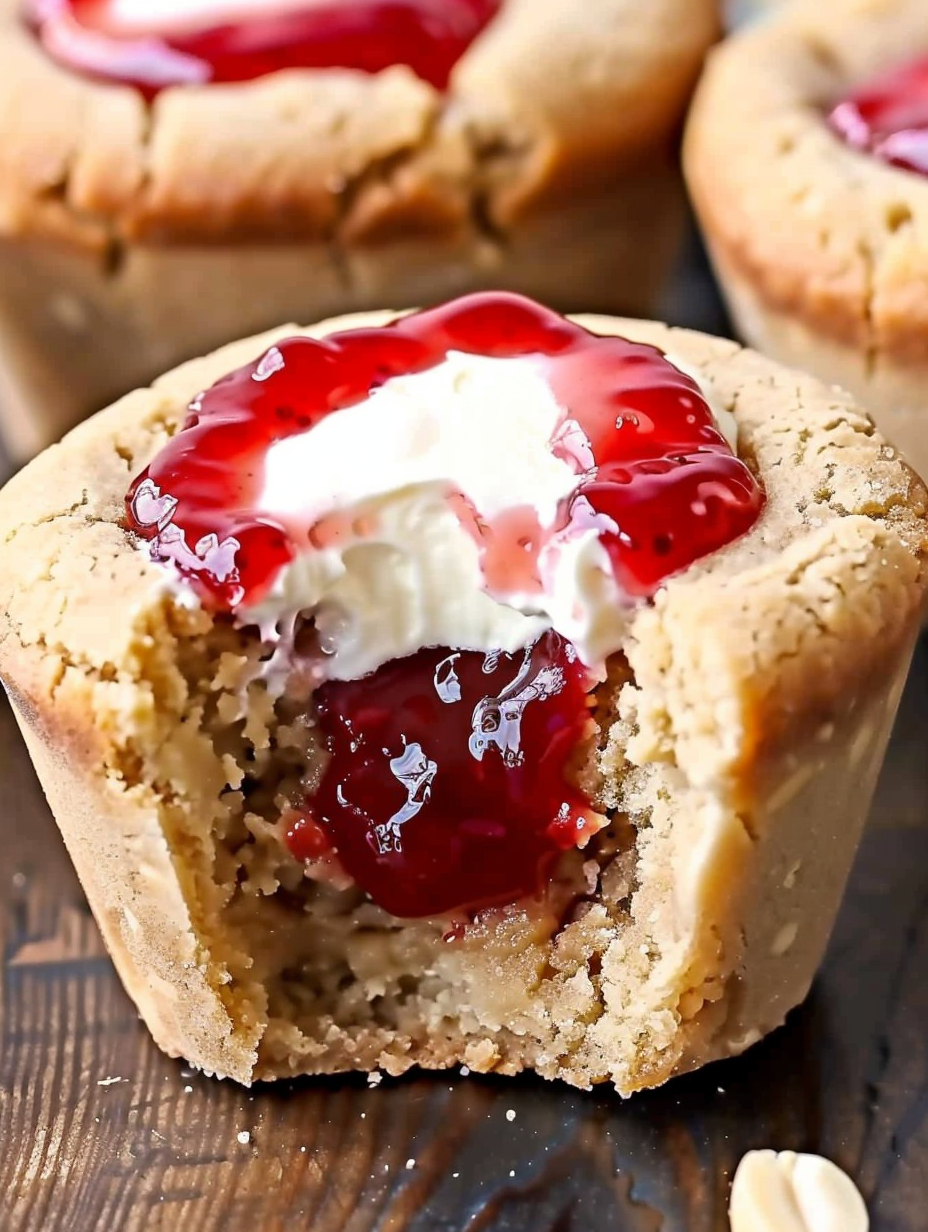
Take a lunchbox classic to the next level with these easy-to-make Peanut Butter & Jelly Cookie Cups — crisp-edged cookies filled with raspberry jam and a light peanut butter mousse.
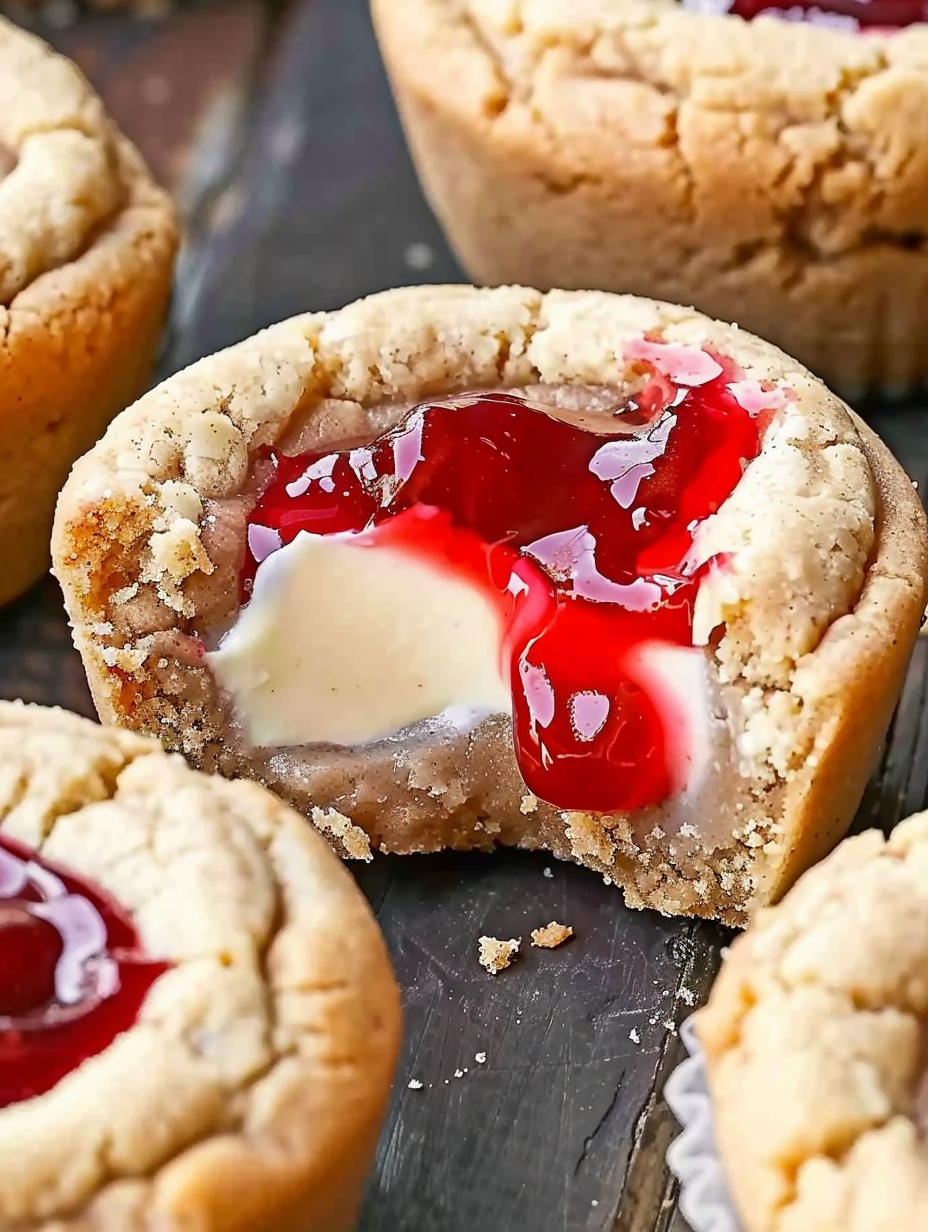
This Peanut Butter & Jelly cookie cup recipe grew from a desire to turn a nostalgic sandwich into something a little more celebratory. I first made these on a rainy Saturday when the kids wanted PB&J but I wanted a slightly fancier dessert for an afternoon playdate. The result was a crisp, golden cookie shell with a soft center, warmed jam tucked into the well, and a cloud of peanut butter mousse crowning each one. The texture contrast — an initial crunchy bite, a sweet jam burst, followed by airy, peanutty cream — always makes everyone smile.
I discovered the formula after several small experiments with cookie dough ratios and cooling techniques; the trick is to press the cookie into the tin immediately after they come out of the oven so the walls form without cracking. These cookie cups are special because they keep the familiar flavors of a treasured sandwich while introducing a refined presentation perfect for lunchboxes, potlucks, or after-school treats. For busy afternoons, they can be made ahead and frozen, and the mousse stays delightfully light even after chilling.
In my kitchen these are always a hit — friends often ask how I made the mousse so light or how the cookie keeps its shape. Watching someone take that first bite and grin at the familiar jam flavor paired with the airy peanut filling is one of my favorite small joys. This recipe has become my go-to for small celebrations because it feels special without being fussy.
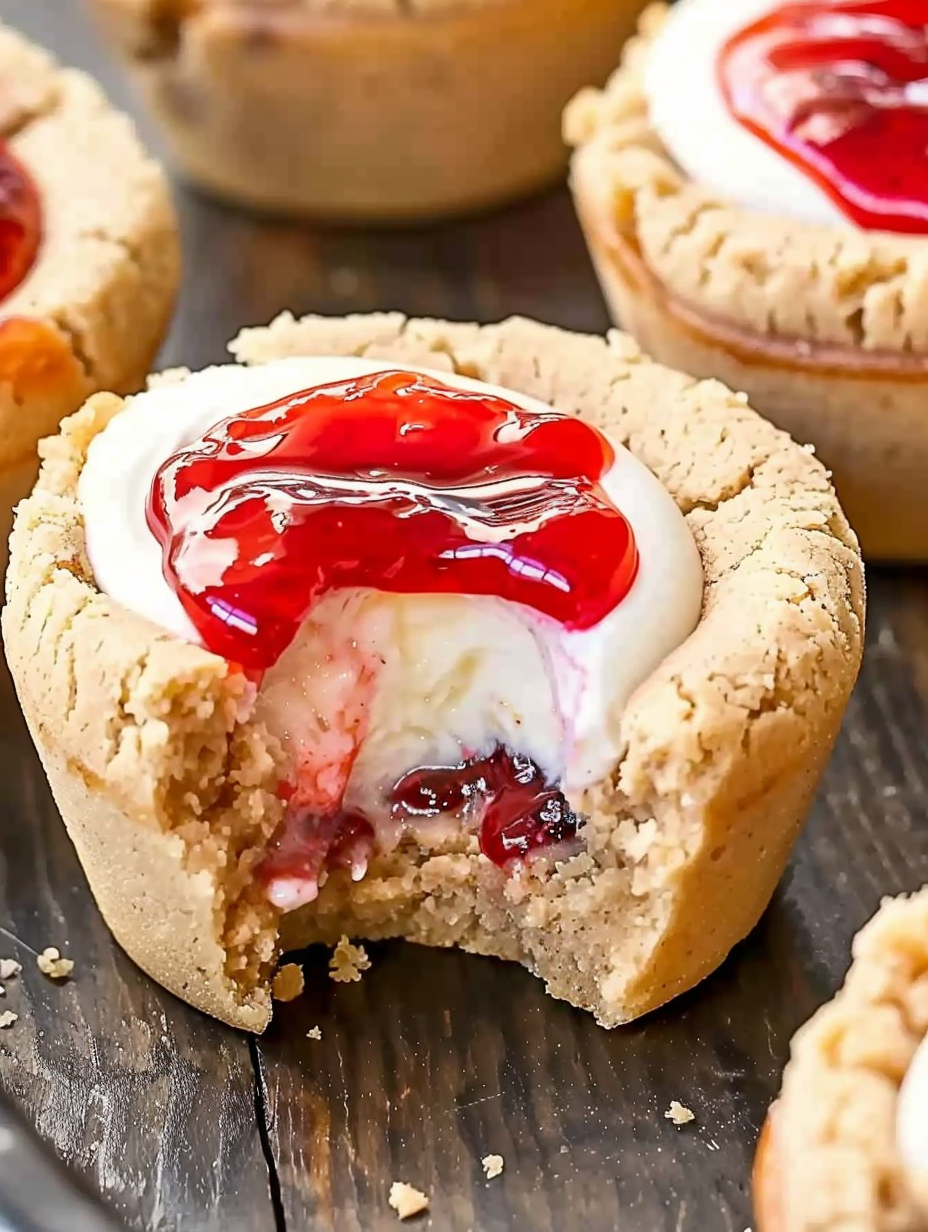
My favorite part is the contrast: a crisp edge that gives way to a jammy center and then a feather-light peanut cream on top. Over the years I’ve learned to keep the jam slightly warmed for easy spooning and to chill the mousse thoroughly so the cups hold their shape when served. Family members always ask if they can take extras home — proof this hybrid treat bridges comfort food and a pretty party sweet.
Store finished cookie cups in a single layer in an airtight container in the refrigerator for up to 2–3 days. If freezing, place the baked and cooled shells on a tray and freeze for 1 hour, then transfer to a zip-top bag; fill and top with mousse after thawing. When refrigerating, place a sheet of parchment between layers to prevent sticking. To re-crisp shells after refrigeration, gently warm in a 300°F oven for 4–5 minutes before filling; avoid heating once mousse is added.
For nut-free diets, swap peanut butter with a sunflower seed butter (watch for a greener hue and slightly different flavor). Use a dairy-free cream cheese alternative and coconut cream whipped to mimic the mousse for a dairy-free version, but note the texture will be slightly less stable. Gluten-free all-purpose flour blends can replace regular flour 1:1 in many cases; allow a slightly longer chill to help the dough hold shape. For less sweet profiles, reduce the mousse sugar by one tablespoon and choose a tart jam.
Serve chilled on a platter with garnishes: extra spoonfuls of warmed jam brushed on top for sheen, a sprinkle of chopped roasted peanuts, or a light dusting of powdered sugar. They pair beautifully with a cold glass of milk or a bright cup of black tea. For brunch or tea parties, arrange with fresh berries and small coffee or tea servings. These cups are festive for kids’ lunches, bake sales, or casual dinner-party desserts when you want something nostalgic and refined at once.
The peanut butter and jelly sandwich is an American classic dating back to the early 20th century when peanut butter became a pantry staple. Translating this iconic combination into a handheld dessert is an example of culinary nostalgia influencing modern baking — familiar flavors repackaged with technique and texture. These cups echo the sandwich’s simplicity while showcasing contemporary pastry techniques like stabilized mousse and shaped cookie vessels, bridging everyday comfort and small-bite sophistication.
In summer, use fresh berry compotes instead of jam for a brighter, fresher flavor and lighter presentation. During fall, swap raspberry jam for fig preserves and add a pinch of cinnamon to the cookie dough. For winter holidays, fold a tablespoon of melted dark chocolate into the mousse for a richer profile and top with crushed peppermint for a festive touch. The basic formula adapts well to seasonal pantry finds.
Plan ahead by baking shells up to 2 weeks in advance and freezing them. Prepare the mousse the morning of serving for the best volume, or make it a day ahead and keep chilled. When packing for lunches, store jam in a small separate container and fill the cups at school or at the last minute to avoid moisture softening the shells. Use stiff piping tips to transport the mousse neatly without spills.
These cookie cups are a joyful riff on a classic: easy to make, endlessly adaptable, and reliable crowd-pleasers. Try them once and they’ll become your go-to for turning a simple favorite into a pretty, shareable treat.
Press the wells immediately after removing cookies from the oven to form stable walls.
Chill your mixing bowl and whisk when whipping cream for faster and better volume.
Use non-natural peanut butter (stabilized) for a smooth and predictable mousse.
Warm jam slightly so it pours easily and forms a glossy layer in the wells.
This nourishing peanut butter & jelly cookie cups recipe is sure to be a staple in your kitchen. Enjoy every moist, high protein slice — it is perfect for breakfast or as a wholesome snack any time.
Yes — bake the cookie shells, cool and freeze them on a tray, then transfer to an airtight container. Thaw in the refrigerator before filling.
Warm the jam in 20-second intervals until fluid but not boiling, then spoon into wells for an even layer.
This Peanut Butter & Jelly Cookie Cups recipe makes perfectly juicy, tender, and flavorful steak every time! Serve with potatoes and a side salad for an unforgettable dinner in under 30 minutes.
Preheat oven to 350°F and spray a standard muffin tin with cooking spray to ensure easy release.
Whisk together flour, baking soda, and salt to ensure even leavening distribution.
Beat butter and peanut butter until smooth, then add sugars and beat until pale and fluffy on medium-high for 2–3 minutes.
Reduce mixer speed, add the egg and vanilla, and beat until fully combined, scraping the bowl as needed.
Add the dry ingredients and mix on low until just combined to avoid tough cookies from overworking gluten.
Use a 3 Tbsp cookie scoop to portion dough into muffin wells and press slightly to flatten for even baking.
Bake 10–12 minutes until lightly browned; immediately press a small jar into the centers to form wells and cool 10 minutes in pan before transferring to a rack.
Whip cold heavy cream to stiff peaks. Beat cream cheese and sugar until smooth, add peanut butter, and fold in whipped cream in two additions.
Warm jam slightly to thin, spoon 1–1 1/2 tsp into each well, chill 20 minutes, pipe mousse on top, then refrigerate until set, about 2 hours.
Last Step: Please leave a rating and comment letting us know how you liked this recipe! This helps our business to thrive and continue providing free, high-quality recipes for you.
Leave a comment & rating below or tag
@platemint on social media!

Saucy, cheesy baked ziti with ricotta and basil tastes like lasagna in half the effort, perfect for weeknights or crowds.

Quick, crowd-pleasing cheeseburger sliders baked golden with melty cheddar and savory beef. Ready in 30 minutes, great for parties and easy meal prep.

Crispy air fryer sweet potato fries with tender centers, fast-food flavor without deep frying. Ready in minutes and irresistibly snackable.
Leave a comment & rating below or tag @platemint on social media!
Enjoyed this recipe? Share it with friends and family, and don't forget to leave a review!
This recipe looks amazing! Can't wait to try it.
Comments are stored locally in your browser. Server comments are displayed alongside your local comments.

Join to receive our email series which contains a round-up of some of our quick and easy family favorite recipes.
