
>>

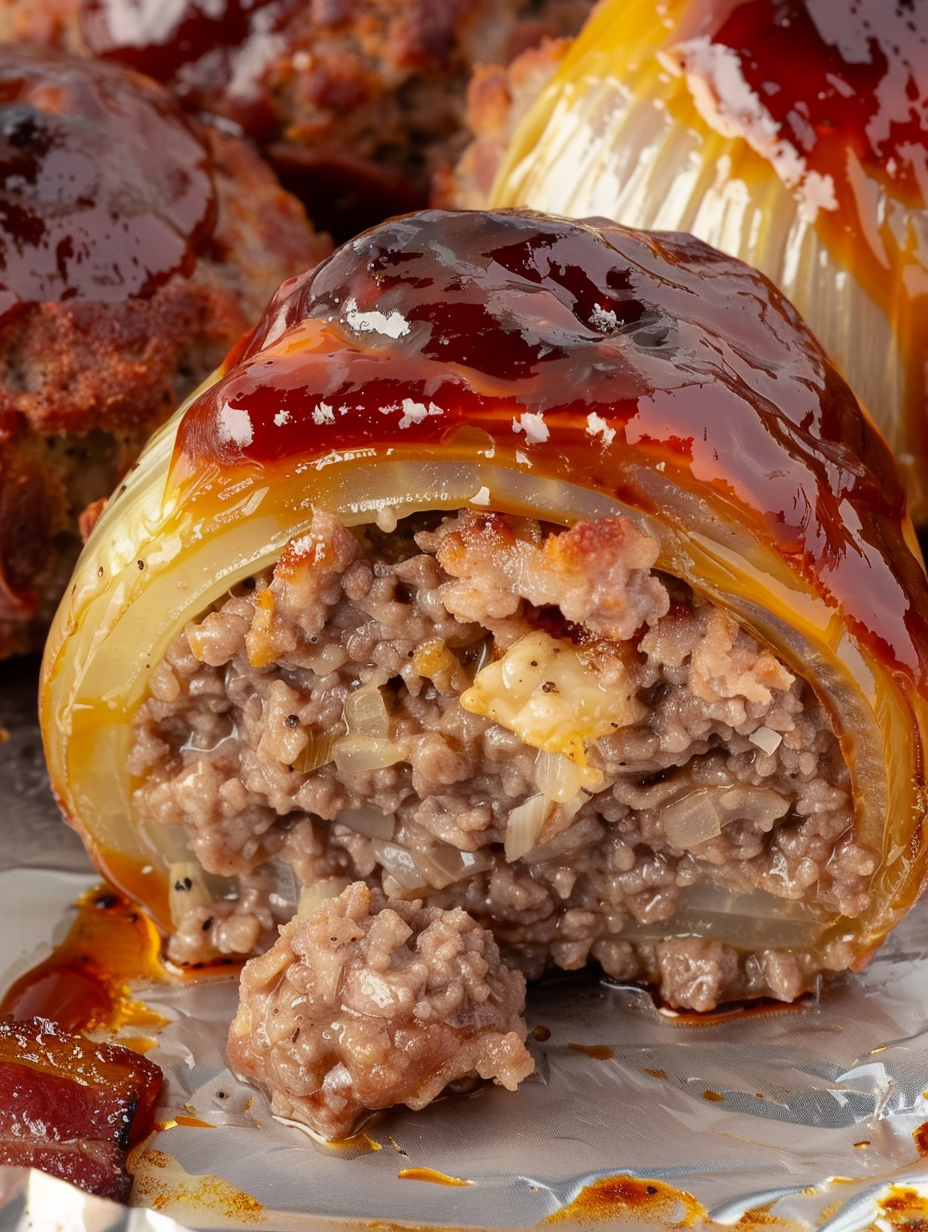
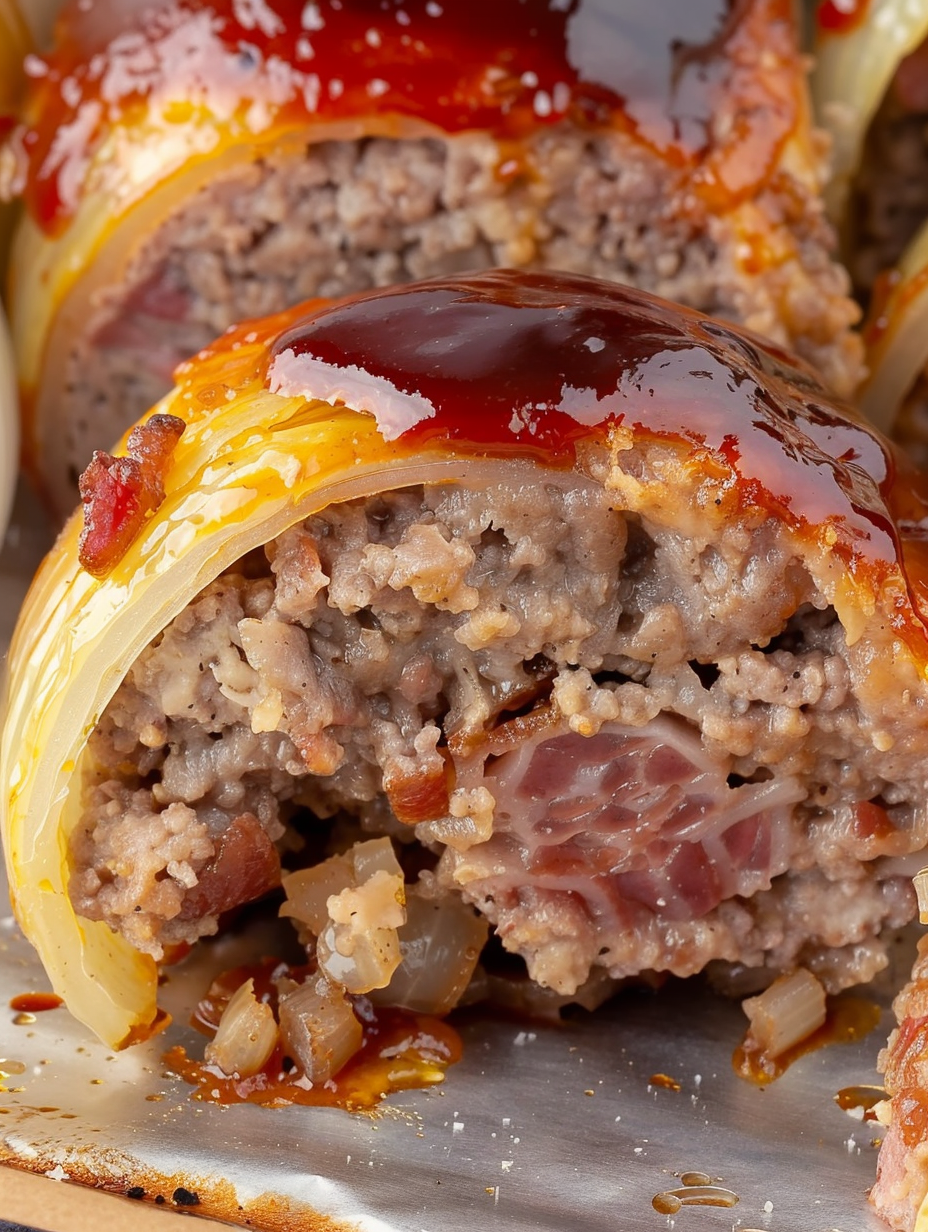
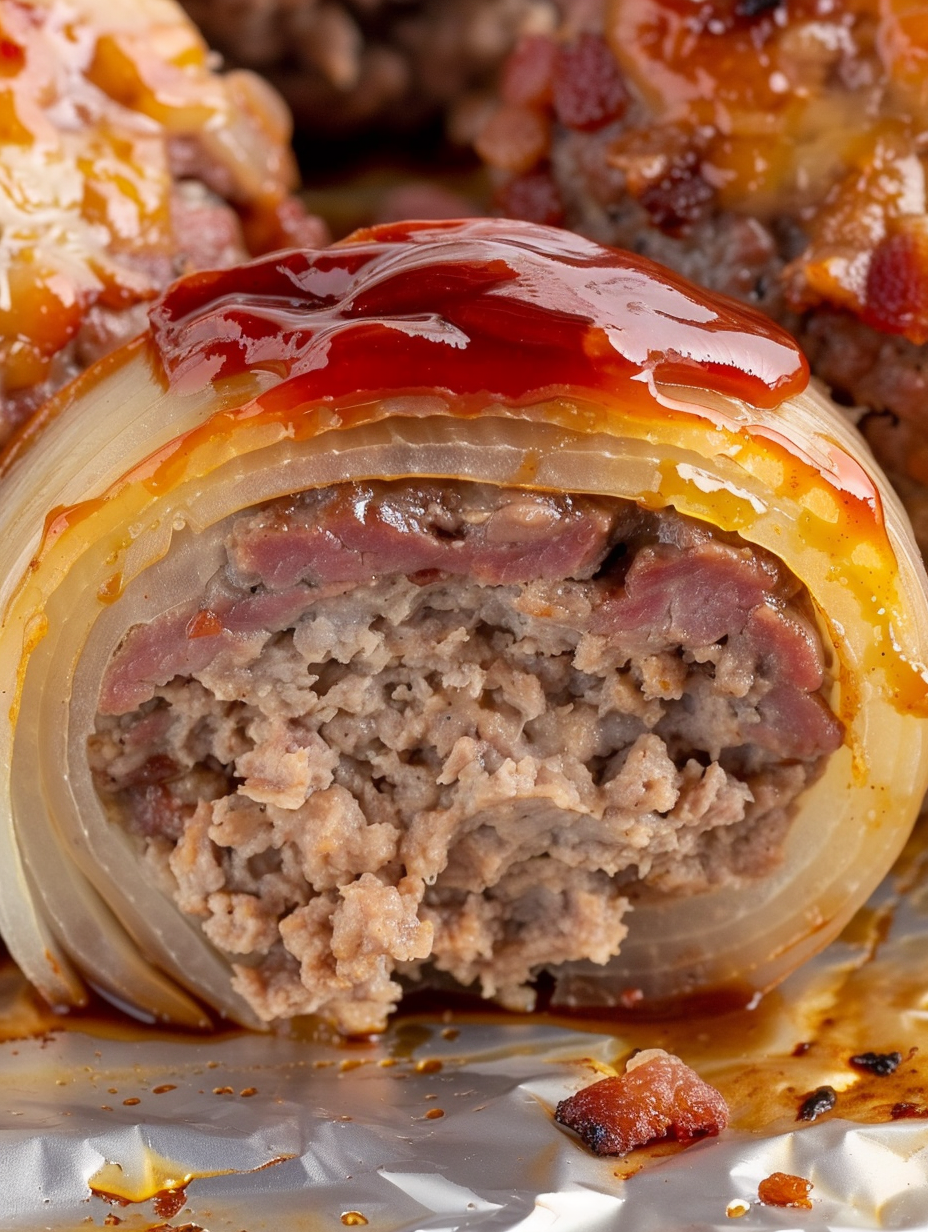
Juicy seasoned beef and melted cheddar tucked inside sweet onion layers, wrapped in smoky bacon and brushed with caramelized barbecue glaze. Perfect for parties or weeknight dinners.
This recipe for Onion Bombs has been a party favorite in my house for years — a hybrid of all the things I love most: sweet roasted onion, smoky bacon, and a molten cheddar center hugged by well-seasoned beef. I first put this combination together on a cool autumn afternoon when I wanted something fun to serve guests that felt indulgent but was easy to assemble. The first time I served them, everyone circled the baking sheet like kids at a campfire, and the platter came back empty. They’re hands-on, showy, and comforting all at once.
What makes these Onion Bombs special is the layering of textures and flavors: the onion softens and turns sweet in the oven, the beef stays juicy thanks to a little binder and milk, the cheddar delivers a gooey surprise, and the bacon crisps and caramelizes against a final brush of barbecue sauce. They’re deceptively simple but rewarding — great for game day, a relaxed dinner, or a crowd-pleasing appetizer. I’ll walk you through every step with tips to keep the beef sealed around the cheese and the bacon snug so nothing unravels in the oven.
I remember plating these for a backyard gathering and watching neighbors saunter over for a taste. The smoky-sweet aroma pulled people in, and folks were debating whether the best part was the crisp bacon or the molten cheese center. My cousin declared them “dangerously addictive,” and I’ve been making them on repeat ever since — they’re reliably the first thing to disappear off any appetizer table.
My favorite aspect is the reveal — when you cut into one and the cheddar gushes out into the onion layers. One winter I served these alongside roasted Brussels sprouts and mashed potato rounds; the contrast of sweet onion and smoky bacon made for an unforgettable comfort meal. Guests always comment on the presentation, and I enjoy that they’re hands-on but simple enough to assemble with a few helpers.
Store cooled bombs in an airtight container in the refrigerator for up to 3 days. Reheat in a 350°F oven on a foil-lined sheet for 10–12 minutes until warmed through to preserve bacon crispness; avoid microwaving if you want to keep the bacon texture. For longer storage, freeze assembled bombs on a tray until firm, then transfer into a sealed freezer bag for up to 3 months. Thaw overnight in the fridge before reheating, or bake from frozen adding 10–15 minutes to the cook time and tenting with foil halfway through to prevent over-browning.
If you need to adapt, swap ground beef for ground turkey or pork — note that lean turkey will be drier, so add a tablespoon of olive oil or an extra tablespoon of milk. Use pepper jack or mozzarella instead of cheddar for a different melt and flavor profile; keep cubes uniform so they melt evenly. For gluten-free, replace breadcrumbs with crushed gluten-free crackers or almond flour (the texture will be slightly more tender). If you prefer lower sodium, choose a low-sodium barbecue sauce and reduced-sodium bacon.
Serve these as an appetizer on a wooden board with toothpicks and extra barbecue sauce or alongside a simple green salad for a lighter main course. They pair well with roasted vegetables, smashed potatoes, or corn on the cob for a summer cookout. Garnish with coarsely chopped chives or parsley for color and a bright contrast to the smoky glaze. For parties, arrange them on a tiered platter so guests can grab a hot bomb without crowding the kitchen.
Although not a traditional dish from a single cuisine, these Onion Bombs draw on American barbecue and comfort-food traditions: the sweet onion and smoky bacon echo Southern flavors, while the convenience of bottled sauce and ground meat speaks to mid-century American home cooking. They’re a modern fusion that borrows the concept of stuffed vegetables (like stuffed peppers or onions) and transforms it into a portable, crowd-pleasing bite — ideal for tailgates and backyard gatherings.
In summer, swap hearty barbecue sauce for a lighter fruit-based glaze such as peach or apricot BBQ for a bright finish. In winter, try a balsamic reduction brushed on at the end for richer caramel notes. For holiday gatherings, add a teaspoon of chopped fresh rosemary or thyme to the beef mixture, and choose smoked gouda in place of cheddar for a festive twist. Making mini versions using smaller onions works well for holiday hors d’oeuvres.
Assemble bombs a day ahead and refrigerate on a lined tray covered tightly with plastic wrap, then bake when guests arrive. If you’re prepping for a week of dinners, make double and freeze half. When working assembly-line style, set stations for meat mixing, cheese stuffing, onion placement, and bacon wrapping to speed things up. Keep toothpicks and extra sauce handy at the plating station so guests can customize their portion.
These Onion Bombs are equal parts showstopper and comfort food — a recipe I return to whenever I want something satisfying, shareable, and a little bit theatrical. I hope you make them and pass them on to friends; there’s nothing quite like the sound of happy eating and the sight of an empty serving tray.
Pinch seams of the meat tightly around the cheese cube to prevent leakage when the cheese melts.
Brush the barbecue sauce on after 30 minutes to avoid burning the glaze during the long bake.
Use a meat thermometer for accuracy and avoid overcooking; aim for 160–165°F internal temperature.
This nourishing onion bombs — bacon-wrapped beef & cheese stuffed onions recipe is sure to be a staple in your kitchen. Enjoy every moist, high protein slice — it is perfect for breakfast or as a wholesome snack any time.
Use a meat thermometer inserted into the center of the meatball; it should read 160–165°F for fully cooked ground beef.
Yes. Assemble them on a tray, freeze until firm, then transfer to a freezer bag. Bake from frozen, adding 10–15 minutes to the cooking time.
This Onion Bombs — Bacon-Wrapped Beef & Cheese Stuffed Onions recipe makes perfectly juicy, tender, and flavorful steak every time! Serve with potatoes and a side salad for an unforgettable dinner in under 30 minutes.
Preheat oven to 425°F and line a rimmed baking sheet with heavy-duty foil. Lightly oil the foil to prevent sticking.
Slice off the top and bottom of each onion, peel the papery skin, halve lengthwise, and remove the outer two layers from each half to form onion cups. Soak in hot water 3–4 minutes if needed to loosen layers.
In a large bowl combine ground beef, breadcrumbs, egg, milk, 3 tbsp barbecue sauce, garlic and onion powders, salt, and pepper. Mix until just combined to keep mixture tender.
Divide the mixture into 8 equal portions, flatten each into a 3–4 inch disc, place a 1-inch cheddar cube in the center, and wrap the meat around it sealing seams tightly.
Place a meatball between two outer onion halves so most of the meatball is covered. Lay two bacon slices in an X, set the onion bomb in the center, pull bacon up and wrap snugly around the onion and meat, securing with a toothpick if necessary.
Bake at 425°F for 30 minutes. Remove and brush each bomb with the remaining 1/3 cup barbecue sauce. Return to oven and bake 10–15 more minutes until glaze is caramelized and internal temperature is 160–165°F.
Allow bombs to rest 5 minutes before serving to let juices settle. Serve warm with extra barbecue sauce on the side.
Last Step: Please leave a rating and comment letting us know how you liked this recipe! This helps our business to thrive and continue providing free, high-quality recipes for you.
Leave a comment & rating below or tag
@platemint on social media!

Saucy, cheesy baked ziti with ricotta and basil tastes like lasagna in half the effort, perfect for weeknights or crowds.

Quick, crowd-pleasing cheeseburger sliders baked golden with melty cheddar and savory beef. Ready in 30 minutes, great for parties and easy meal prep.

Crispy air fryer sweet potato fries with tender centers, fast-food flavor without deep frying. Ready in minutes and irresistibly snackable.
Leave a comment & rating below or tag @platemint on social media!
Enjoyed this recipe? Share it with friends and family, and don't forget to leave a review!
This recipe looks amazing! Can't wait to try it.
Comments are stored locally in your browser. Server comments are displayed alongside your local comments.

Join to receive our email series which contains a round-up of some of our quick and easy family favorite recipes.
