
Olive Focaccia - Easy One-Bowl Recipe
30-MINUTE MEALS! Get the email series now
platemint

Olive Focaccia

5 from 1 vote
1 Comments
Wendie
By: WendieUpdated: Aug 14, 2026
This post may contain affiliate links. Please read our disclosure policy.

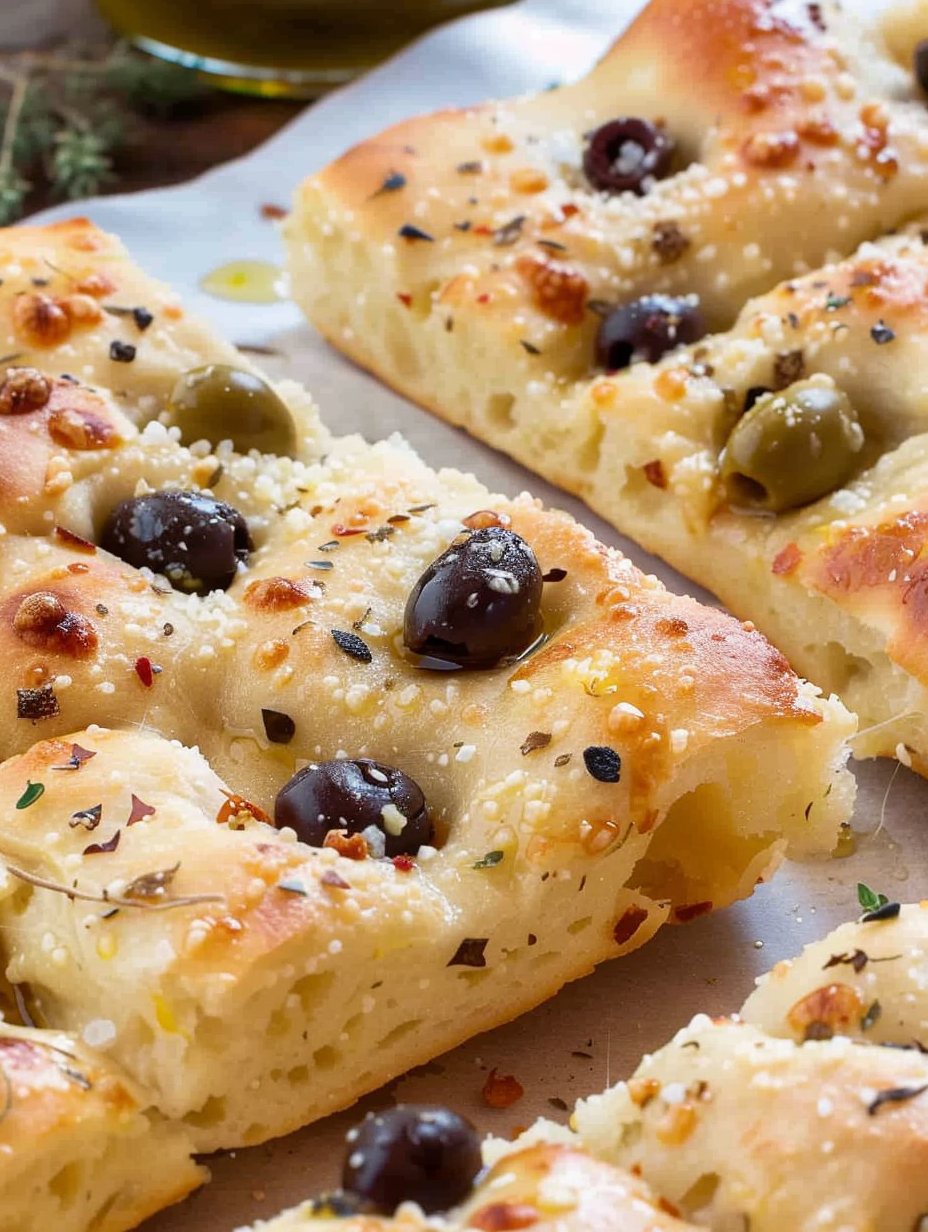
A no-knead olive focaccia with a golden, oil-scented crust, pillowy interior, and briny Kalamata olives. Easy to make in one bowl and perfect as an appetizer or bread.
Olive Focaccia
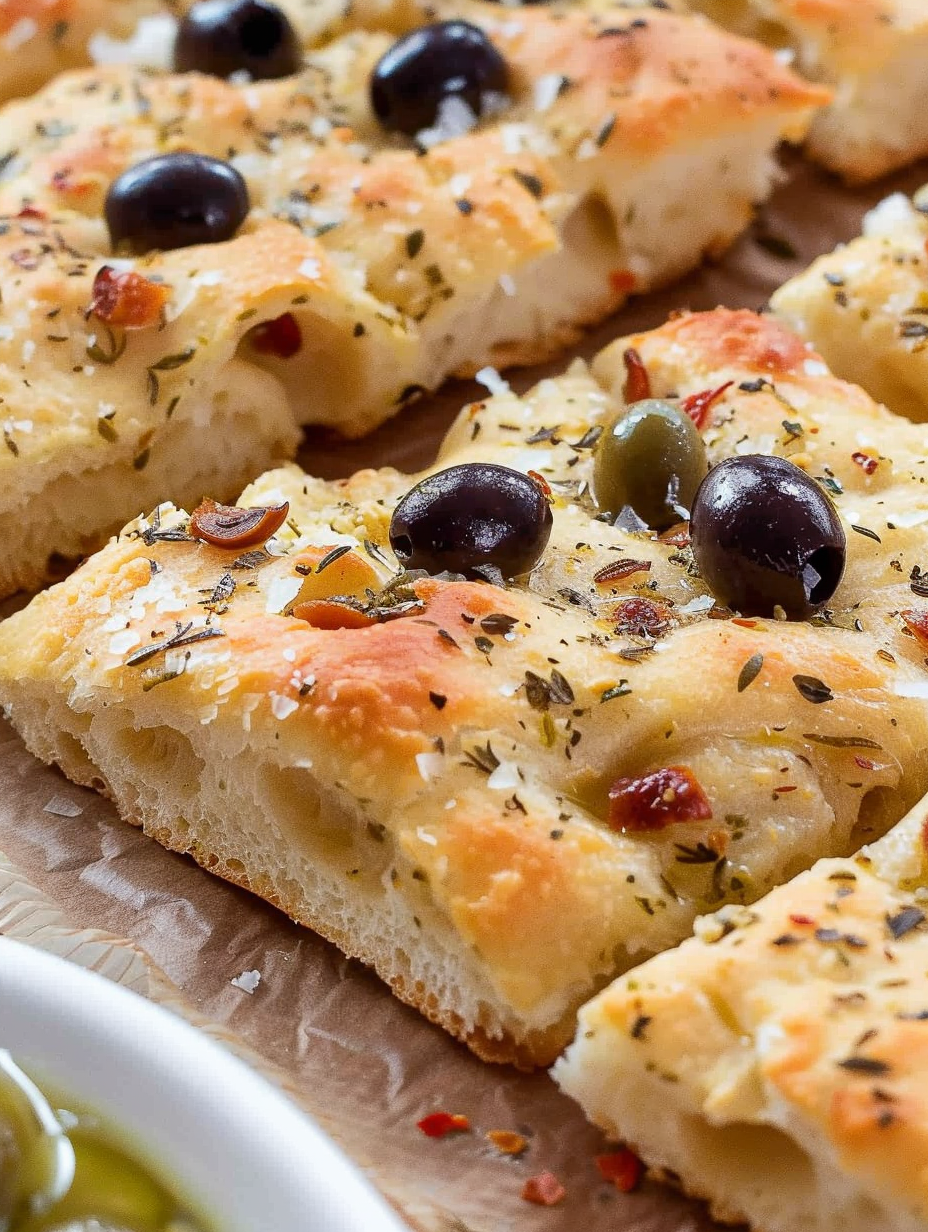
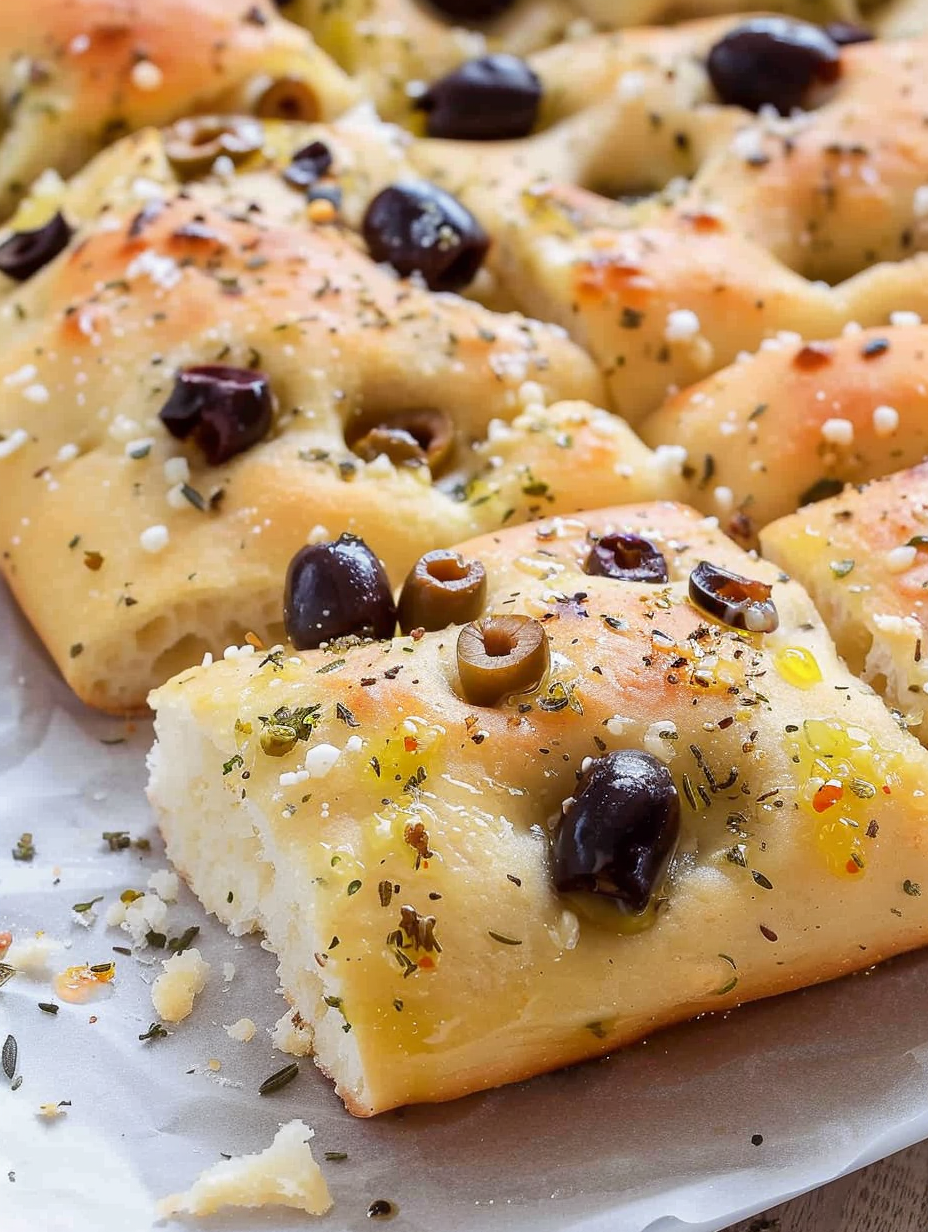
This olive focaccia is one of those simple pleasures that became a weekend ritual in my kitchen. I first discovered this approach during a rainy Saturday when I wanted a hands-off loaf that still tasted indulgent. The dough comes together in a single bowl with nothing more than a spoon, and the result is a moist interior with an irresistible olive oil-scented crust. I remember my partner tearing away a warm square the minute it hit the counter and declaring it the best thing to come out of my oven that month. That reaction has repeated itself more times than I can count and is the reason this version lives in my regular rotation. What makes this particular method special is the balance between effortless technique and deeply satisfying texture. Instead of long kneading, the dough relies on a wet, forgiving consistency and a gentle proof to develop gluten. The surface finishes with a simple brine that pools in the dimples you create with your fingertips, giving pockets of saline richness that complement the fruity brine of Kalamata olives. The toppings are flexible, but I stick to oregano and a scattering of chili flakes for a slight warmth. The aroma while it bakes is enough to make guests gather, and the crust browns to a thin, golden sorbet of olive oil and crispness while the crumb stays tender.

Why You'll Love This Recipe

  • This method requires no kneading or stand mixer and comes together in one bowl using a spoon or spatula, so it is ideal for busy home cooks and beginners.
  • The dough is forgiving thanks to a wet consistency and a resting period; small variations in flour absorption are easy to correct with a tablespoon of water.
  • Ready to bake after a short second rest, the entire process including proofing yields golden bread in under two hours of clock time with minimal hands-on minutes.
  • Uses pantry staples such as all-purpose flour, olive oil and active dry yeast and a cup of Kalamata olives for that authentic Mediterranean flavor.
  • Make-ahead friendly: it freezes well and also keeps at room temperature for a day, making it practical for entertaining and meal prep.

I tested this focaccia several times while refining the timing and the brine ratio and every trial improved the texture. My family prefers this slightly oilier finish compared to drier versions and often asks for it warm with a drizzle of extra virgin olive oil and a small bowl of balsamic for dipping. It has become the bread I reach for when I want something simple that still feels special.
Ingredients

  • All purpose flour: Use 2 1/2 cups, leveled, for a soft, tender crumb. If you prefer a chewier structure, swap half the amount for bread flour. I often use King Arthur all purpose for consistent results.
  • Fine salt: 3/4 teaspoon added to the dry flour balances the oil and olives. Use table salt or fine sea salt to blend evenly.
  • Active dry yeast: 1 teaspoon. Dissolved in lukewarm water until foamy for a stronger proof; instant yeast can be used directly in the flour if you prefer.
  • Sugar: 1/2 teaspoon. Helps jumpstart the yeast during the first five minute rest without making the dough sweet.
  • Water, lukewarm: 1 cup plus 3 tablespoons. Lukewarm means comfortable to the wrist. The dough should be wet but not soupy.
  • Olive oil: 2 tablespoons in the dough and extra for the brine. Use a fruity extra virgin for finishing and a lighter oil for baking if you like a subtler taste.
  • Brine ingredients: 3 tablespoons water, 3 tablespoons olive oil, 1/2 teaspoon fine salt, and 1/4 teaspoon garlic powder to flavor the dimples.
  • Kalamata olives: 1 cup pitted, roughly 70 to 80 grams. Their briny, fruity flavor makes them ideal, but other black olives work well too.
  • Oregano and finishing salts: 1 1/2 tablespoons dried oregano and optional finishing salt flakes and chili flakes for contrast and texture.

Instructions

Combine dry ingredients: In a large bowl, whisk together 2 1/2 cups all purpose flour and 3/4 teaspoon fine salt so the salt disperses evenly. This step ensures consistent seasoning throughout the dough and prevents pockets of salt. Proof the yeast: In a measuring jug, mix 1 cup plus 3 tablespoons lukewarm water with 1 teaspoon active dry yeast and 1/2 teaspoon sugar. Let rest until foamy, about 5 minutes. A foamy surface is the visual cue that the yeast is active and ready. Mix wet and dry: Add the foamy yeast mixture and 2 tablespoons olive oil to the flour. Use a spoon or spatula to stir until no dry streaks remain. The dough will be loose and sticky; that hydration is deliberate and will produce an open, tender crumb. First rise: Cover the bowl with a damp kitchen towel and let rest in a warm place until roughly double in size, about 1 hour. Temperature affects timing so allow a little more time in a cool kitchen. The dough should look puffy and domed. Shape in the pan: Prepare a 9 by 13 inch pan with parchment or a light coating of oil. Scrape the dough gently into the pan and dust the surface with a touch of flour. From the center, press outward with floured fingers so the dough reaches the edges but avoid degassing it completely. Make the brine and dimple: Whisk 3 tablespoons water, 3 tablespoons olive oil, 1/2 teaspoon salt and 1/4 teaspoon garlic powder. Pour the brine evenly over the surface and use fingertips to poke deep dimples filling them with the brine. Place pitted Kalamata olives into many of the dimples. Second rest: Sprinkle 1 1/2 tablespoons oregano and optional salt flakes or chili flakes. Let the pan rest for 30 minutes while you preheat the oven to 430 degrees Fahrenheit or 220 degrees Celsius. Bake and cool: Bake for 15 to 20 minutes until the focaccia is golden and the edges are crisp. Remove and let cool at least 10 minutes before slicing so the crumb sets and the olive oil absorbs slightly back into the bread. User provided content image 1

You Must Know

  • The dough is intentionally wet; do not try to make it stiff. A tacky, slightly spreadable dough yields a softer interior and more pronounced dimples.
  • This keeps best on the day it is baked. Store in an airtight container at room temperature for up to 24 hours and reheat briefly in a warm oven for the best texture.
  • Freezes very well: cool fully, wrap tightly, and freeze up to three months. Thaw at room temperature and refresh in a 350 degree Fahrenheit oven for 8 to 10 minutes.
  • Adjust water by tablespoon increments if your flour absorbs more or less liquid; the climate and brand can affect absorption significantly.

My favorite aspect is how forgiving this technique is. I have made it in a rush with slightly cold water and still ended up with a tender loaf because the proofing gives time for the gluten to develop gently. Friends often ask how something so simple can taste so complex and the answer is olive oil, time, and the concentrated pockets of brine in the dimples. Serve it warm with olive oil and aged balsamic and you will understand why it disappears quickly at gatherings.

Storage Tips

Once cooled, store focaccia at room temperature wrapped in a tea towel or in an airtight container for up to one day. For longer storage, slice into portions and freeze wrapped in plastic and foil for up to three months. To reheat from frozen, unwrap and place on a baking sheet in a 350 degree Fahrenheit oven for 10 to 12 minutes until warmed through. For a softer crumb, wrap the warmed slices in foil for a few minutes before serving. Avoid refrigeration unless you plan to toast or reheat because cold storage dries the crumb quickly.
User provided content image 2

Ingredient Substitutions

If you do not have Kalamata olives, use any brine cured black olives but expect a milder flavor. Substitute up to half the flour with bread flour for a chewier texture or swap 1 cup for whole wheat to deepen the flavor; reduce water by a tablespoon if you add whole grain flour. Use instant yeast by sprinkling it into the flour and omitting the sugar and the five minute foam step. For a garlicky finish, add a teaspoon of garlic powder to the dough and increase the brine garlic to taste. Olive oil can be any neutral oil in the dough, though an extra virgin finish adds aroma.

Serving Suggestions

Serve warm with extra virgin olive oil and a small bowl of aged balsamic vinegar for dipping. It pairs beautifully with soups, a plate of cold cuts and cheeses, or as an accompaniment to a tomato and basil salad. For an appetizer platter, cut into small squares and top with thinly sliced prosciutto, ricotta, or marinated artichokes. Garnish with fresh herbs such as thyme or rosemary for a fragrant twist right before serving.

Cultural Background

Focaccia has deep roots in Italian regional cooking, most famously from Liguria where the style emphasizes olive oil, simple seasonings, and a tender crumb. The practice of dimpling the dough and filling the hollows with oil or brine predates modern ovens and evolved as a way to create a richly flavored surface with a modest set of ingredients. Across Italy, variations include herbs, olives, tomatoes, and even sweet toppings. This recipe leans on the classic approach but simplifies technique to suit home kitchens without sacrificing traditional flavor.

Seasonal Adaptations

In summer, top the focaccia with halved cherry tomatoes and fresh basil immediately after baking to take advantage of peak produce. In autumn, caramelized onions and rosemary add depth. For winter gatherings, scatter roasted garlic cloves into the dimples before baking for a mellow, sweet garlic note. Holiday versions can include thinly sliced roasted red peppers or olives spiced with toasted cumin and fennel for a festive touch.

Meal Prep Tips

Make the dough the evening before and refrigerate for a slow overnight proof to develop richer flavor. Bring cold dough to room temperature for about 30 minutes before shaping into the pan and proceed with the brine and toppings. Portion baked focaccia into individual slices for grab and go lunches and store in single layer pieces to prevent sogginess. Label frozen portions with the date and reheat directly from frozen for convenience.

This focaccia is a humble but remarkably satisfying bread to share. It rewards a little patience and minimal hands on time with flavor that feels both rustic and intentional. Invite friends over, pour good wine, and let the bread do the rest.

Pro Tips

  • Use lukewarm water that feels like warm bath water to activate the yeast without killing it.

  • Keep the dough fairly wet; a tacky dough gives the best interior texture and holds dimples well.

  • If your kitchen is cool, extend the first rise by 15 to 30 minutes rather than increasing water temperature.

  • Fill the dimples generously with the oil and water brine to get pockets of flavor after baking.

This nourishing olive focaccia recipe is sure to be a staple in your kitchen. Enjoy every moist, high protein slice — it is perfect for breakfast or as a wholesome snack any time.

Tags

Appetizers & SnacksOlive FocacciaFocacciaBreadItalianOlivesOne-bowl doughNo-knead
No ratings yet

Olive Focaccia

This Olive Focaccia recipe makes perfectly juicy, tender, and flavorful steak every time! Serve with potatoes and a side salad for an unforgettable dinner in under 30 minutes.

Servings: 6 steaks
Olive Focaccia
Prep:5 minutes
Cook:15 minutes
Rest Time:10 mins
Total:20 minutes

Ingredients

Focaccia dough

Brine

Topping

Instructions

1

Combine dry ingredients

Whisk together 2 1/2 cups all purpose flour and 3/4 teaspoon fine salt in a large bowl to distribute the salt evenly.

2

Proof the yeast

Mix 1 cup plus 3 tablespoons lukewarm water with 1 teaspoon active dry yeast and 1/2 teaspoon sugar. Let it sit until foamy, about five minutes.

3

Mix wet and dry

Add the foamy yeast mixture and 2 tablespoons olive oil to the flour. Stir with a spoon until no dry flour remains. The dough should be wet and sticky.

4

First rise

Cover with a damp towel and let the bowl rest in a warm place until roughly doubled in size, about 60 minutes depending on kitchen temperature.

5

Shape in the pan

Prepare a 9 by 13 inch pan lined with parchment or lightly oiled. Scrape the dough into the pan and use floured fingers to press it gently from the center to the edges.

6

Make brine and dimple

Whisk 3 tablespoons water, 3 tablespoons olive oil, 1/2 teaspoon salt and 1/4 teaspoon garlic powder. Pour over the dough and poke deep dimples with your fingertips, filling them with the brine. Press pitted olives into the surface and sprinkle oregano.

7

Second rest

Let the pan rest for 30 minutes while preheating the oven to 430 degrees Fahrenheit. This short proof firms the surface and creates a better crust.

8

Bake and cool

Bake for 15 to 20 minutes until golden brown and crusty. Cool at least 10 minutes before slicing to allow the crumb to set.

Last Step: Please leave a rating and comment letting us know how you liked this recipe! This helps our business to thrive and continue providing free, high-quality recipes for you.

Nutrition

Calories: 310kcal | Carbohydrates: 45g | Protein:
6g | Fat: 10.5g | Saturated Fat: 3g |
Polyunsaturated Fat: 2g | Monounsaturated Fat:
4g | Trans Fat: 1g | Cholesterol: 253mg | Sodium:
0mg | Potassium: 953mg | Fiber: 0g | Sugar:
0g | Vitamin A: 577IU | Vitamin C: 3mg | Calcium:
47mg | Iron: 6mg

Did You Make This?

Leave a comment & rating below or tag
@platemint on social media!
Olive Focaccia

Categories:

Olive Focaccia

Did You Make This?

Leave a comment & rating below or tag @platemint on social media!

Rate This Recipe

Share This Recipe

Enjoyed this recipe? Share it with friends and family, and don't forget to leave a review!

Comments (1)

Leave a Comment

0/1000 characters
Food Lover
1 day ago

This recipe looks amazing! Can't wait to try it.

Rating:

Comments are stored locally in your browser. Server comments are displayed alongside your local comments.

Family photo

Hi, I'm Wendie!

Chef and recipe creator specializing in delicious Appetizers & Snacks cooking. Passionate about sharing easy-to-follow recipes that bring families together around the dinner table.

30-Minute Meals!

Join to receive our email series which contains a round-up of some of our quick and easy family favorite recipes.