
No Bake Raspberry Cheesecake

A simple, creamy no-bake raspberry cheesecake with a buttery graham cracker crust and bright homemade raspberry sauce. Perfect for parties and make-ahead dessert.
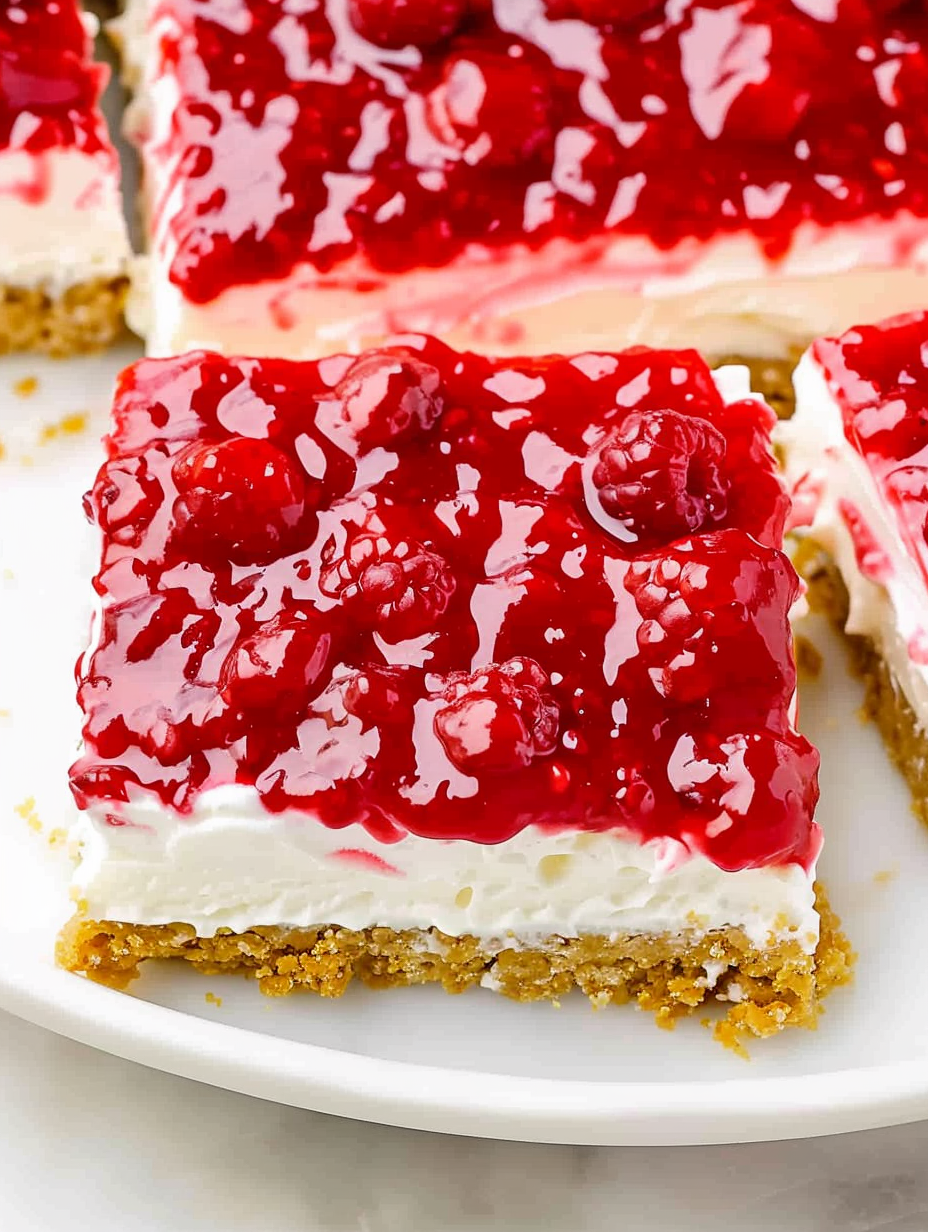
This no bake raspberry cheesecake has been a summer favorite in my kitchen for years. I first developed this version during a backyard potluck when I wanted something that tasted homemade and fresh but didn’t require turning on the oven. The combination of a sweet, buttery graham cracker base, velvety cream cheese filling, and a tangy homemade raspberry sauce is the reason this keeps showing up at picnics, birthdays, and casual dinners. The texture is smooth and light from the whipped topping while still rich enough to feel indulgent. I discovered the final balance of lemon and powdered sugar after a few trials; that little pop of citrus brightens the cream and keeps the dessert from feeling cloying.
I remember the first time I served this to a family friend who claimed she didn’t like cheesecake. She had two full slices and asked for the recipe. That moment convinced me that the no-bake format makes this accessible: it’s forgiving, fast to assemble, and carries a fresh fruit finish that wins over people who are usually skeptical. The raspberry sauce is made from frozen raspberries, so it’s available year-round and still tastes like summer when you serve it chilled. This approach requires minimal equipment and very little active cooking time—most of the work is waiting for the dessert to chill until it sets.
Why You'll Love This Recipe
- This dessert is easy to assemble and requires only about 20 minutes of active prep time—perfect for busy evenings or last-minute gatherings.
- The graham cracker crust is buttery and crisp without baking, so you skip the oven and still get great texture.
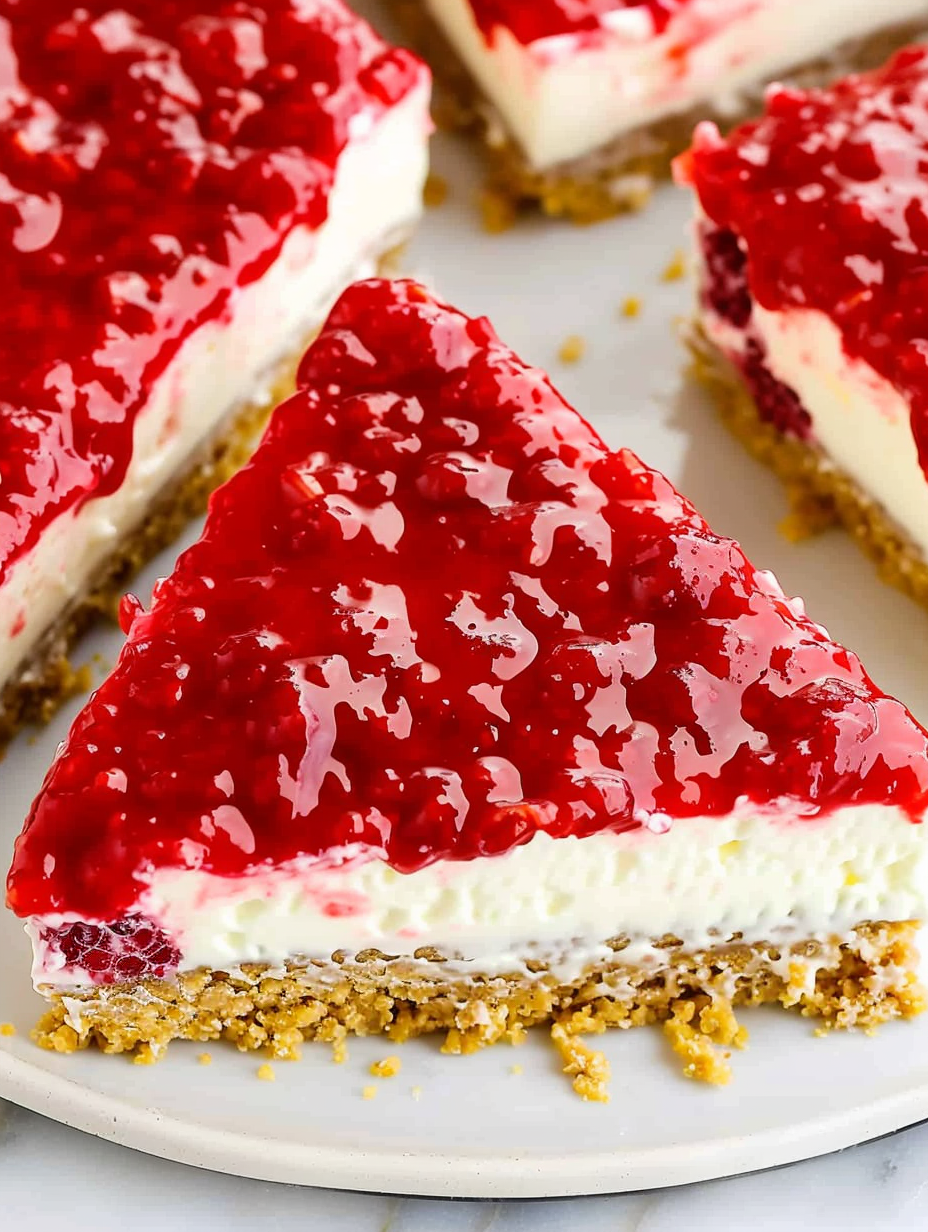
- Homemade raspberry sauce made from frozen berries brings vibrant flavor and natural color, and it’s thickened with a small cornstarch slurry for a glossy finish.
- The filling blends full-fat cream cheese with thawed whipped topping for a light yet rich mouthfeel that slices cleanly after chilling.
- Make-ahead friendly: assemble up to a day before serving, or freeze for longer storage following the flash-freeze note below.
- Uses pantry staples and common frozen items—no specialty shopping required, and it’s easy to double for a crowd.
In my experience this dessert always disappears quickly; guests love the balance of sweet and tart. It’s especially appreciated at summer BBQs when people enjoy a lighter, fruit-forward finish to a hearty meal. I also like that picky eaters often prefer the creamy texture of this version over denser baked varieties.
Ingredients
- Frozen raspberries (3 cups): I use frozen berries because they offer consistent flavor year-round and are already soft for cooking. Choose rind-free frozen raspberries for the cleanest sauce, such as store-brand or well-known brands like Wyman’s.
- Granulated sugar (1/3 cup + 1 tablespoon): The 1/3 cup sweetens the raspberry sauce while an extra tablespoon lightly sweetens the crust for balance. Use regular granulated sugar; superfine is unnecessary.
- Fresh lemon juice (3 tablespoons total): Brightens both the sauce (1 tablespoon) and the filling (2 tablespoons). Use freshly squeezed lemon for the best aroma and acidity.
- Cornstarch (2 tablespoons): Combined into a slurry with water to thicken the raspberry sauce. Cornstarch gives a glossy, stable finish that sets well in the refrigerator.
- Graham cracker crumbs (1 3/4 cups): For a classic flavor, use regular graham crackers crushed finely. You can buy pre-crumbed or pulse sheets in a food processor until uniformly fine.
- Unsalted butter (6 tablespoons), melted: Melting allows easy blending into crumbs so the crust compacts firmly. Use unsalted butter so you control the salt level; if using salted, reduce added salt.
- Cream cheese (16 ounces), softened: Room temperature cream cheese whips smooth without lumps. Use full-fat blocks for the creamiest texture—avoid cream cheese spreads for structure.
- Powdered sugar (1 cup): Sweetens and smooths the filling without graininess. Sift if lumpy.
- Vanilla extract (1 teaspoon): Adds warm background flavor—pure vanilla if possible.
- Frozen whipped topping (8 ounces), thawed: Folded into the cream cheese mixture to lighten the texture. Cool Whip or store-brand stabilized whipped topping works well.
Instructions
Make the Raspberry Sauce: In a medium saucepan over medium heat, combine 3 cups frozen raspberries, 1/3 cup granulated sugar, and 1 tablespoon fresh lemon juice. Bring to a gentle boil, stirring frequently so the fruit breaks down and the sugar dissolves. Cook for 3 to 4 minutes until the raspberries release their juices and the mixture is aromatic. Thicken the Sauce: Whisk 2 tablespoons cornstarch with 1 1/2 tablespoons water to form a smooth slurry. Pour the slurry into the boiling raspberry mixture, stir continuously and cook for about 1 minute until the sauce becomes glossy and thick enough to coat the back of a spoon. Remove from heat and transfer to a bowl to cool completely; chilling will further thicken the sauce. Prepare the Crust: In a medium bowl combine 1 3/4 cups graham cracker crumbs, 6 tablespoons melted unsalted butter, 1 tablespoon granulated sugar, and 1/2 teaspoon salt. Mix until the crumbs are evenly moistened and hold together when pressed between your fingers. Line a 9x9-inch baking pan with parchment paper, leaving an overhang for easy removal, and firmly press the crust into the bottom in an even layer. Chill briefly while you make the filling. Make the Filling: Beat 16 ounces softened cream cheese with 1 cup powdered sugar, 2 tablespoons fresh lemon juice, and 1 teaspoon vanilla extract for 1 to 2 minutes until smooth and fluffy. Scrape the bowl to ensure there are no lumps. Gently fold in 8 ounces thawed frozen whipped topping until fully incorporated and airy. Assemble and Chill: Spread the cream cheese mixture evenly over the prepared crust. Spoon the cooled raspberry sauce over the top and smooth gently. Refrigerate for at least 6 hours or overnight to allow the filling and sauce to set fully. For clean slices, chill thoroughly and use a warm, dry knife when cutting.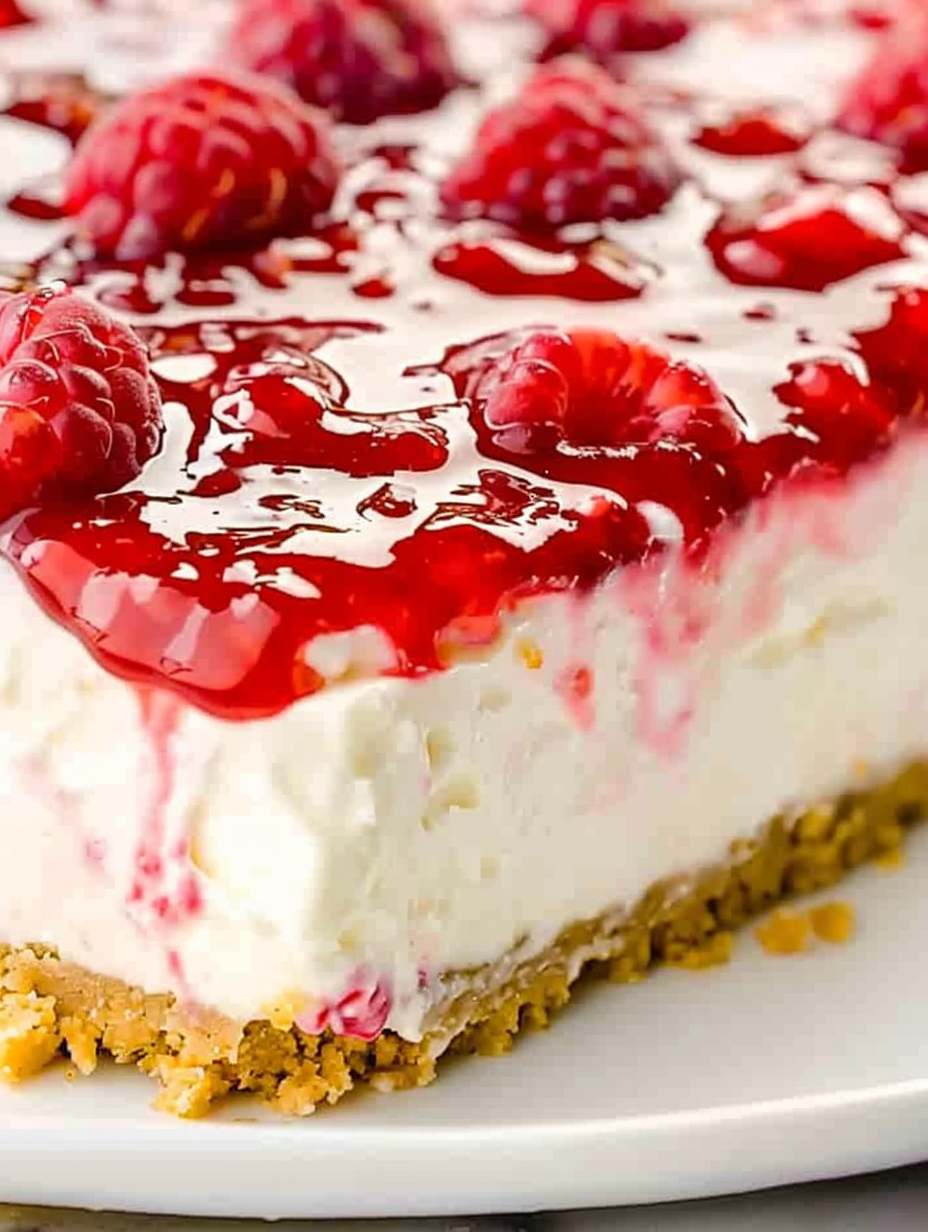
You Must Know
- This dessert is high in fat and calories per slice (about 273 kcal) and stores well refrigerated for up to 4 days when covered.
- It freezes well for up to 3 months if wrapped tightly after flash-freezing for an hour—see the notes below for freezer-safe tips.
- Make sure the cream cheese is softened to room temperature to avoid lumps; if it is cold, warm it on low power in short bursts in the microwave while rotating.
- For cleaner slices, warm your knife under hot water, dry it, and then cut; repeat between slices to avoid sticking.
- If you need a gluten-free version, replace graham crumbs with certified gluten-free cookies or almond flour crust adjusted with a little extra butter.
What I love most about this preparation is how approachable it is: a little stovetop cooking for the sauce and a few straightforward mixing steps yield something that looks and tastes special. My family usually fights over the end pieces, and the tartness of the raspberry topping keeps everyone coming back for more—even those who claim they don’t like overly sweet desserts.
Storage Tips
Store the chilled dessert covered in the refrigerator for up to 4 days. Use an airtight container or cover the pan tightly with plastic wrap to prevent flavor transfer. If freezing for long-term storage, assemble in a disposable heavy-duty aluminum 9x9 tray, flash-freeze unwrapped for 1 hour to set the raspberry layer, then wrap tightly with aluminum foil and freeze up to 3 months. Thaw in the refrigerator overnight before serving to preserve texture.
Ingredient Substitutions
For a gluten-free option swap graham cracker crumbs for finely ground gluten-free cookies or almond meal and increase butter by 1 tablespoon if using drier crumbs. To reduce sugar, try a natural sweetener like erythritol in the crust and filling, but keep the powdered sugar in the filling to help with texture—use a 1:1 replacement designed for baking. For a lighter version, replace half the cream cheese with ricotta, but expect a slightly grainier texture and milder tang.
Serving Suggestions
Serve chilled on a platter garnished with fresh raspberries, a few mint leaves, and a light dusting of powdered sugar. Pair with a cup of espresso or a dessert wine like Moscato d’Asti. For parties, cut into 16 squares and place on decorative paper liners. This dessert works well after heavy mains because its bright fruit finish refreshes the palate.
Cultural Background
No-bake chilled desserts grew in popularity when refrigeration became widely available; they offer a quick alternative to oven-baked cheesecakes. While traditional New York-style cheesecake is baked and dense, this chilled American adaptation borrows techniques from mousse and frozen desserts to create a lighter texture that became popular for summer entertaining. Using a graham cracker crust is a hallmark of American no-bake cheesecakes and pie bases.
Seasonal Adaptations
In summer use fresh raspberries and thin the sauce slightly for an intensely bright flavor. In autumn swap raspberries for stewed berries with a pinch of cinnamon for warmth. For winter holidays top with a spiced cranberry compote instead of raspberry sauce. You can also add a streusel layer between crust and filling for a fall twist.
Meal Prep Tips
Make the raspberry sauce up to 3 days ahead and keep refrigerated. Prepare the crust and keep it chilled, then combine the filling the day you plan to assemble so the whipped topping stays light. Use shallow, wide containers to refrigerate or freeze individual portions for grab-and-go treats. Label containers with the assembly date for best food safety practices.
This no bake raspberry cheesecake brings together minimal fuss and maximum flavor; it’s a dessert I trust for any gathering, and I hope you make it part of your repertoire. Enjoy—share a slice with someone you love and watch it become a new favorite.
Pro Tips
Make sure cream cheese is at room temperature before beating to avoid lumps in the filling.
Flash-freeze the assembled cheesecake unwrapped for 1 hour before wrapping for long-term freezing to prevent the raspberry layer from smearing.
Use a warm, dry knife for slicing; heat the blade under hot water, dry it, and cut in one smooth motion for clean edges.
Sift powdered sugar if it’s lumpy before adding to the cream cheese for a velvety texture.
This nourishing no bake raspberry cheesecake recipe is sure to be a staple in your kitchen. Enjoy every moist, high protein slice — it is perfect for breakfast or as a wholesome snack any time.
FAQs about Recipes
Can I freeze this cheesecake?
Yes. Assemble in a disposable heavy-duty aluminum 9x9 tray, flash-freeze for 1 hour, wrap tightly with foil, and freeze up to 3 months. Thaw overnight in the refrigerator.
How do I get clean slices?
Warm a sharp knife under hot water, dry it, then slice through the chilled cheesecake. Wipe and warm the knife between slices for clean cuts.
Tags
No Bake Raspberry Cheesecake
This No Bake Raspberry Cheesecake recipe makes perfectly juicy, tender, and flavorful steak every time! Serve with potatoes and a side salad for an unforgettable dinner in under 30 minutes.
Ingredients
Raspberry Sauce
Graham Cracker Crust
Cheesecake Layer
Instructions
Cook raspberries
Combine frozen raspberries, granulated sugar, and fresh lemon juice in a medium saucepan. Bring to a low boil over medium heat, stirring frequently, and cook for 3 to 4 minutes until berries break down.
Thicken sauce
Mix cornstarch and water to form a slurry. Add to boiling raspberries, cook for about 1 minute until thickened and glossy, then remove from heat and cool completely.
Make crust
Mix graham cracker crumbs, melted butter, granulated sugar, and salt until evenly moistened. Press firmly into the bottom of a parchment-lined 9x9 pan and chill briefly.
Prepare filling
Beat softened cream cheese with powdered sugar, lemon juice, and vanilla until smooth and fluffy. Fold in thawed whipped topping until fully incorporated and airy.
Assemble and chill
Spread the filling evenly over the crust, spoon cooled raspberry sauce on top, and refrigerate for at least 6 hours or overnight before slicing and serving.
Last Step: Please leave a rating and comment letting us know how you liked this recipe! This helps our business to thrive and continue providing free, high-quality recipes for you.
Nutrition
Did You Make This?
Leave a comment & rating below or tag
@platemint on social media!
Categories:
You might also like...

Cheesy Baked Ziti Casserole
Saucy, cheesy baked ziti with ricotta and basil tastes like lasagna in half the effort, perfect for weeknights or crowds.

Juicy Cheeseburger Sliders Bake
Quick, crowd-pleasing cheeseburger sliders baked golden with melty cheddar and savory beef. Ready in 30 minutes, great for parties and easy meal prep.

Air Fryer Sweet Potato Fries
Crispy air fryer sweet potato fries with tender centers, fast-food flavor without deep frying. Ready in minutes and irresistibly snackable.
Did You Make This?
Leave a comment & rating below or tag @platemint on social media!
Rate This Recipe
Share This Recipe
Enjoyed this recipe? Share it with friends and family, and don't forget to leave a review!
Comments (1)
This recipe looks amazing! Can't wait to try it.
Comments are stored locally in your browser. Server comments are displayed alongside your local comments.

Hi, I'm Wendie!
What's Popular

30-Minute Meals!
Join to receive our email series which contains a round-up of some of our quick and easy family favorite recipes.