
No Bake Peanut Butter Kiss Cookies

A classic, quick no-bake treat — crunchy cereal coated in a warm peanut butter syrup, topped with a chocolate kiss. Ready in 15 minutes and perfect for gatherings.

This recipe for No Bake Peanut Butter Kiss Cookies has been a staple in my kitchen for years. I first made these on a busy holiday afternoon when I needed something sweet and festive that didn’t require the oven. The simplicity and nostalgia of the combination — warm, slightly sticky peanut butter coating hugging crisp cereal, finished with a chocolate kiss pressed into the center — instantly made them a crowd favorite. They’re the kind of cookie that delivers comforting, chewy texture with just the right snap from the cereal and a glossy chocolate finish that kids and adults both love.
I cherish the memories of making batches with my family: the laughter as we dropped the sticky mixture by spoonfuls, the gentle pressing of a chocolate kiss into each mound, and that triumphant moment when the first cookie is tasted and a chorus of approval follows. These cookies are not just fast; they bring back afternoons of baking with my grandmother and the thrill of simple ingredients transforming into something magical. Whether you need a last-minute party contribution or a quick treat to lift your spirits, these cookies deliver consistent, comforting results with minimal fuss.
Why You'll Love This Recipe
- Fast and fuss-free: ready in about 15 minutes from start to finish, perfect for last-minute gatherings or spontaneous baking sessions.
- Pantry-friendly: uses common staples like corn syrup, brown sugar, peanut butter, and Rice Krispies — no special grocery run required.
- Kid-approved and hands-on: great for involving children in the kitchen; they can help drop the cookie mounds and press in the chocolates.
- Make-ahead friendly: sets quickly and stores well for several days at room temperature or can be frozen for longer storage.
- Textural contrast: chewy, slightly sticky coating with the light crunch of cereal and the smooth burst of chocolate from the kiss.
- Adaptable: swap the cereal or chocolates for dietary needs or seasonal variations without losing the essence of the treat.
I’ve made these for potlucks, school functions, and cozy rainy-day snacks. Each time they disappear quickly, and the simplicity means I often double the batch. The recipe’s predictability — as long as the syrup reaches a full boil — makes it a reliable go-to when I need guaranteed results under time pressure.
Ingredients
- Corn syrup (light): 1 cup. Light corn syrup gives shine and chewiness to the coating; use Karo for consistent results and measure by cup for accuracy.
- Brown sugar: 1 cup, packed. Use light brown sugar for a caramel note; packing the cup ensures consistent sweetness and helps the syrup reach the right texture.
- Creamy peanut butter: 1 1/2 cups. Choose a creamy, well-stirred jar (Jif or Skippy work well) for smooth coating — natural peanut butter can be used but stir thoroughly to reintegrate oils.
- Vanilla extract: 1 teaspoon. Adds depth and rounds the sweetness; pure vanilla gives the best flavor.
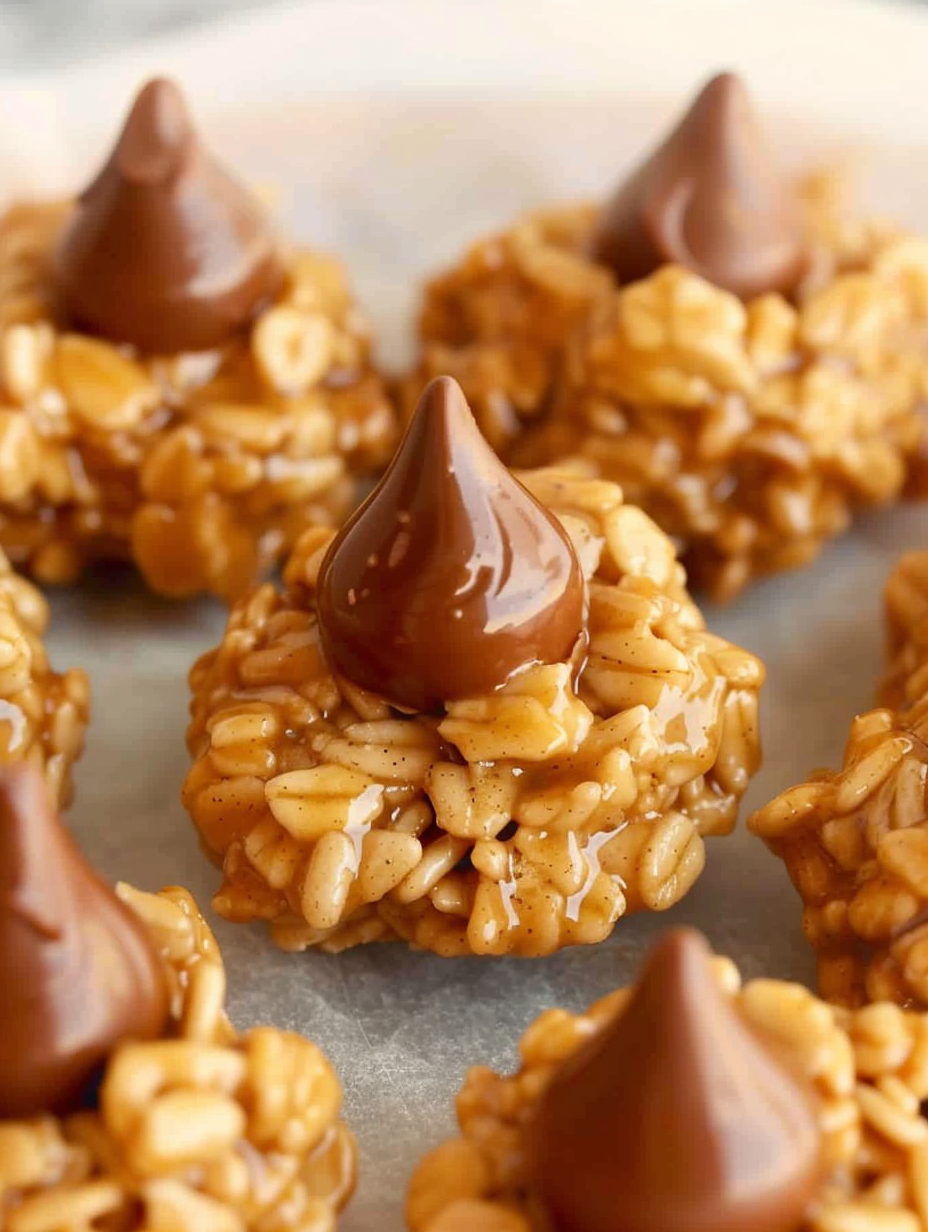
- Rice Krispies cereal: 4 cups. Provides the classic crunch and light structure; measure gently to avoid compacting the cereal.
- Chocolate Kisses: 26 pieces. Use classic milk chocolate Kisses for the traditional flavor; substitute darker or flavored Kisses for a variation.
Instructions
Make the syrup: In a medium saucepan combine 1 cup light corn syrup and 1 cup packed brown sugar over medium heat. Stir constantly with a wooden spoon until the mixture reaches a vigorous, full boil and appears glossy — about 2–3 minutes after boiling begins. A full boil means bubbles are rolling across the surface and do not dissipate when stirred. Enrich with peanut butter and vanilla: Remove the saucepan from heat immediately and stir in 1 1/2 cups creamy peanut butter and 1 teaspoon vanilla. Stir until smooth and uniform. The residual heat thins the peanut butter so it fully incorporates without scorching. Coat the cereal: Place 4 cups Rice Krispies cereal into a large mixing bowl. Pour the warm peanut butter mixture over the cereal and fold gently with a wooden spoon until every flake is evenly coated. Work quickly before the mixture cools and becomes stiff. Form the cookie mounds: Drop the mixture by rounded 1 1/2-inch balls onto a cookie sheet lined with parchment or waxed paper. Use a small cookie scoop or two spoons to keep the sizes uniform. Leave a little space between mounds. Top with chocolate: Press one chocolate kiss into the center of each mound while the mixture is still warm and pliable. Use the base of the kiss to gently shape the mixture around it so the kiss sits snugly in the center. Let the cookies cool and set for a few minutes at room temperature before moving them.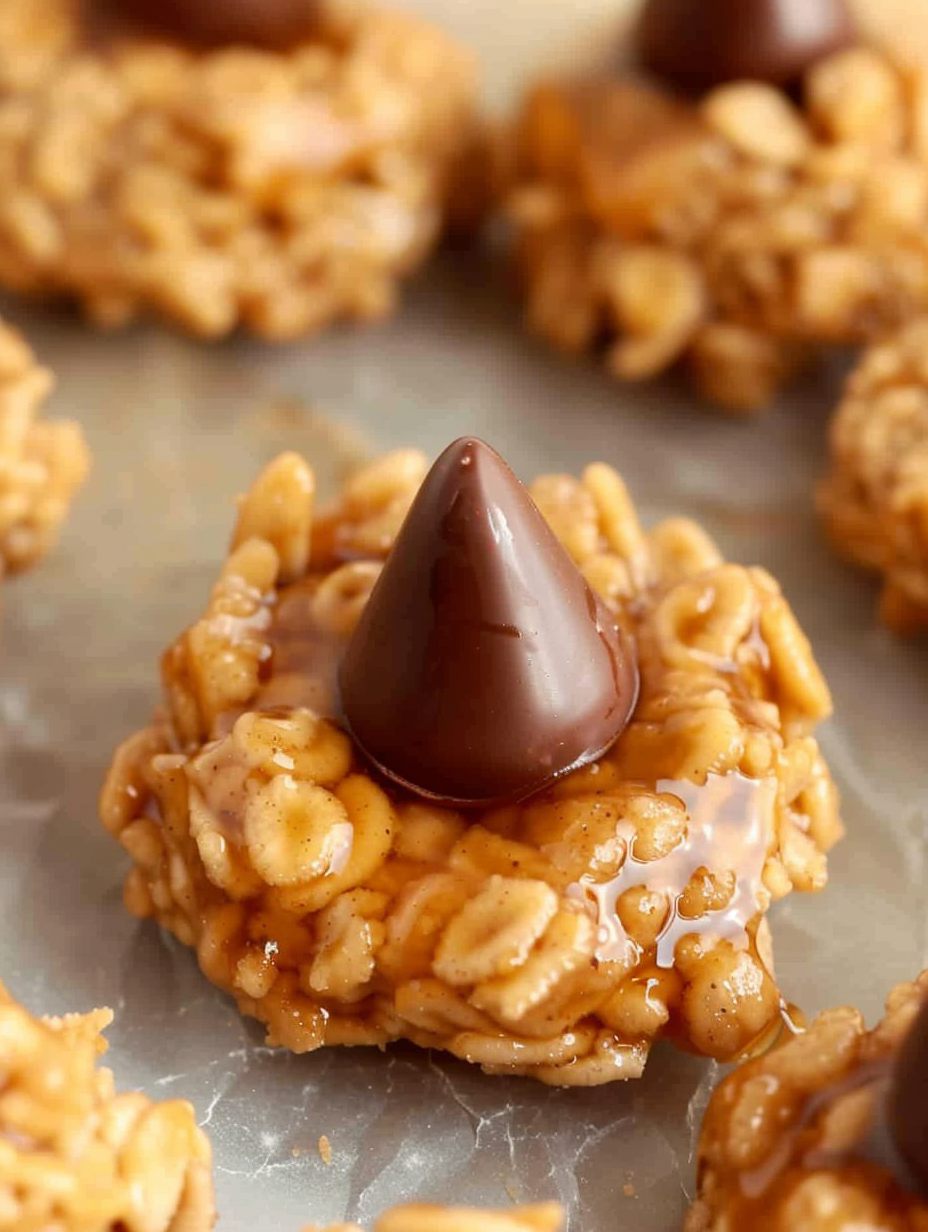
You Must Know
- Ensure the corn syrup and brown sugar reach a full rolling boil; if not, the coating won’t bind the cereal and cookies may crumble.
- Work while the mixture is warm — it sets quickly. If it becomes too cool, gently rewarm in the saucepan off heat to regain pliability.
- Store at room temperature in an airtight container; refrigeration can harden the chocolate and change texture.
- These cookies freeze well for up to 3 months when individually wrapped and placed in a sealed container.
- Use a small cookie scoop for consistent sizing; uniform cookies set at the same rate and look polished on a platter.
My favorite thing about these is how reliably they transport well — I’ve taken them to picnics, bake sales, and holiday parties without worry. Family and friends always comment on the perfect balance of sweet caramelized flavor and peanut richness, and the chocolate kiss is a nostalgic finishing touch that signals home-baked comfort.
Storage Tips
Store cooled cookies in an airtight container at room temperature for up to 4–5 days. Layer parchment between rows to prevent sticking. For longer storage, individually wrap cookies in plastic wrap and freeze in a rigid container for up to 3 months. When ready to enjoy, thaw at room temperature for 30–60 minutes to retain the intended soft-chewy texture; avoid microwaving frozen cookies as the chocolate can bloom or separate.
Ingredient Substitutions
For a nut-free version, replace peanut butter with a sunflower seed butter of similar texture and flavor intensity. If you prefer a natural peanut butter, stir thoroughly to reincorporate oils and consider chilling the mixture briefly before forming mounds to manage stickiness. Swap Rice Krispies for gluten-free puffed rice if you need the recipe to be gluten-free — note texture will be slightly different. Use dark chocolate kisses or mini peanut butter cups for a flavor twist; adjust sweetness if using darker chocolate.
Serving Suggestions
Serve on a festive platter lined with waxed paper for parties or pack in small cellophane bags for gifts. These pair nicely with a hot cup of coffee or a cold glass of milk. Garnish with a light dusting of flaky sea salt on the chocolate kiss for an elevated contrast, or sprinkle crushed nuts around the base for added texture. They’re also lovely alongside other no-bake treats on a dessert board.
Cultural Background
This style of no-bake chocolate-and-cereal cluster is rooted in mid-20th-century American home baking, where convenience and shelf-stable ingredients were prized. Combinations of corn syrup, sugar, and peanut butter became popular for quick confections. The addition of a chocolate kiss as a finishing touch became a classic decorative tradition, turning simple crisps into instantly recognizable holiday and bake sale favorites across many U.S. households.
Seasonal Adaptations
Adapt for holidays by swapping chocolate kisses with red or green foil-wrapped candies at Christmas, or pastel candies for spring events. In the fall, stir in a teaspoon of ground cinnamon or pumpkin pie spice to the warm peanut butter mixture before coating the cereal. For summer gatherings, use a mix of milk and dark chocolate kisses for contrast and consider adding toasted coconut flakes for a lighter, beachy profile.
Meal Prep Tips
Make a double batch and portion into snack-sized bags for grab-and-go treats throughout the week. Keep a small jar of corn syrup and a measured scoop of peanut butter on hand for speedy assembly. If planning ahead, prepare and cool the mounds, then press the kisses in just before serving to prevent chocolate bloom during storage. Label frozen containers with the date to track freshness.
These cookies are forgiving, fast, and full of nostalgia — a true pantry hero that brings people together. Try them once and they’ll likely become a requested staple for your celebrations and cozy moments alike.
Pro Tips
Make sure the corn syrup and brown sugar reach a full rolling boil before removing from heat to ensure the mixture sets correctly.
Use a small cookie scoop to keep cookie sizes uniform so they set at the same rate.
If the mixture cools and becomes hard to work with, briefly rewarm it over low heat while stirring constantly to regain pliability.
Store in an airtight container at room temperature; freeze individual cookies for longer storage.
Press the chocolate kisses in while the cookies are still warm so they adhere properly and nestle into the dough.
This nourishing no bake peanut butter kiss cookies recipe is sure to be a staple in your kitchen. Enjoy every moist, high protein slice — it is perfect for breakfast or as a wholesome snack any time.
Tags
No Bake Peanut Butter Kiss Cookies
This No Bake Peanut Butter Kiss Cookies recipe makes perfectly juicy, tender, and flavorful steak every time! Serve with potatoes and a side salad for an unforgettable dinner in under 30 minutes.
Ingredients
Main
Instructions
Make Sugar Syrup
Combine 1 cup light corn syrup and 1 cup packed brown sugar in a medium saucepan over medium heat. Stir constantly until the mixture comes to a full rolling boil and appears glossy, about 2–3 minutes after boiling begins.
Add Peanut Butter and Vanilla
Remove the saucepan from heat and stir in 1 1/2 cups creamy peanut butter and 1 teaspoon vanilla extract until smooth and fully combined.
Coat the Cereal
Place 4 cups Rice Krispies cereal in a large bowl. Pour the warm peanut butter mixture over the cereal and fold gently until evenly coated, working quickly before the mixture sets.
Form Balls and Add Kisses
Drop by rounded 1 1/2-inch balls onto a cookie sheet lined with parchment. Press one chocolate kiss into the center of each mound while still warm, shaping the mixture around the base of the kiss.
Set and Cool
Allow the cookies to cool and set for a few minutes at room temperature before transferring to a storage container or serving platter.
Last Step: Please leave a rating and comment letting us know how you liked this recipe! This helps our business to thrive and continue providing free, high-quality recipes for you.
Nutrition
Did You Make This?
Leave a comment & rating below or tag
@platemint on social media!
Categories:
You might also like...

Cheesy Baked Ziti Casserole
Saucy, cheesy baked ziti with ricotta and basil tastes like lasagna in half the effort, perfect for weeknights or crowds.

Juicy Cheeseburger Sliders Bake
Quick, crowd-pleasing cheeseburger sliders baked golden with melty cheddar and savory beef. Ready in 30 minutes, great for parties and easy meal prep.

Air Fryer Sweet Potato Fries
Crispy air fryer sweet potato fries with tender centers, fast-food flavor without deep frying. Ready in minutes and irresistibly snackable.
Did You Make This?
Leave a comment & rating below or tag @platemint on social media!
Rate This Recipe
Share This Recipe
Enjoyed this recipe? Share it with friends and family, and don't forget to leave a review!
Comments (1)
This recipe looks amazing! Can't wait to try it.
Comments are stored locally in your browser. Server comments are displayed alongside your local comments.

Hi, I'm Wendie!
What's Popular

30-Minute Meals!
Join to receive our email series which contains a round-up of some of our quick and easy family favorite recipes.