
>>

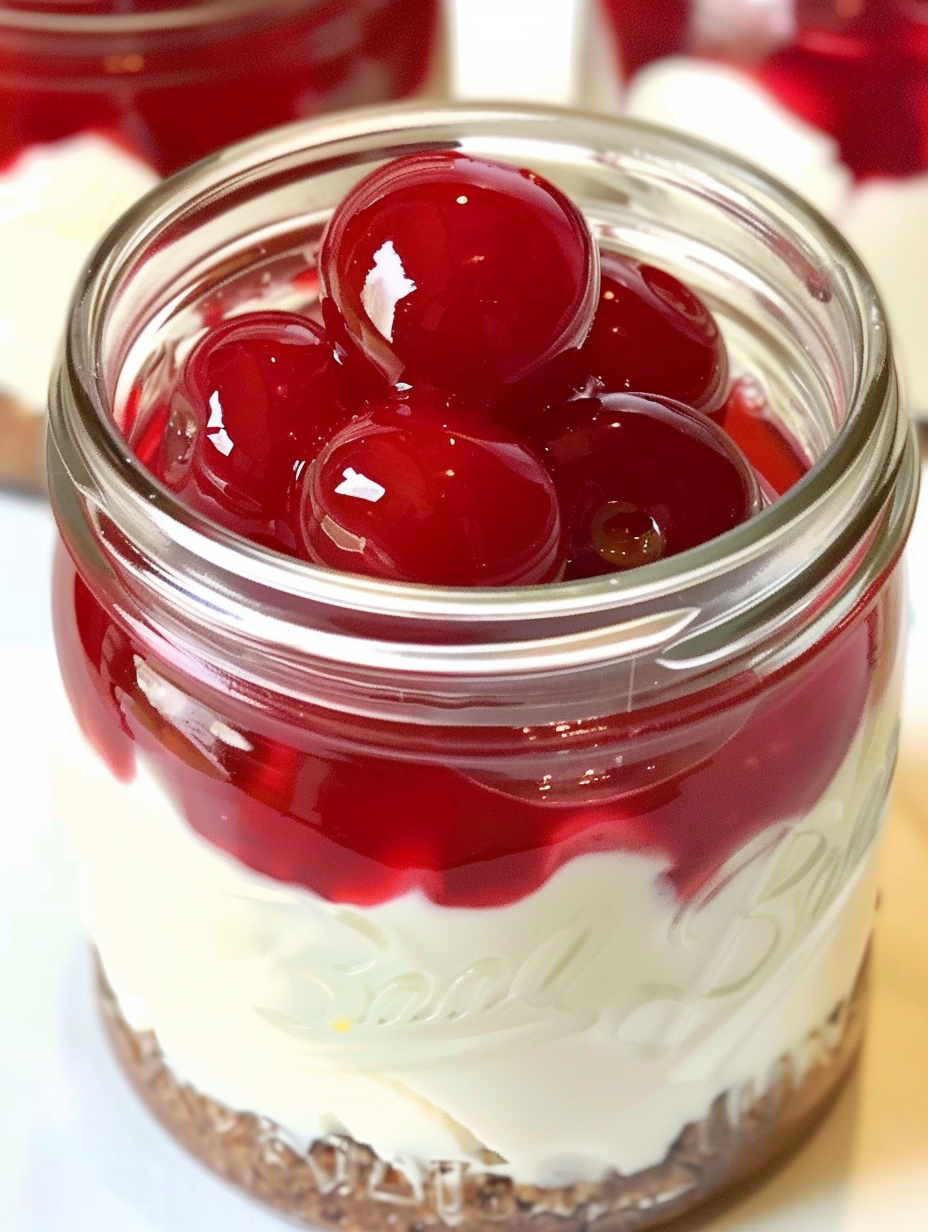
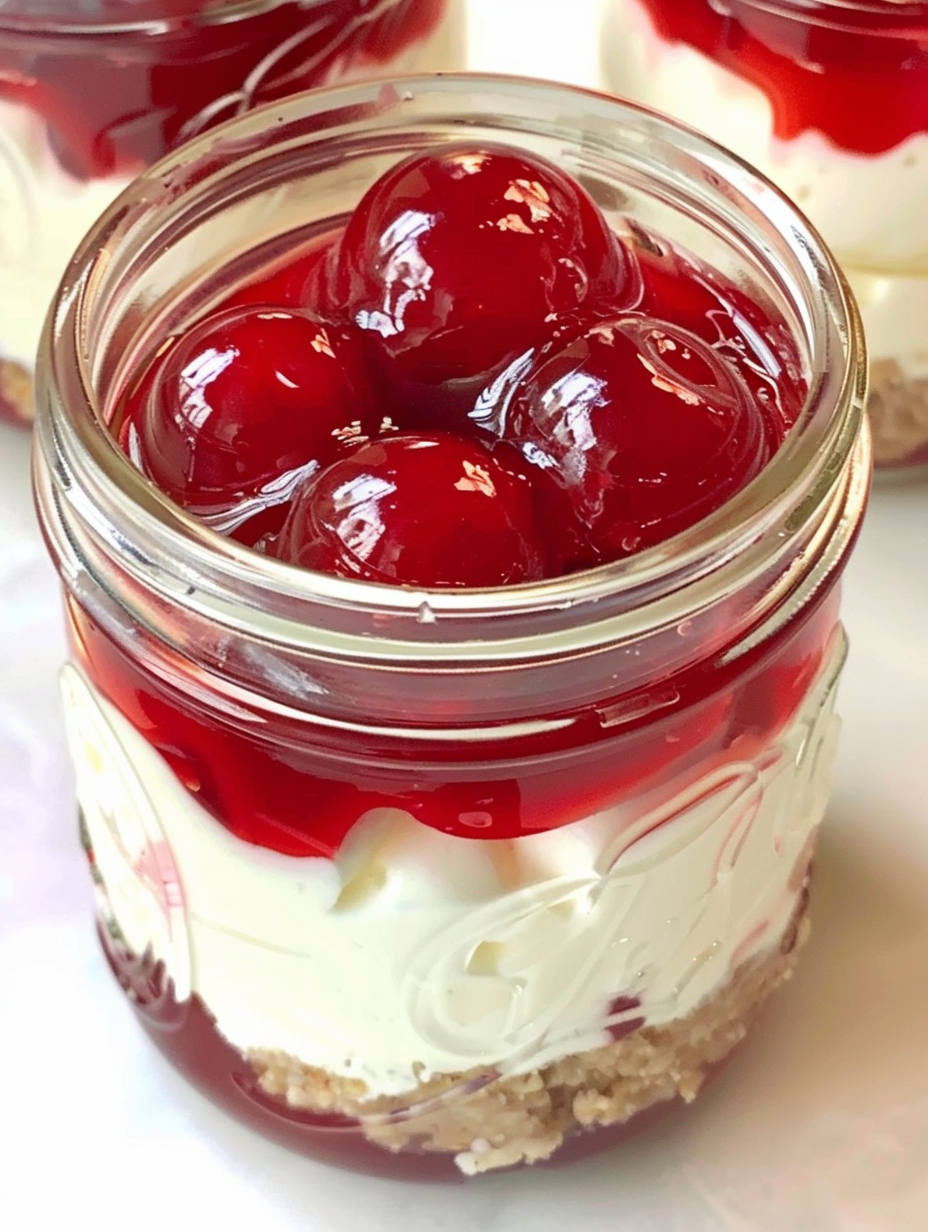
A silky, no-bake cheesecake topped with bright cherry pie filling — easy to assemble in jars or a springform for an elegant dessert without an oven.

This no-bake cherry cheesecake became a household favorite the first winter I tried it. I was looking for a fuss-free dessert that felt special for a small dinner party and discovered how simple ingredients — cream cheese, sweetened condensed milk, lemon, and a crisp graham cracker base — transform into a luxuriously smooth filling with almost no effort. The texture is light and pillowy yet rich enough to satisfy a craving for something indulgent; the lemon brightens the dairy, and the cherry topping adds a nostalgic, jewel-toned sweetness that always gets compliments.
I first tasted a version of this at a friend’s potluck where it was served in little jars. The portability and presentation stuck with me — everyone loves an individual portion — and I adapted the original to use a single 8-ounce block of Philadelphia cream cheese and a can of sweetened condensed milk for stability and creaminess. It stays reliably smooth when beaten properly and requires only chilling, not baking. Whether you make it in 6 jars for guests or a 9-inch springform for family dessert, it’s a dependable recipe that I turn to for weeknight celebrations and holiday dinners alike.
My family’s reaction the first time I made jars of these was immediate — forks in hands and requests for the recipe. I now keep a can of cherry pie filling in the pantry for when I want a quick, celebratory dessert. Over time I’ve refined the lemon amount to keep the filling bright without curdling and learned the exact beat time to reach silky peaks without overworking the dairy.
My favorite part is how reliably this comes together — the lemon-and-vanilla balance turns a simple cream cheese base into something you’d expect from a pastry case. I’ve brought jars to picnics and whole cakes to family dinners; both formats disappear fast. The cherry topping gives it a celebratory look that turns an everyday dessert into something special.
Store assembled portions covered in the refrigerator for up to 3–4 days. Use airtight containers or seal jars with lids to prevent absorption of other fridge odors. If you need longer storage, omit the cherry topping and wrap the cheesecake tightly with plastic wrap and a layer of foil before freezing; freeze up to 3 months. Thaw overnight in the refrigerator and add fresh topping just before serving to maintain texture and appearance. For reheating individual portions, let them come to cool room temperature for 15–20 minutes — the texture is best slightly chilled, not warm.
For a gluten-free version, substitute gluten-free graham cracker crumbs in equal measure. For a lighter base, swap half the butter for neutral oil, but expect a softer crust. If dairy is a concern, use a full-fat vegan cream cheese and a sweetened condensed coconut milk alternative; the texture will be close but slightly different in mouthfeel. Swap cherry pie filling for blueberry, strawberry, or lemon curd for seasonal variations. If you prefer fewer processed ingredients, make homemade crumbs from plain crackers and adjust sugar to taste.
Serve jars individually with a small spoon and a mint leaf for garnish or present a 9-inch cake on a chilled platter with piped whipped cream rosettes. Pair with coffee, black tea, or a sparkling rosé. For celebrations, add toasted almond slivers or white chocolate shavings over the cherries. For a summer party, top with lightly macerated fresh cherries and a sprinkle of coarse sugar for crunch.
Cheesecake has deep roots across many cuisines, but the modern American no-bake variant is a pragmatic evolution that became popular with the availability of processed conveniences like sweetened condensed milk and instant crusts. This cherry-topped style echoes classic American diner desserts and pie-topped cheesecakes that gained wide popularity in mid-20th century home cooking. Serving in jars nods to the picnic and potluck culture where portability and single portions are prized.
Winter: use canned cherry or cranberry compote and warm spices (a pinch of cinnamon) in the crust. Spring: swap cherries for macerated strawberries and add lemon zest to the filling. Summer: use fresh berries and reduce lemon slightly to let fruit sweetness shine. Fall: add a tablespoon of maple syrup to the filling and use gingersnap crumbs in place of graham crackers for a warm spice profile.
Make the crust and filling a day ahead and keep them chilled separately; assemble the final portions the day of serving. Portion the crust into jars and freeze for quicker assembly — remove 30 minutes before filling so they set without condensation. Use uniform jars or ramekins for consistent servings and reheating times. Label and date any frozen portions to rotate stock easily.
There’s joy in a dessert that’s both easy and polished — this cherry-topped no-bake cheesecake is one of those recipes that keeps me reaching for the same ingredients whenever I want to delight friends without fuss. Try it in jars for gifts, or a single cake for Sunday dinner, and personalize the topping to make it your own.
Soften cream cheese to room temperature for at least 30 minutes to ensure a lump-free, silky filling.
Press the graham cracker crumbs firmly with the bottom of a measuring cup to create a compact crust that won't fall apart when served.
Use fresh lemon juice rather than bottled for the best bright flavor and to help the filling set properly.
Chill at least 2–3 hours, preferably overnight, for the creamiest texture.
This nourishing no-bake cherry cheesecake recipe is sure to be a staple in your kitchen. Enjoy every moist, high protein slice — it is perfect for breakfast or as a wholesome snack any time.
Yes — prepare the crust and filling up to two days ahead; add cherry topping just before serving for the freshest presentation.
Omit the cherry topping and freeze tightly wrapped for up to 3 months. Thaw overnight in the refrigerator and add topping before serving.
This No-Bake Cherry Cheesecake recipe makes perfectly juicy, tender, and flavorful steak every time! Serve with potatoes and a side salad for an unforgettable dinner in under 30 minutes.
Combine graham cracker crumbs, sugar, and melted butter until the mixture holds when pressed. Press 2–3 tablespoons into the bottom of each jar or evenly into a 9-inch springform pan. Chill for about 1 hour to firm the crust.
Beat the softened cream cheese on medium-high until light and fluffy, about 2–3 minutes, scraping the bowl as needed to avoid lumps.
With mixer on low, gradually add the sweetened condensed milk until fully combined, then increase speed and beat until smooth.
Add lemon juice and vanilla extract and beat until the mixture thickens and forms soft peaks, about 1–2 minutes.
Spoon the filling over the chilled crust, smooth the top, cover, and refrigerate for at least 2–3 hours or overnight for best texture.
Spoon cherry pie filling over each portion or across the top of the cake just before serving. Garnish with mint or toasted almonds if desired.
Last Step: Please leave a rating and comment letting us know how you liked this recipe! This helps our business to thrive and continue providing free, high-quality recipes for you.
Leave a comment & rating below or tag
@platemint on social media!

Saucy, cheesy baked ziti with ricotta and basil tastes like lasagna in half the effort, perfect for weeknights or crowds.

Quick, crowd-pleasing cheeseburger sliders baked golden with melty cheddar and savory beef. Ready in 30 minutes, great for parties and easy meal prep.

Crispy air fryer sweet potato fries with tender centers, fast-food flavor without deep frying. Ready in minutes and irresistibly snackable.
Leave a comment & rating below or tag @platemint on social media!
Enjoyed this recipe? Share it with friends and family, and don't forget to leave a review!
This recipe looks amazing! Can't wait to try it.
Comments are stored locally in your browser. Server comments are displayed alongside your local comments.

Join to receive our email series which contains a round-up of some of our quick and easy family favorite recipes.
