
>>

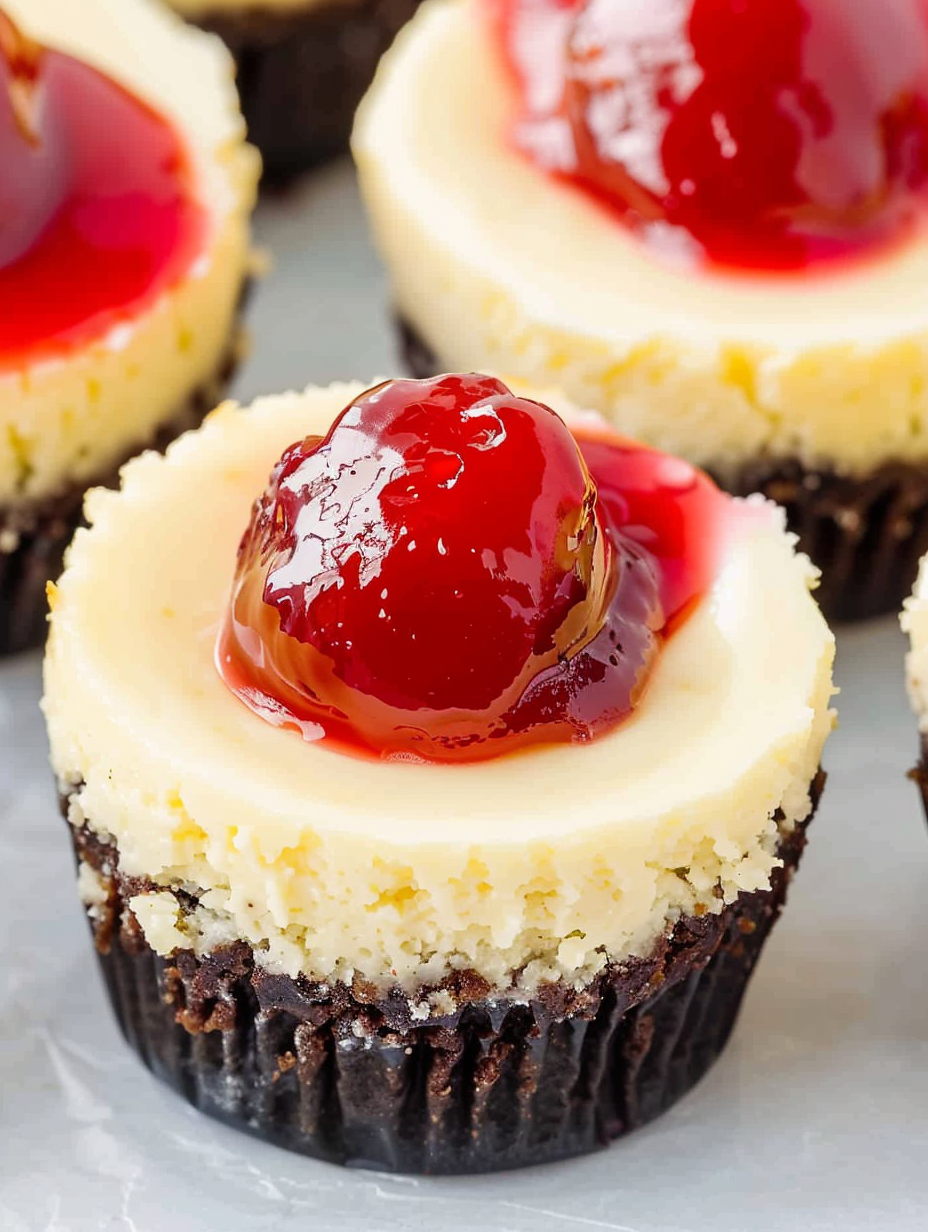
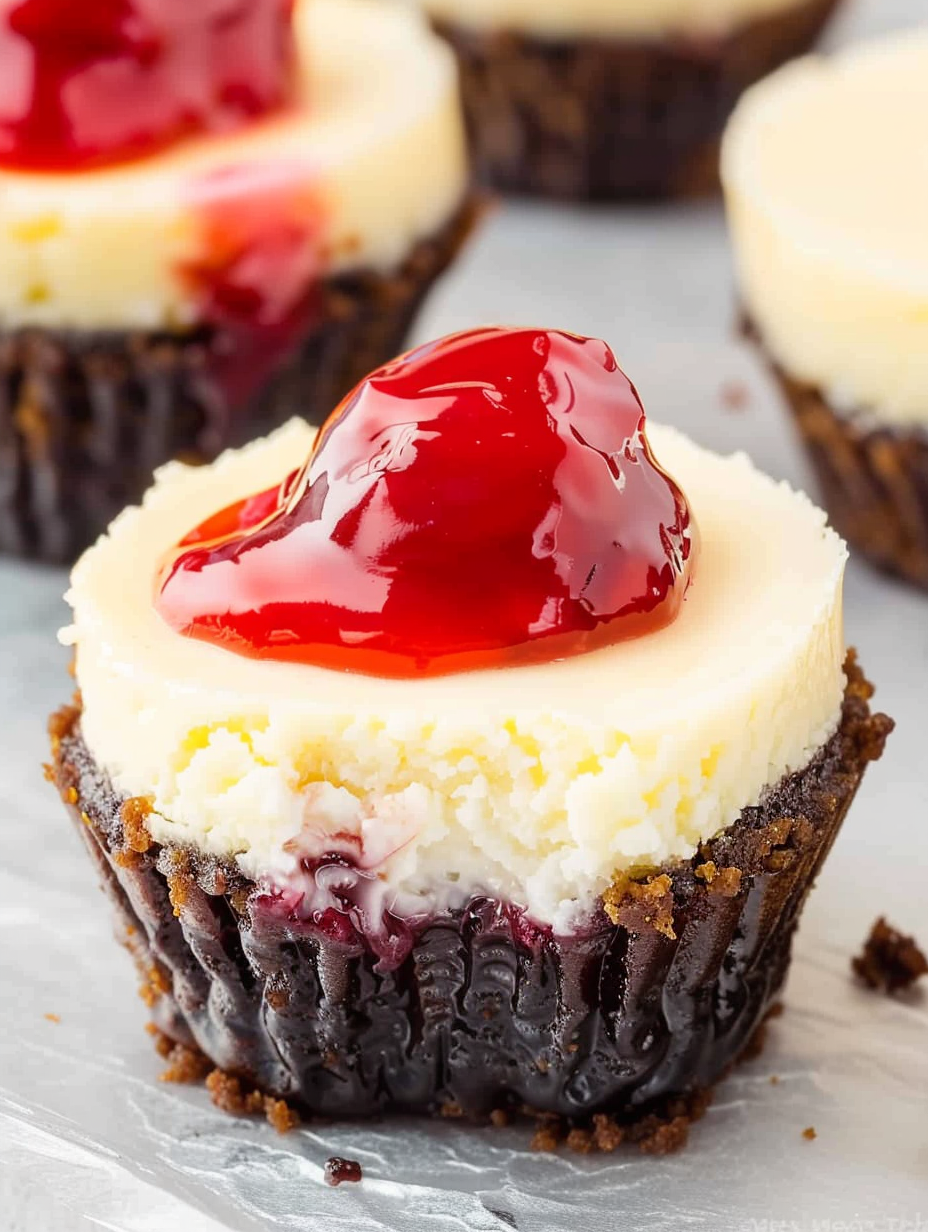
Creamy, bite-sized cherry cheesecakes with a crunchy graham crust and glossy cherry topping—perfect for parties, make-ahead gatherings, and sweet cravings.
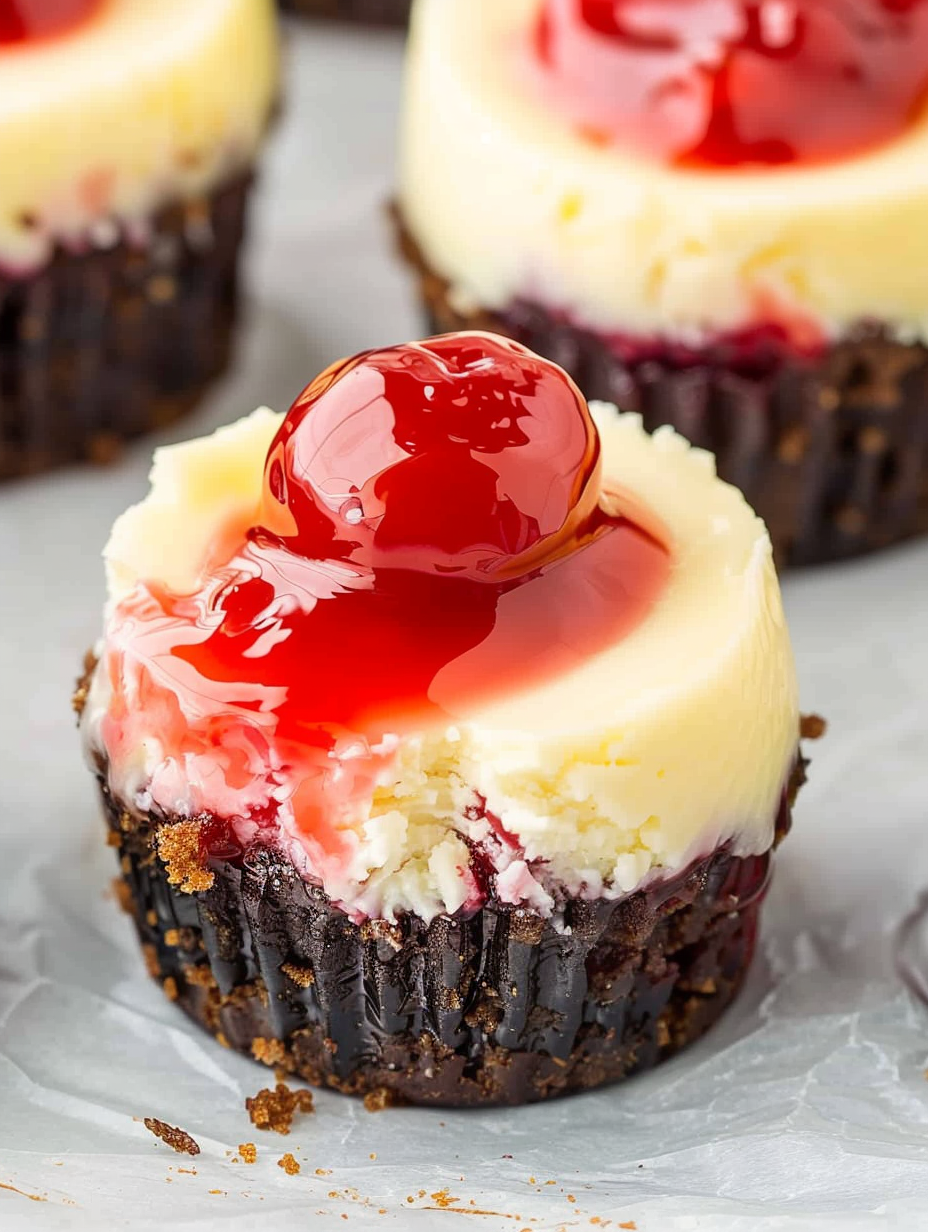
This recipe for mini cherry cheesecakes is a little piece of joy I first perfected for a summer potluck and have been making ever since. Bite-sized desserts are my go-to when I want something elegant without fuss, and these tiny cheesecakes strike the ideal balance of creamy filling, buttery graham crust, and bright cherry topping. I remember the first time I served them: within ten minutes there wasn’t a single one left. They’re the kind of sweet that invites conversation and second helpings.
I developed this version after testing different crust thicknesses and baking times to get a reliably dense yet tender texture that holds its shape. The filling is enriched with cream cheese, a touch of sour cream, and a splash of vanilla to round out the flavor. Using foil-lined cupcake wrappers makes the removal clean and simple and gives each mini dessert a polished look without elaborate equipment. These are ideal for birthdays, backyard gatherings, or anytime you want an elegant dessert in a convenient, hand-held format.
On the first holiday I brought these to, my cousin asked for the recipe and my neighbor asked for the address of the bakery where I bought them. It’s become my little brag-worthy dessert. I often double the batch because guests always want more, and I love that the leftovers (if any) keep beautifully in the fridge for a couple of days.
What I love most is the reliability: follow the simple timing cues and you'll end up with uniform results every time. Watching guests bite into that first spoonful and pause with a smile is one of my favorite parts of hosting. These little desserts have been present at picnics, showers, and quiet weeknight dinners, and each time they bring the same happy response.
Store the chilled minis in a single layer in an airtight container to prevent condensation from making the crust soggy. If you need to stack them, separate layers with wax paper. Refrigerate for up to 4 days—beyond that the texture and flavor begin to degrade. For longer storage, freeze un-topped minis on a baking sheet until solid, then transfer them to a freezer-safe container for up to 3 months. Thaw in the fridge overnight and add cherry topping right before serving to preserve the glossy look.
If you prefer a slightly lighter version, substitute light cream cheese and light sour cream, though expect a small change in richness and mouthfeel. For a nutty crust, replace half the graham crumbs with finely ground almonds or pecans; reduce butter by 1 tablespoon if the mixture feels too oily. To make them gluten-free, use certified gluten-free graham crumbs or crushed gluten-free cookies—note that texture can be a touch crumblier. For a fresh-fruit alternative, swap canned cherry filling for macerated fresh cherries tossed with a tablespoon of sugar and a teaspoon of lemon juice.
Serve the minis on a tiered dessert stand for an elegant presentation at showers or tea parties, or arrange them on a simple white platter sprinkled with finely chopped pistachios for contrast. They pair beautifully with a light coffee or an after-dinner digestif. For a festive touch, garnish with a small mint leaf or a thin curl of dark chocolate. These are also great plated alongside scoopable sorbet or a dollop of whipped cream for a more composed dessert course.
Mini cheesecakes are a playful variation of the classic American-style cheesecake, which traces its roots to early cheesemaking traditions and evolved into the dense, sweet dessert we recognize today. Single-serving versions became popular as entertaining trends favored portion control and individual plating. The graham-cracker base is a distinctly American twist, introduced in the early 20th century as graham crackers gained culinary use beyond snacking. Cherry topping is a timeless accompaniment, reflecting the longstanding pairing of tart fruit with rich dairy desserts.
In summer, swap in lightly macerated fresh cherries or use a blueberry compote for variation. During fall, swap the cherry topping for a warm spiced apple compote flavored with cinnamon and a splash of maple syrup. For winter celebrations, decorate each mini with a sprinkling of crushed gingerbread cookies and a spiced cranberry topping. These seasonal swaps let you tailor the dessert for holidays or seasonal flavors without changing the core technique.
Make these ahead by baking and chilling them a day in advance—top with cherries just before serving to keep the glaze vibrant. If you’re packing for a picnic, store the minis in a cooler and keep them chilled until serving. Label containers with the date if freezing batches. When portioning for events, place two minis per guest as a standard dessert serving to make them stretch further without sacrificing satisfaction.
These mini cherry cheesecakes are one of those small pleasures that make hosting feel effortless and thoughtful. They travel well, present beautifully, and satisfy a range of tastes. Try them once and I’m certain they’ll become one of your easy favorites to bring out for gatherings and celebrations.
Always use cream cheese at room temperature to avoid lumps and achieve a silky filling.
Don’t overfill the liners—leave about 1/2 inch of headspace to prevent overflow while baking.
Bake until just slightly jiggly in the center; residual heat finishes the set as they cool.
Chill fully before topping to ensure clean slices and prevent the topping from sliding.
This nourishing mini cherry cheesecake recipe is sure to be a staple in your kitchen. Enjoy every moist, high protein slice — it is perfect for breakfast or as a wholesome snack any time.
Chill for at least 2 hours; overnight chilling gives the best texture and flavor.
Yes—freeze un-topped minis on a tray until solid, then transfer to a sealed container for up to 3 months.
Use foil-lined cupcake wrappers; they peel cleanly and help the crust release without breaking.
This Mini Cherry Cheesecake recipe makes perfectly juicy, tender, and flavorful steak every time! Serve with potatoes and a side salad for an unforgettable dinner in under 30 minutes.
Preheat oven to 350°F and line 18 muffin cups with foil-lined cupcake wrappers. Organize ingredients so assembly is efficient.
Combine 1 1/2 cups graham cracker crumbs with 1/2 cup melted butter and press about 1 tablespoon into each liner to form a compact base.
Beat 16 ounces softened cream cheese with 1 cup sugar until smooth. Add eggs one at a time, then fold in 1/3 cup sour cream, 1 teaspoon vanilla, and 1 tablespoon flour until silky.
Spoon the filling into liners, filling each to about 1/2 inch from the top. Tap the pan to remove air bubbles.
Bake at 350°F for 20 to 25 minutes until edges are set and centers are slightly jiggly. Begin checking at 18 minutes if your oven runs hot.
Cool at room temperature for 20 minutes, then chill in the refrigerator for at least 2 hours before topping with cherry pie filling.
Top each chilled mini with a scoop of cherry pie filling. Remove liners for a clean presentation or serve in wrappers for easy handling.
Last Step: Please leave a rating and comment letting us know how you liked this recipe! This helps our business to thrive and continue providing free, high-quality recipes for you.
Leave a comment & rating below or tag
@platemint on social media!

Saucy, cheesy baked ziti with ricotta and basil tastes like lasagna in half the effort, perfect for weeknights or crowds.

Quick, crowd-pleasing cheeseburger sliders baked golden with melty cheddar and savory beef. Ready in 30 minutes, great for parties and easy meal prep.

Crispy air fryer sweet potato fries with tender centers, fast-food flavor without deep frying. Ready in minutes and irresistibly snackable.
Leave a comment & rating below or tag @platemint on social media!
Enjoyed this recipe? Share it with friends and family, and don't forget to leave a review!
This recipe looks amazing! Can't wait to try it.
Comments are stored locally in your browser. Server comments are displayed alongside your local comments.

Join to receive our email series which contains a round-up of some of our quick and easy family favorite recipes.
