
>>

Mini sugar cookie cups filled with a homemade strawberry pie glaze and fresh diced strawberries — a bright, easy bite of spring that doesn’t use Jell-O.
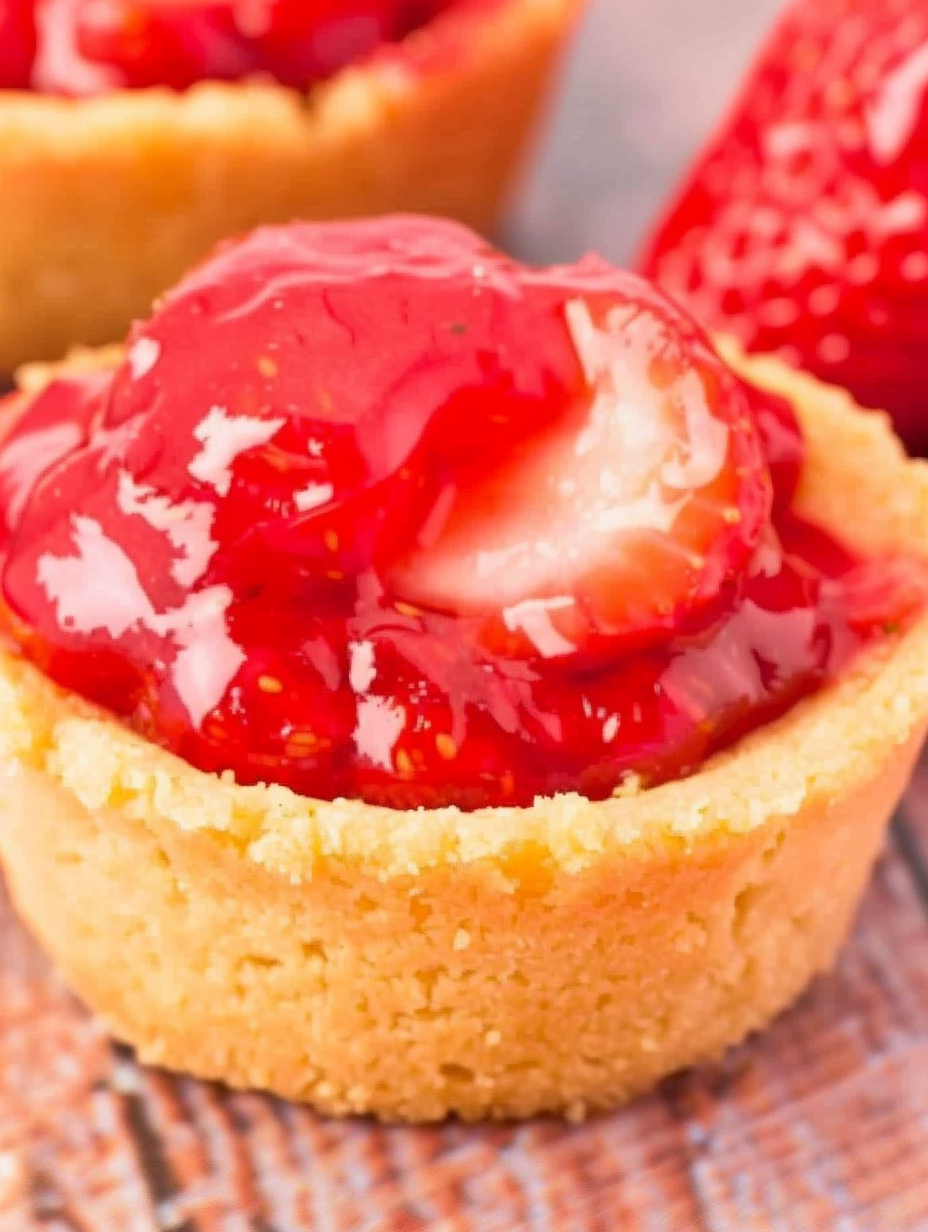
This recipe for Fresh Strawberry Pie Cookie Cups is one of those treats that instantly brightens a sundrenched afternoon. I first made these during a spring picnic when our strawberry patch was at its sweetest, and everyone agreed the combination of a tender sugar cookie shell with a glossy, homemade strawberry filling felt like mini handheld pies — but much easier to share. The texture contrast is what makes them memorable: a slightly crisp edge on the cookie cup, a soft, buttery interior, and a jammy, spoonable filling studded with fresh fruit.
I discovered this method while adapting family cookie recipes to create a small-portioned dessert for gatherings. The filling avoids boxed gelatin, relying instead on cornstarch and fresh strawberries for genuine strawberry flavor and a clear, shiny glaze. These cups are perfect for potlucks, baby showers, or a casual weekend dessert when you want something pretty without fuss. They refrigerate well, travel nicely, and are fast to assemble once the components are chilled.
In my kitchen this became a spring staple because they travel well and always disappear first. Family members comment on how the filling tastes like fresh strawberries in a glossy glaze, and friends often ask for the recipe because they’re surprised such a simple dough bakes into a perfectly shaped cup every time.

My favorite thing about this recipe is how reliably it impresses: the first time I brought a tray to a neighborhood potluck, someone asked if they could buy them. The simple glaze lets the strawberry flavor shine through, and the mini format keeps everyone coming back for another one without feeling like a big dessert commitment.
Store filled cups in a single layer in an airtight container in the refrigerator for up to 3 to 4 days. If stacking is necessary, separate layers with parchment to avoid sticking. For make-ahead planning, bake the cookie cups and freeze them unfilled in a freezer-safe container for up to 2 months; when ready to serve, thaw at room temperature for 30 minutes, then fill with freshly prepared glaze. Reheat is unnecessary — serve straight from chilled for the best texture and flavor balance.
To make the dough dairy-free, substitute a vegan butter stick 1:1 and use a flax “egg” (1 tablespoon ground flaxseed + 3 tablespoons water) if avoiding egg — note the texture will be slightly different. For a lower-sugar filling, reduce the glaze sugar by up to one-third and allow the mixture to cook a little longer to concentrate flavor. Use arrowroot powder as a 1:1 replacement for cornstarch if you prefer, but cook to a full boil to activate thickening. Gluten-free flour blends can replace all-purpose flour 1:1, though cups may be a touch more fragile.
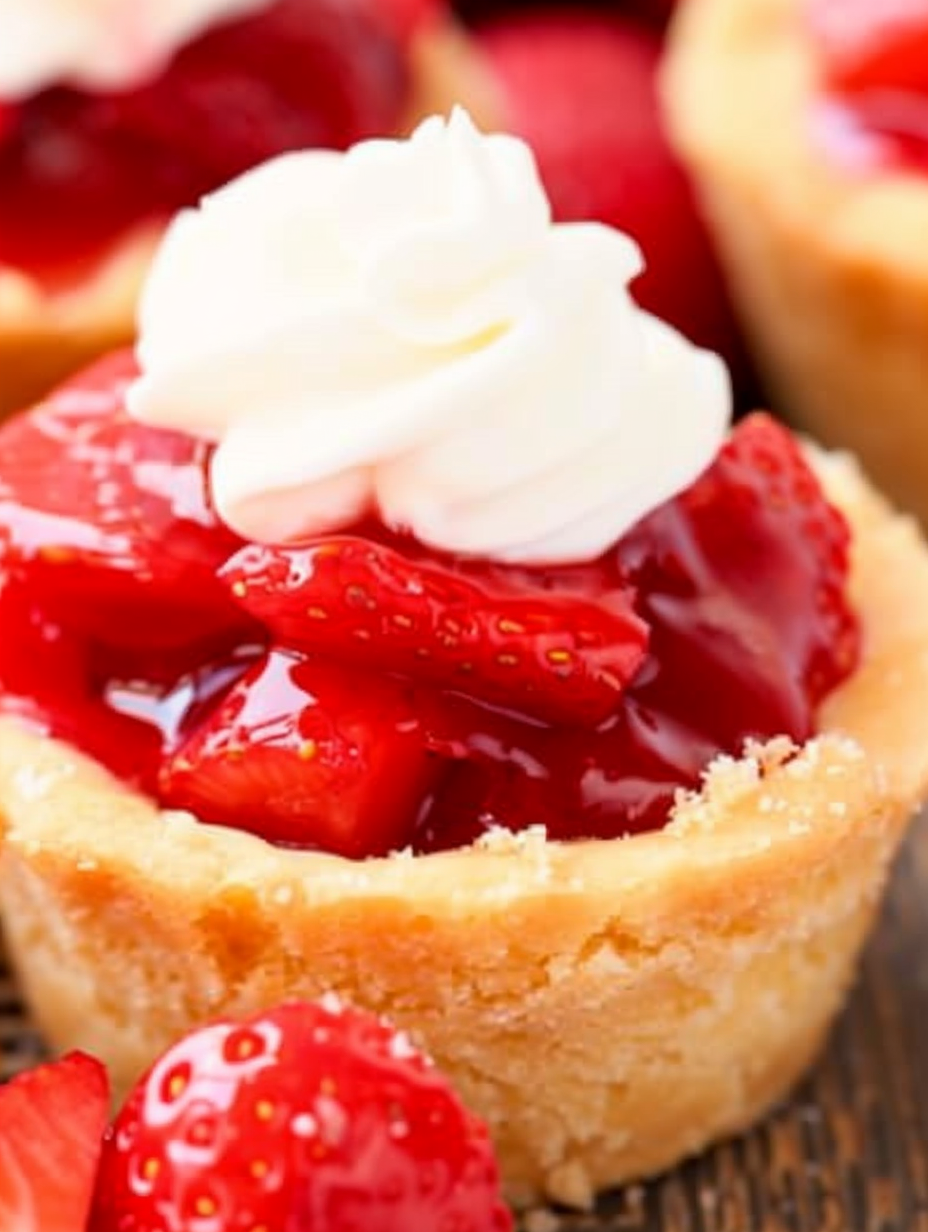
Serve these on a platter with a dusting of powdered sugar or a small mint leaf for color contrast. They pair beautifully with light whipped cream, a scoop of vanilla bean ice cream, or a small cup of champagne for celebratory occasions. For a brunch spread, present them alongside lemon bars and a fruit salad to create a bright, seasonal dessert board. They also make lovely edible favors when wrapped individually in cellophane with a ribbon.
Mini fruit-filled pastries and tarts have long been a part of American picnic and fair culture, where handheld desserts are prized for portability. These cookie cups borrow the idea of a tart shell but use a sugar cookie base inspired by classic family cookie recipes. The homemade glaze — cornstarch thickened instead of gelatin — reflects old-fashioned jam-making techniques adapted for a glossy, spoonable finish without boxed products.
Swap the strawberries for fresh blueberries with lemon zest and a splash of lemon juice for summer variation, or use chopped peaches with a touch of cinnamon in late summer. For winter gatherings, consider a cranberry-orange filling with slightly less sugar to balance tartness. Holiday versions can include a thin layer of chocolate ganache in the cup before filling for a richer treat.
Plan production in stages: bake the cups one day, make the glaze and dice strawberries the next day, then fill just before serving to keep fruit texture lively. Use a small cookie scoop to standardize dough amounts for consistent cups and predictable yield. Label and date frozen unfilled cups, and prepare the glaze in advance — the cooled glaze refrigerates for up to 48 hours and can be gently re-warmed before mixing with fresh diced strawberries.
These mini strawberry cups are as much about convenience as they are about flavor — they're a joyful, colorful way to celebrate spring and a perfect recipe to personalize. Make a batch, share them with neighbors, and watch how quickly they become someone else’s favorite easy dessert.
Chill the dough before shaping — cold butter keeps cup walls defined during baking.
Press the cups immediately after baking while still warm to form a deep well that won’t spring back.
Use a fine-mesh strainer if you want an ultra-smooth glaze without seeds.
For consistent cups, use a 1 1/2 tablespoon scoop for each ball of dough.
Fill cups when glaze is warm to room temperature to avoid soggy cookies.
This nourishing fresh strawberry pie cookie cups recipe is sure to be a staple in your kitchen. Enjoy every moist, high protein slice — it is perfect for breakfast or as a wholesome snack any time.
Yes. Bake the cups as directed and let them cool completely. Freeze the unfilled cups in a single layer on a baking sheet, then transfer them to a freezer-safe container for up to 2 months. Thaw before filling.
Use 1 tablespoon of filling per cup for a tidy presentation. If you prefer a taller dome of filling, increase to 1 1/2 tablespoons but chill thoroughly so they set.
If the glaze isn’t thickening, continue to simmer gently while stirring; ensure cornstarch was fully dissolved and the mixture reached a boil to activate thickening.
This Fresh Strawberry Pie Cookie Cups recipe makes perfectly juicy, tender, and flavorful steak every time! Serve with potatoes and a side salad for an unforgettable dinner in under 30 minutes.
Cream butter and sugar until light. Add egg, vanilla, and salt. Sift and add dry ingredients; mix to form dough. Wrap and chill 30 minutes to firm the butter for shaping.
Portion dough with 1 1/2 tablespoon scoops, roll into balls, and press into muffin tin cavities using thumbs to form cup shapes. Keep dough chilled if it softens.
Bake at 350°F for 12 minutes. Immediately press centers with the back of a spoon to deepen wells, then cool completely on a wire rack before removing.
Combine sugar, cornstarch, water, and mashed strawberries in a saucepan. Stir constantly over medium until the mixture boils and thickens, 2–5 minutes after heating. Remove from heat and color if desired.
Let glaze cool until warm, stir in diced strawberries, spoon about 1 tablespoon into each cooled cup, and refrigerate until fully set before serving.
Last Step: Please leave a rating and comment letting us know how you liked this recipe! This helps our business to thrive and continue providing free, high-quality recipes for you.
Leave a comment & rating below or tag
@platemint on social media!

Saucy, cheesy baked ziti with ricotta and basil tastes like lasagna in half the effort, perfect for weeknights or crowds.

Quick, crowd-pleasing cheeseburger sliders baked golden with melty cheddar and savory beef. Ready in 30 minutes, great for parties and easy meal prep.

Crispy air fryer sweet potato fries with tender centers, fast-food flavor without deep frying. Ready in minutes and irresistibly snackable.
Leave a comment & rating below or tag @platemint on social media!
Enjoyed this recipe? Share it with friends and family, and don't forget to leave a review!
This recipe looks amazing! Can't wait to try it.
Comments are stored locally in your browser. Server comments are displayed alongside your local comments.

Join to receive our email series which contains a round-up of some of our quick and easy family favorite recipes.
