
>>

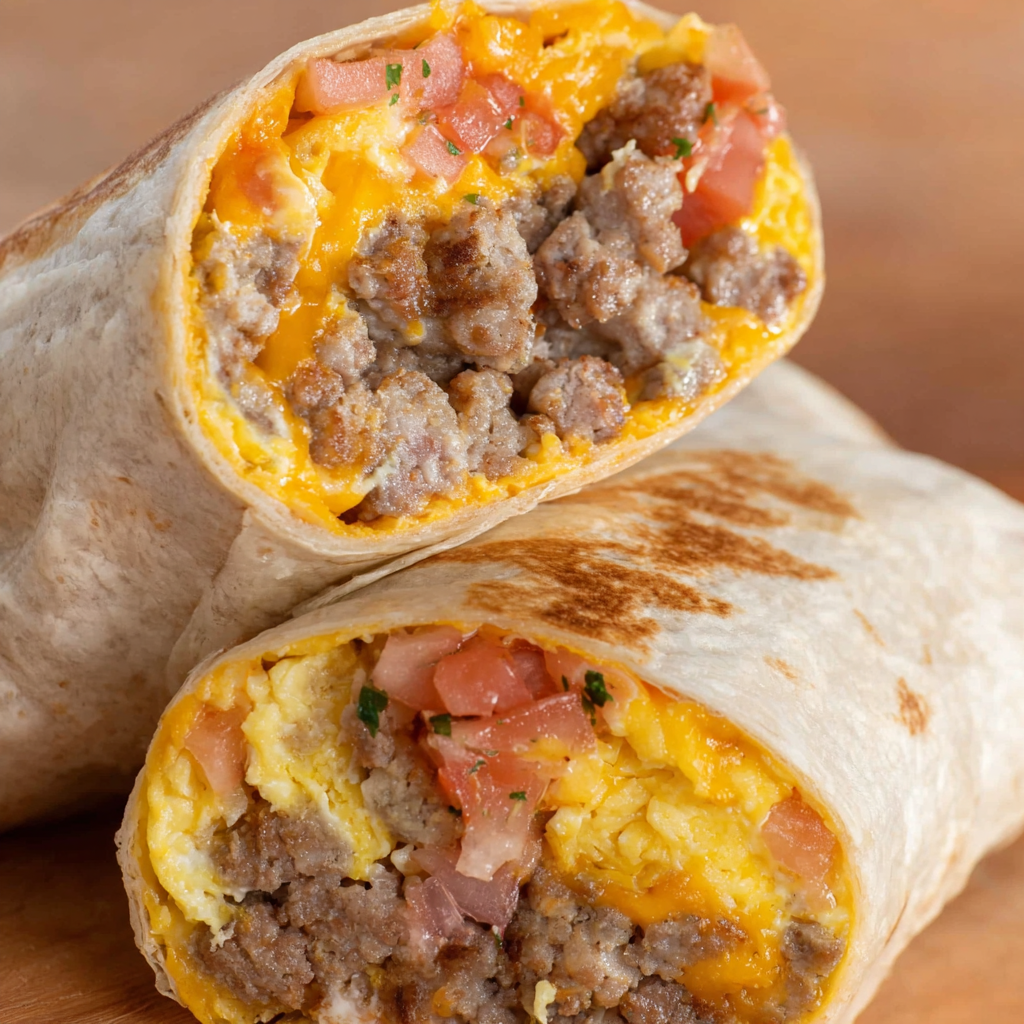
These hearty freezer breakfast burritos pack savory sausage, creamy eggs, and melty cheddar in warm tortillas for fast, customizable mornings.
My family loves choosing their add-ins at assembly time, and I keep a small station of pico, hot sauce, and jalapeños on the counter. I learned to warm the tortillas just before rolling, which prevents tears and gives that irresistible diner-style chew after reheating. Every round feels like prepping future comfort for the people I love.
My favorite part is hearing the light crackle of the tortilla as it hits a hot skillet for a final toast. It smells like a diner griddle and tastes even better. These saved us during early game days and long commute mornings, and they always disappear faster than I expect.
Cool the burritos for 10 to 15 minutes before wrapping to reduce steam and ice crystals. Wrap each burrito snugly in foil, then slide them into a heavy freezer bag and press out excess air. Label with the date. Freeze for up to 3 months; after that, quality slowly drops. In the refrigerator, store wrapped burritos up to 4 days. To reheat, microwave without foil in a damp paper towel for 2 to 4 minutes, or bake at 350°F until hot, 25 to 30 minutes if frozen. For a crisper exterior, unwrap and toast in a dry skillet for 1 to 2 minutes per side after heating.
Swap pork sausage for turkey sausage one-to-one for a leaner option, or use cooked bacon or diced ham at about 1 cup total. For vegetarian, replace sausage with 1 to 1 1/2 cups seasoned black beans or sautéed mushrooms. Monterey Jack, pepper jack, or Colby can stand in for cheddar with equal amounts. Use whole wheat tortillas for extra fiber or gluten-free tortillas if needed; warm gluten-free wraps well to prevent tearing. Skip pico inside and add it after reheating if your tomatoes are very juicy; alternatively, use 2 to 3 tablespoons salsa verde per burrito but keep it minimal to avoid soggy results.

Serve burritos with hot sauce, sliced avocado, or a dollop of Greek yogurt on the side for creaminess. Add a quick fruit salad or citrus wedges to brighten the plate. For a brunch spread, pair with crispy hash browns, roasted peppers and onions, and a pitcher of cold brew. If you are hosting, keep a batch in a 200°F oven covered loosely with foil so guests can grab and go. Garnish with fresh cilantro, extra pico, or pickled jalapeños for a little kick right before serving.
Breakfast burritos trace their popularity to Southwestern kitchens, where tortillas, eggs, and chiles have long been morning staples. As burrito culture spread, cooks began wrapping classic breakfast ingredients into large flour tortillas for a handheld, satisfying meal. The freezer-friendly version is a modern meal prep twist, merging diner-style flavors with the convenience of make-ahead cooking. While fillings vary by region, the idea remains the same: a portable package that blends soft eggs, flavorful meats, melty cheese, and a bright salsa element.
In spring, fold in tender asparagus tips or sautéed spring onions. Summer invites grilled corn and diced poblano peppers. For fall, add roasted butternut squash cubes and a sprinkle of smoked paprika. In winter, swap pico for a spoonful of jarred salsa or chipotle sauce and add a little extra cheese for comfort. Around holidays, use leftover ham and a touch of cranberry-jalapeño relish on the side. Always keep moisture in check by sautéing vegetables and patting them dry before assembly.

Batch your workflow: brown sausage first, scramble eggs while tortillas warm, then assemble assembly-line style. Label each foil wrap with contents and date. Keep flavors distinct by preparing a few vegetarian burritos first, then move to meat. If packing for the week, refrigerate several and freeze the rest so you have both quick-access and long-term options. Reheat directly from frozen when time is tight, or thaw overnight for the fastest oven or skillet reheat. For crisp edges, pan-toast after microwaving to add a griddle-kissed finish.
Whether you are feeding a morning crowd or just safeguarding your sanity on busy weekdays, these freezer breakfast burritos deliver comfort and speed with every melty, savory bite. Make a batch, tuck them away, and enjoy easier mornings ahead.
Warm tortillas before rolling to prevent cracking.
Season eggs after cooking to keep them tender.
Drain sausage well to keep fillings from getting soggy.
Label and date each burrito for easy rotation.
Crisp finished burritos in a skillet for a diner-style finish.
This nourishing freezer breakfast burritos recipe is sure to be a staple in your kitchen. Enjoy every moist, high protein slice — it is perfect for breakfast or as a wholesome snack any time.
Yes. Drain them well, pat dry, and use 1 to 1 1/2 cups. Keep moisture low to protect tortilla texture.
Remove foil and wrap the burrito in a damp paper towel. Microwave 2 to 4 minutes until hot, then crisp in a dry skillet if you like.
Cool before wrapping, use minimal wet add-ins, and press air out of bags. Freeze up to 3 months for best quality.
This Freezer Breakfast Burritos recipe makes perfectly juicy, tender, and flavorful steak every time! Serve with potatoes and a side salad for an unforgettable dinner in under 30 minutes.
Cook pork breakfast sausage in a large skillet over medium heat, breaking into small crumbles, until no pink remains and lightly browned, 6–8 minutes. Transfer to a plate to drain.
Reduce heat to medium-low. Add whisked eggs and gently push curds from edges to center until just set and glossy, 2–3 minutes. Remove from heat; season with salt and pepper.
Microwave stacked tortillas 20–30 seconds or warm in a dry skillet until flexible. Keep covered with a clean towel to retain heat and prevent cracking.
Layer cheese, eggs, sausage, and drained pico on each tortilla. Fold sides in, pull bottom over filling, and roll tightly to seal.
Cool 10–15 minutes. Wrap each burrito snugly in foil, place in a labeled zip-top freezer bag, and freeze up to 3 months.
Microwave: remove foil, wrap in damp paper towel, heat 2–4 minutes. Oven: 350°F for 25–30 minutes from frozen (7–10 minutes if thawed). Stovetop: medium heat, 5 minutes per side.
Last Step: Please leave a rating and comment letting us know how you liked this recipe! This helps our business to thrive and continue providing free, high-quality recipes for you.
Leave a comment & rating below or tag
@platemint on social media!

Saucy, cheesy baked ziti with ricotta and basil tastes like lasagna in half the effort, perfect for weeknights or crowds.

Quick, crowd-pleasing cheeseburger sliders baked golden with melty cheddar and savory beef. Ready in 30 minutes, great for parties and easy meal prep.

Crispy air fryer sweet potato fries with tender centers, fast-food flavor without deep frying. Ready in minutes and irresistibly snackable.
Leave a comment & rating below or tag @platemint on social media!
Enjoyed this recipe? Share it with friends and family, and don't forget to leave a review!
This recipe looks amazing! Can't wait to try it.
Comments are stored locally in your browser. Server comments are displayed alongside your local comments.

Join to receive our email series which contains a round-up of some of our quick and easy family favorite recipes.
