
Dirt and Worms Pudding Cups

Playful individual cups of creamy chocolate pudding, crunchy Oreo 'dirt', and gummy worms—an easy no-bake treat perfect for parties and snacks.
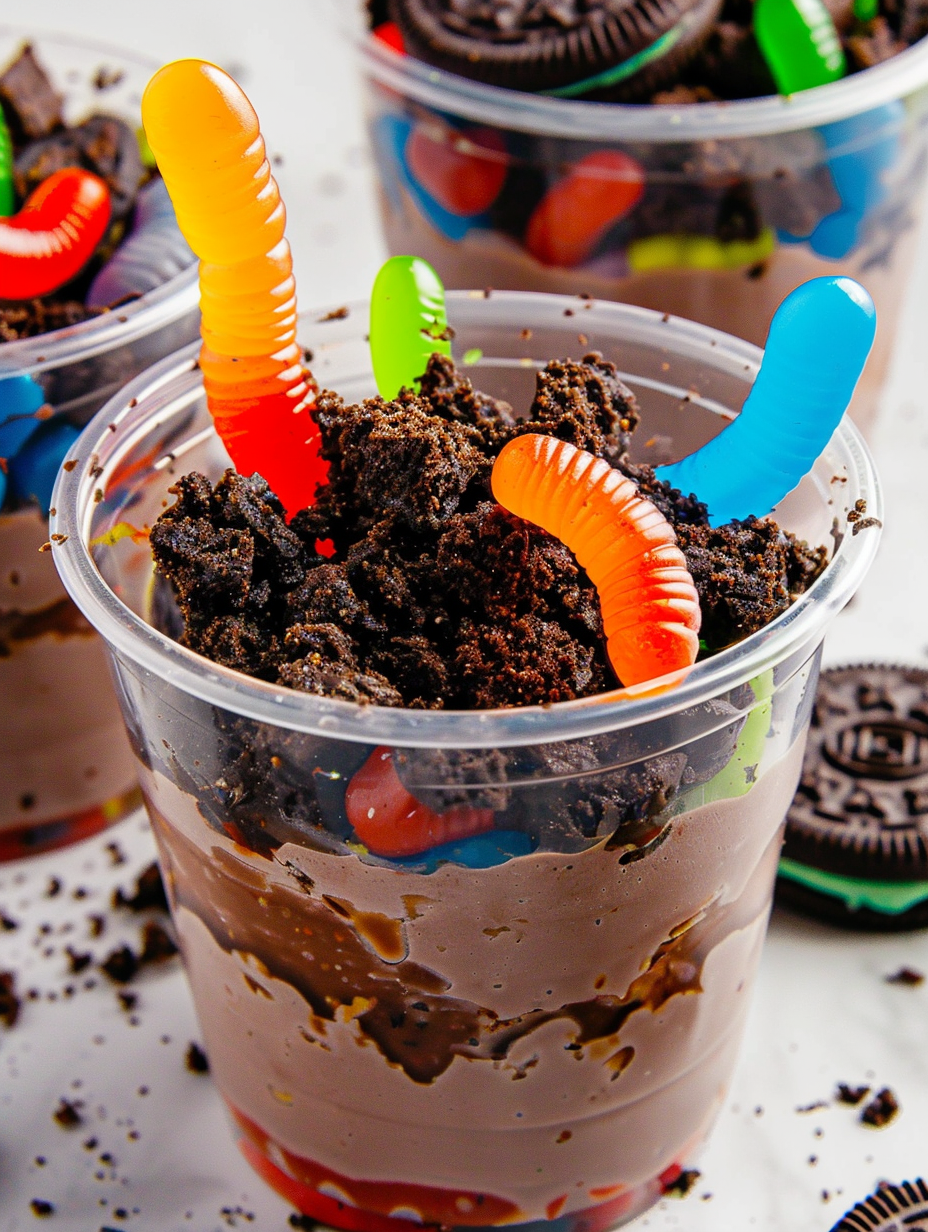
This playful Dirt and Worms pudding cup is one of those recipes that instantly transports me back to neighborhood birthday parties and rainy afternoon crafts. I first made this when my niece asked for a spooky-themed snack for a school gathering; the idea of hiding gummy worms in a bed of Oreo crumbs felt like a tiny bit of edible theater. The combination of silky chocolate pudding, airy whipped topping, and the satisfying crunch of crushed cookies always wins over a crowd—kids giggle, adults smile, and no one walks away unchanged.
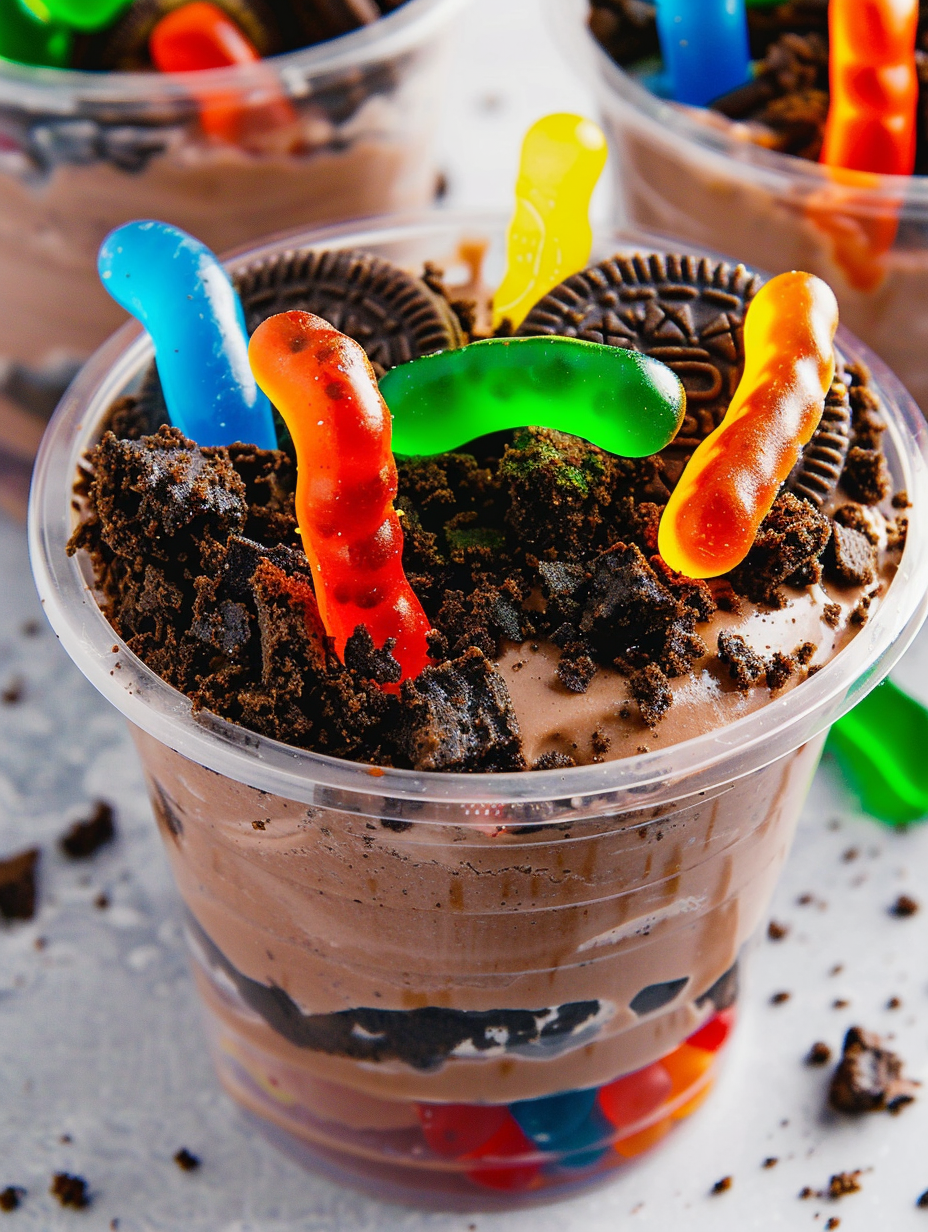
What makes this version special is how quickly the components come together and how adaptable the assembly is. I learned early on that chilling the pudding for just a few minutes gives it the perfect body to hold layers without becoming dense. The texture plays a big role: smooth pudding, light whipped cream, and distinctly crunchy crumbs create a contrast that keeps every spoonful interesting. Serve these in clear plastic cups for a kid-friendly presentation or in small glass tumblers for grown-up parties—either way, they disappear fast.
Why You'll Love This Recipe
- Ready in about 15 minutes from start to finish, including a short chill—perfect for last-minute treats and parties.
- Uses pantry-friendly staples: instant pudding mix, milk, store-bought whipped topping, sandwich cookies, and gummy candy—no specialty shopping needed.
- No-bake and kid-friendly: children can help crush the cookies and place the gummy worms, making this a great hands-on activity.
- Flexible assembly: layer for a pretty parfait look or top the pudding for a quicker version—both taste the same but present differently.
- Scales easily: double or triple the ingredients for larger gatherings, and the cups hold up well in a cooler or fridge during events.
- Party-ready: these are ideal for birthday parties, school events, Halloween treats, or a fun after-school snack.
I remember hiding a tiny worm under the cookie dust at my niece's party and watching the children squeal with delight as they discovered it. Even the pickiest eaters enjoyed the creamy chocolate and crunchy topping so much that some kids scraped every crumb from the cup. It’s become my go-to when I want something festive that’s as much about the presentation as it is about taste.
Ingredients
- Chocolate instant pudding mix (3.4-ounce box): This is the backbone of the cups—choose a tried-and-true brand like Jell-O for consistent flavor and thickening. The instant mix sets quickly with cold milk and creates a smooth chocolate base that isn’t overly sweet.
- Cold milk (2 cups): Use cold whole milk for a richer mouthfeel; reduced-fat milk works in a pinch but the pudding will be slightly less creamy. Measure with liquid cups for accuracy.
- Whipped topping (8-ounce tub): I use store-bought whipped topping (Cool Whip) for convenience and stability; it folds in to lighten the pudding and keeps its shape in the cups. If you prefer, substitute stabilized whipped cream (use 1 cup heavy cream whipped with 1 tbsp powdered sugar).
- Oreo cookies (about 20 cookies): Finely crushed, these create the "dirt" layer. You can use classic Oreos or gluten-free sandwich cookies if necessary. For the finest crumbs, pulse in a food processor or put in a zip-top bag and crush with a rolling pin.
- Gummy worms (24–32 pieces): The whimsical garnish—choose bright, chewy worms for visual contrast. Keep extra on hand for decorating each cup with 3–4 worms.
- Serving cups (8 individual cups): Clear plastic or small glass cups (about 8 ounces each) make the layers visible and are perfect for portion control.
Instructions
Mix the pudding: In a large mixing bowl, whisk the 3.4-ounce pudding mix with 2 cups of cold milk until completely smooth and free of lumps—about 2 minutes of brisk whisking. Start slowly to incorporate the powder, then whisk vigorously to aerate slightly. The cold milk helps the instant mix activate quickly and yields a satiny texture. Chill briefly: Place the bowl in the refrigerator for 5 minutes to allow the pudding to thicken slightly. This short chill gives the mixture body so it layers cleanly in cups rather than running into the crumbs. Don’t over-chill—about 5 minutes is ideal. Fold in whipped topping: Remove pudding from the fridge and gently fold in the 8-ounce tub of whipped topping using a rubber spatula. Use a light hand and fold just until homogeneous—this keeps the mixture airy and prevents deflating the whipped topping. The goal is a fluffy, spoonable filling. Prepare the cookie "dirt": Place about 20 Oreo cookies in a food processor and pulse to fine crumbs, or seal them in a plastic bag and crush with a rolling pin until sandy. Reserve a few tablespoons of slightly larger pieces for a more realistic "dirt" texture if you like a bit of crunch. Assemble cups: Divide the pudding mixture evenly among 8 serving cups (roughly 1/2 cup of filling per cup). For a layered look, spoon a layer of pudding, add a thin layer of cookie crumbs, and repeat once more. For a quicker build, fill cups with pudding and top with the cookie crumbs. Smooth the top with the back of a spoon for a neat finish. Chill and garnish: Refrigerate assembled cups until ready to serve—at least 10–15 minutes is fine if you plan to serve soon. Just before serving, top each cup with 3–4 gummy worms, letting some drape over the edge for drama. Serve chilled.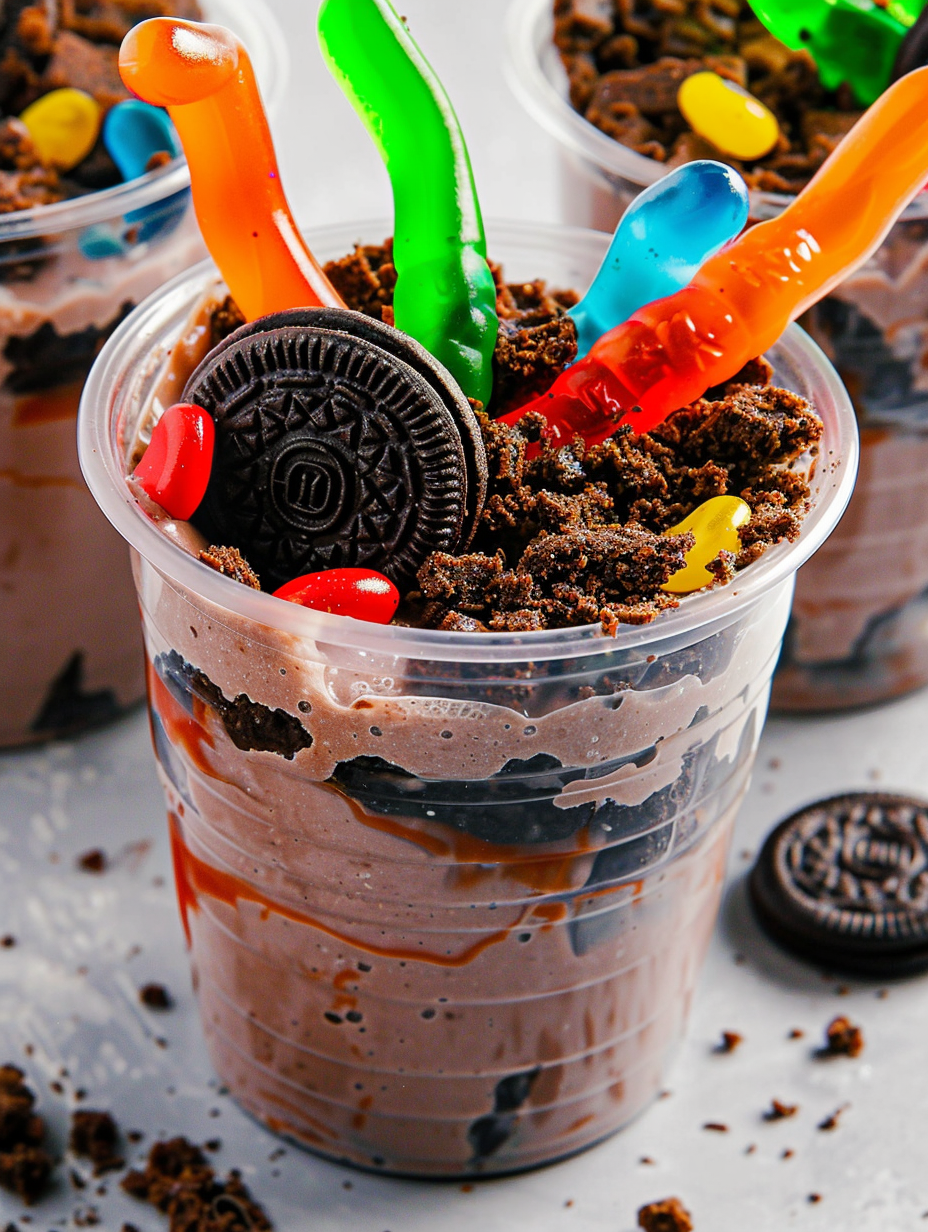
You Must Know
- These cups keep well in the refrigerator for up to 2 days; cookie crumbs will soften slightly over time but remain tasty.
- Freeze is not recommended—the texture of the whipped topping and gummy worms changes when frozen.
- High in simple carbs and sugar, so consider them an occasional treat rather than a daily snack.
- Allergen notes: contains dairy, wheat (unless using gluten-free cookies), and may contain soy from cookie ingredients.
One of my favorite things about this treat is watching adults revert to kid-mode when they see the worms peeking out of the "soil." At a recent backyard picnic, the adults were as enthusiastic as the children, comparing presentations and debating which cup had the best worm placement. The recipe’s simplicity means you can spend more time styling the display—use a large serving tray with a layer of chocolate sprinkles or brown sugar for a “garden” look.
Storage Tips
Store assembled cups in an airtight container or covered platter in the refrigerator for up to 48 hours. If you need to prepare ahead for a party, assemble up to the point of adding gummy worms—store the cups refrigerated and add worms just before serving to keep them vibrant and chewy. For transport, place cups in a shallow box with a non-slip liner and keep chilled in a cooler with ice packs. Look for condensation on the cups as a sign they’ve warmed and return them to cold storage promptly.
Ingredient Substitutions
If you prefer a dairy-free version, use a vegan chocolate pudding mix and a non-dairy whipped topping made from coconut cream; note that flavor and texture will be subtly different. Swap Oreos for gluten-free sandwich cookies to accommodate gluten-free diets. For a less sugary option, use sugar-free pudding mix and a light whipped topping, though results will be less rich. If gummy worms are an issue, substitute with fruit leather strips or fresh berries for natural sweetness.
Serving Suggestions
Serve these cups as a playful dessert at birthday parties, Halloween gatherings, or outdoor picnics. Add edible greenery—tiny mint leaves or fresh basil—for a whimsical garden effect. Pair with simple snacks like popcorn or a fruit platter to balance sweetness. For a themed buffet, place cups on a bed of brown sugar or cocoa-dusted parchment and use small spoons for easy serving.
Cultural Background
The idea of using crumbled cookies as “dirt” and candy as “worms” is a playful American invention popular at children’s parties and holiday gatherings. It’s a modern reinterpretation of classic parfaits and layered desserts that emphasizes fun presentation over culinary complexity. Variations appear across home kitchens and party blogs, where the focus is always on creativity and the surprise element of the hidden gummy worms.
Seasonal Adaptations
In autumn, swap gummy worms for candy pumpkins or use cinnamon Oreos for a spiced twist. For spring or Easter, choose pastel-colored gummy candies and add edible flower petals as decoration. Summer parties benefit from adding fresh berries on top of the crumbs for a fresher contrast. Adjust toppings and garnishes seasonally to keep the cups feeling timely and festive.
Meal Prep Tips
To prep for a week of gatherings, make the pudding mix and fold in the whipped topping the morning of the event, then store in a covered bowl in the fridge. Crush cookies just before assembly if you want maximum crunch, or prepare them a day ahead and store in an airtight container. Portion the filling into cups and refrigerate; add final crumbs and gummy worms within an hour of serving for best texture and appearance.
These dirt and worms pudding cups are equal parts nostalgia and convenience—an easy, crowd-pleasing treat that’s as fun to assemble as it is to eat. Give the kids a role in the decoration and you’ll get double the laughs and half the cleanup hassle. Enjoy!
Pro Tips
Use cold milk and whisk thoroughly to prevent lumps in the instant pudding.
Fold whipped topping gently into pudding to keep the mixture light and airy.
Crush cookies to a mixture of fine crumbs and a few larger pieces for a realistic texture.
Add gummy worms right before serving to maintain their chewiness and color.
This nourishing dirt and worms pudding cups recipe is sure to be a staple in your kitchen. Enjoy every moist, high protein slice — it is perfect for breakfast or as a wholesome snack any time.
FAQs about Recipes
How long can I make these in advance?
Yes. Assemble the cups up to adding gummy worms and store covered in the refrigerator for up to 48 hours. Add gummy worms just before serving.
Can I make a dairy-free version?
If you need a dairy-free option, use a vegan instant pudding and coconut-based whipped topping. Note the texture and flavor will be slightly different.
Tags
Dirt and Worms Pudding Cups
This Dirt and Worms Pudding Cups recipe makes perfectly juicy, tender, and flavorful steak every time! Serve with potatoes and a side salad for an unforgettable dinner in under 30 minutes.
Ingredients
Filling
Toppings
Supplies
Instructions
Mix the pudding
Whisk the 3.4-ounce pudding mix with 2 cups of cold milk in a large bowl until smooth and lump-free, about 2 minutes.
Chill briefly
Refrigerate the pudding mixture for 5 minutes to thicken slightly so it layers cleanly.
Fold in whipped topping
Gently fold the 8-ounce tub of whipped topping into the thickened pudding until just combined to keep the mixture light.
Prepare cookie crumbs and assemble
Crush about 20 Oreos to fine crumbs. Divide pudding into 8 cups and top or layer with cookie crumbs, reserving some larger pieces for texture.
Chill and garnish
Chill assembled cups until serving time. Top each cup with 3–4 gummy worms just before serving.
Last Step: Please leave a rating and comment letting us know how you liked this recipe! This helps our business to thrive and continue providing free, high-quality recipes for you.
Nutrition
Did You Make This?
Leave a comment & rating below or tag
@platemint on social media!
Categories:
You might also like...

Cheesy Baked Ziti Casserole
Saucy, cheesy baked ziti with ricotta and basil tastes like lasagna in half the effort, perfect for weeknights or crowds.

Juicy Cheeseburger Sliders Bake
Quick, crowd-pleasing cheeseburger sliders baked golden with melty cheddar and savory beef. Ready in 30 minutes, great for parties and easy meal prep.

Air Fryer Sweet Potato Fries
Crispy air fryer sweet potato fries with tender centers, fast-food flavor without deep frying. Ready in minutes and irresistibly snackable.
Did You Make This?
Leave a comment & rating below or tag @platemint on social media!
Rate This Recipe
Share This Recipe
Enjoyed this recipe? Share it with friends and family, and don't forget to leave a review!
Comments (1)
This recipe looks amazing! Can't wait to try it.
Comments are stored locally in your browser. Server comments are displayed alongside your local comments.

Hi, I'm Wendie!
What's Popular

30-Minute Meals!
Join to receive our email series which contains a round-up of some of our quick and easy family favorite recipes.