
>>

Crispy fried mushrooms with two breading options, ready in minutes and perfect as an appetizer or side dish.

This fried mushrooms recipe is one I return to whenever I want a simple snack that feels indulgent and comforting. I first learned this method years ago when I wanted something crisp and savory to serve at a small backyard gathering. The mushrooms were gone in minutes, and I realized how versatile a single pint could be when treated with a little seasoned flour and hot oil. What makes this approach special is the flexibility. You can make a very thin, lightly crisped coating or go for a thicker, golden crust by adding an egg wash. Both are quick, and both deliver a pleasing contrast between the tender mushroom and the crunchy exterior.
On busy weeknights I rely on this recipe as a quick side or as an appetizer that pairs well with simple dips and a chilled glass of white wine. The texture is the real hero here. Properly cleaned and patted dry mushrooms sear and cook through in just a few minutes, while the flour or egg and flour coating browns to a deep golden color. Family and friends have told me this reminds them of fair food, but in a small batch that is fresh and not greasy. I include tips for choosing mushrooms and testing oil temperature so you get consistent results each time.
I discovered the thicker breading option when I wanted something that would hold up to a creamy dipping sauce. My sister insisted the thick coated ones are best for nacho style toppings, while my partner prefers the thinner version with a squeeze of lemon. Both versions disappear fast, and we always end up making a second batch.
I love the ease of this recipe. It was a hit at a recent game night where I prepared a thin breading batch and a thick breading batch. Guests debated which was better while picking at both plates. The simple chemistry of hot oil and flour gives you a quick transformation from soft mushroom to crunchy treat.
Leftover mushrooms will lose crispness when refrigerated. For short term storage place cooled mushrooms in an airtight container for up to two days and reheat in a 375 degree Fahrenheit oven for five to seven minutes to regain crispness. Do not store at room temperature for more than two hours. If you plan to freeze, prepare coated mushrooms but do not fry. Arrange single layers on a baking sheet and freeze. Once frozen transfer to a sealable freezer bag and store up to three months. When ready cook from frozen adding an extra minute or two to the frying time.
If you need a gluten free variant use a 1 to 1 gluten free flour blend for coating. For a lower sodium option use one tablespoon seasoned salt and add garlic powder and black pepper to make up flavor. Swap the eggs with an aquafaba solution for a vegan style binder though the dish will not be identical. Using panko instead of all purpose flour will give a crunchier texture but expect a lighter color after frying. Different mushroom varieties such as shiitake or oyster will offer unique textures and bolder flavors.
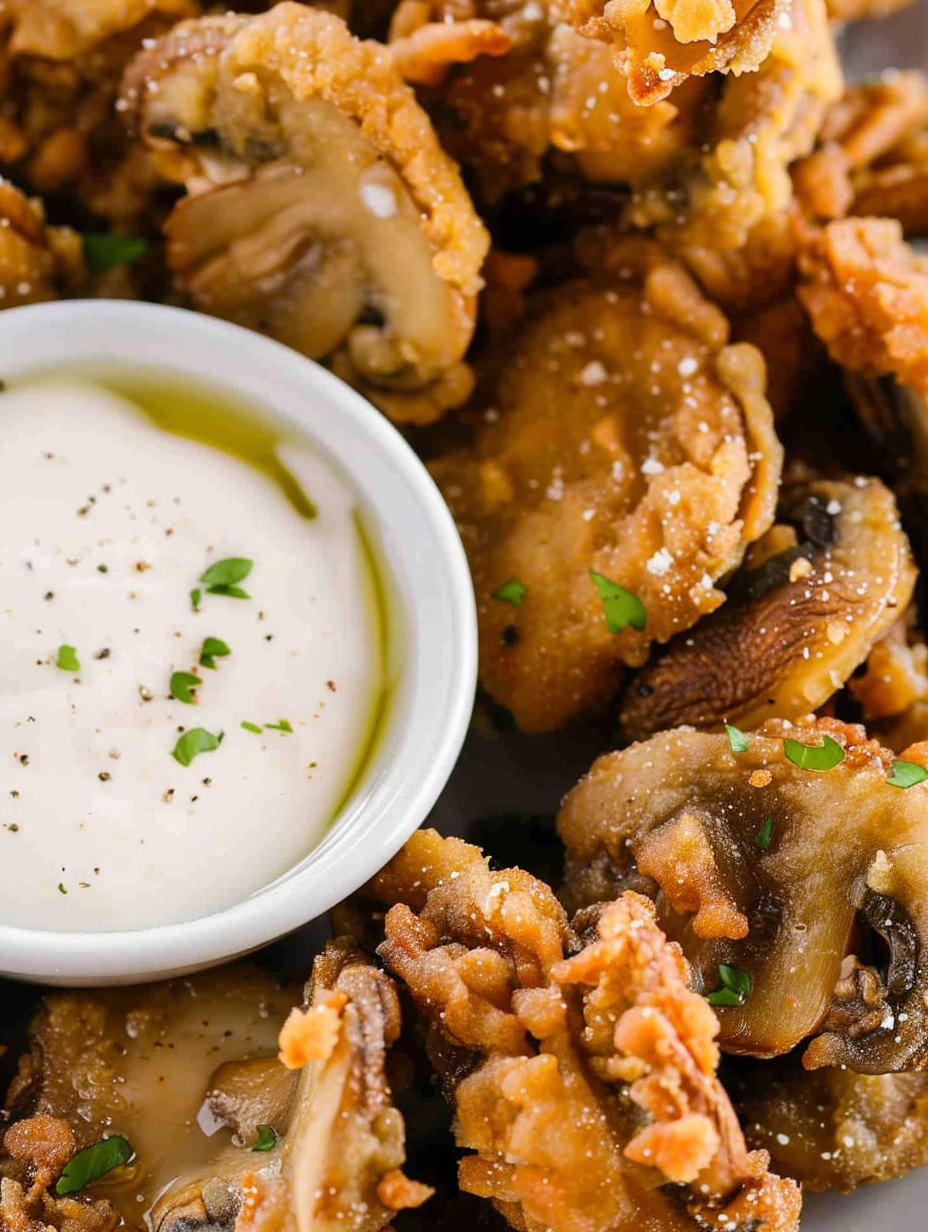
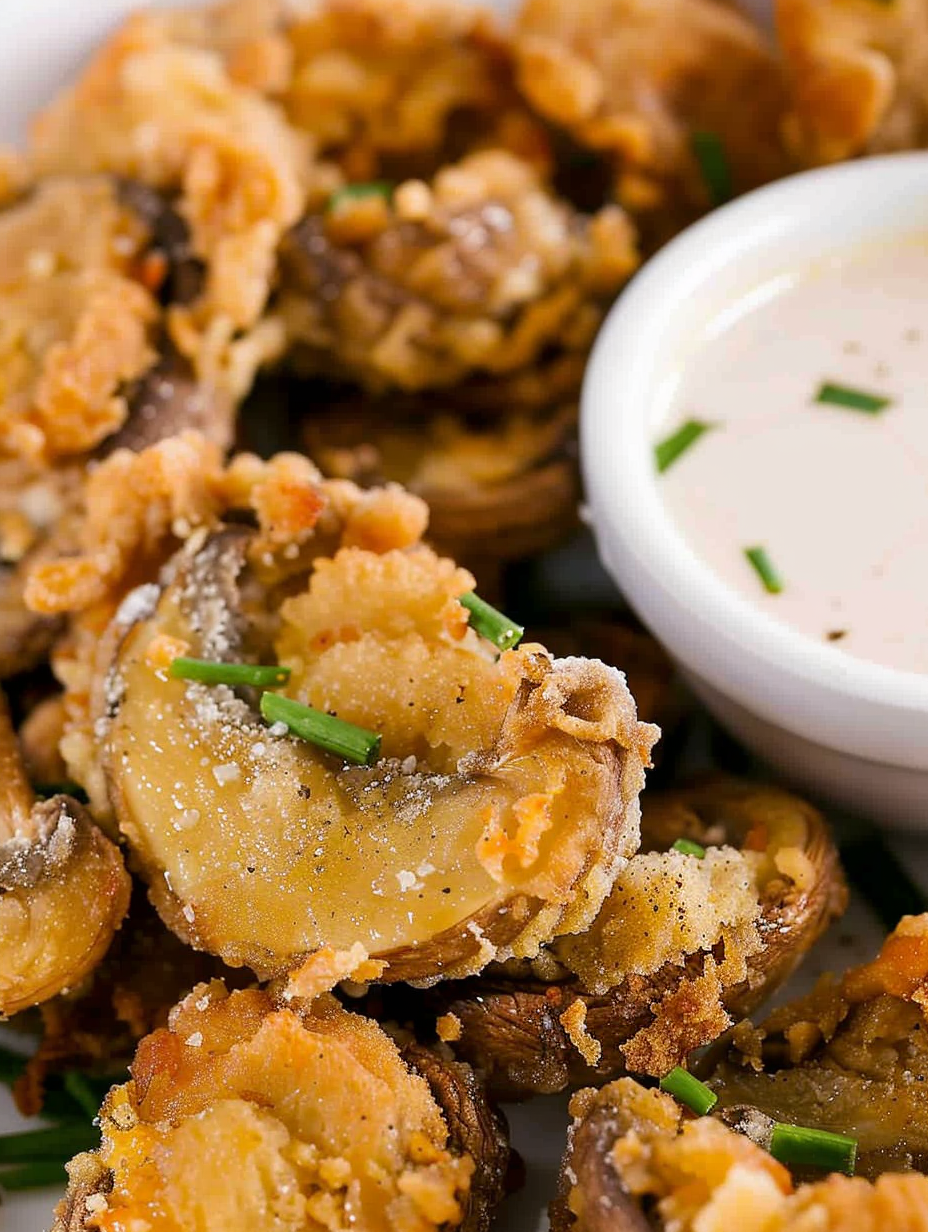
Serve these fried mushrooms on a platter with lemon wedges, a simple garlic aioli, or a spicy sriracha mayo. For a fuller plate offer alongside green salad leaves and a vinaigrette to cut through the oiliness. They also pair well with beer or a light white wine. Garnish with chopped fresh parsley or chives for a fresh visual contrast and subtle flavor lift.
Fried mushrooms echo a long tradition of quick fried vegetables within American home cooking. Coating vegetables in flour for a crisp edge is common in many cultures and is particularly linked to fair food and casual appetizers. While mushrooms fried in batter or breading appear in many regional variants, this simple flour and egg method is a straight forward American style approach that emphasizes texture and ease.
In autumn try using cremini or wild mushrooms for a deeper flavor. Add a pinch of smoked paprika or ground cayenne to the flour for winter gatherings. In spring lighten the seasoning with lemon zest and a sprinkle of fresh herbs after frying. Holiday versions can include a herbed breadcrumb topping or a parmesan dusting for a richer profile.
Slice and dry mushrooms a day ahead. Keep them uncovered on a tray in the refrigerator to firm up. Prepare seasoned flour in a resealable bag and store in a cool dry place. If you plan to serve to guests fry just before arrival for best crunch. For a buffet style event you can keep fried mushrooms warm in a low oven set to 200 degrees Fahrenheit on a wire rack over a baking tray for up to 20 minutes without losing too much texture.
This simple recipe rewards attention to small details such as dryness of the mushrooms and oil temperature. Whether you choose the thin or thicker breading you will have a quick, crowd pleasing dish that feels special. Share it with friends and experiment with spices to make it your own.
Dry mushrooms thoroughly after rinsing to reduce oil splatter and ensure proper crisping.
Do not overcrowd the pan when frying. Work in batches so the oil temperature does not drop and the coating stays crisp.
Use a neutral oil with a high smoke point, such as canola or vegetable oil, for even browning.
If coating in advance freeze coated pieces on a tray before storing in a bag to prevent clumping.
This nourishing crispy fried mushrooms recipe is sure to be a staple in your kitchen. Enjoy every moist, high protein slice — it is perfect for breakfast or as a wholesome snack any time.
Yes. For thin breading skip the eggs and simply dredge the mushrooms in seasoned flour. For a thicker crust dip in egg then flour.
Heat oil to about 375 degrees Fahrenheit for deep frying. For pan frying test with a pinch of flour; if it sizzles, the oil is ready.
This Crispy Fried Mushrooms recipe makes perfectly juicy, tender, and flavorful steak every time! Serve with potatoes and a side salad for an unforgettable dinner in under 30 minutes.
Pour oil to about one inch depth for pan frying or fill deep fryer to manufacturer recommendations. Heat to medium for pan frying or 375 degrees Fahrenheit for deep frying. Test readiness by sprinkling a pinch of flour and watching for immediate sizzle.
Combine one cup all purpose flour and two tablespoons seasoned salt in a large bowl or sealable bag. Mix well to ensure even seasoning across all pieces.
Place sliced mushrooms into the flour mixture and toss or shake until lightly coated. Shake off excess flour and proceed to frying. This creates a light crisp coating that highlights the mushroom texture.
Beat two large eggs in a shallow bowl. Dip mushrooms into the eggs, then dredge through the seasoned flour until evenly coated. This gives a thicker golden crust after frying.
Carefully place coated mushrooms into the hot oil in a single layer. Pan fry for two to three minutes per side until deep golden. For deep frying maintain 375 degrees Fahrenheit and fry for two to three minutes until golden brown.
Remove fried mushrooms with a slotted spoon onto paper towels to drain excess oil. Serve warm with lemon wedges, aioli, or preferred dipping sauce.
Last Step: Please leave a rating and comment letting us know how you liked this recipe! This helps our business to thrive and continue providing free, high-quality recipes for you.
Leave a comment & rating below or tag
@platemint on social media!

Saucy, cheesy baked ziti with ricotta and basil tastes like lasagna in half the effort, perfect for weeknights or crowds.

Quick, crowd-pleasing cheeseburger sliders baked golden with melty cheddar and savory beef. Ready in 30 minutes, great for parties and easy meal prep.

Crispy air fryer sweet potato fries with tender centers, fast-food flavor without deep frying. Ready in minutes and irresistibly snackable.
Leave a comment & rating below or tag @platemint on social media!
Enjoyed this recipe? Share it with friends and family, and don't forget to leave a review!
This recipe looks amazing! Can't wait to try it.
Comments are stored locally in your browser. Server comments are displayed alongside your local comments.

Join to receive our email series which contains a round-up of some of our quick and easy family favorite recipes.
