
>>

Weeknight-friendly stuffed peppers filled with seasoned ground beef, fluffy rice, and a simple tomato sauce. Freezer friendly and family approved.
This stuffed peppers dish has been my go-to for busy weeknights and chilly weekends when I want something hearty, homey, and unfussy. I discovered this combination one evening when my pantry held six stubborn bell peppers and a couple of cups of leftover rice. After browning ground beef with a few pantry spices and simmering a homemade tomato sauce, the first bite felt like a warm hug. The peppers hold just enough structure to deliver a satisfying crunch with every forkful while the filling is tender, savory, and comforting.
I love that this preparation balances texture and flavor without keeping you in the kitchen all evening. The filling is seasoned simply so the tomato sauce and bell pepper shine through. The method works whether you use freshly cooked rice or leftover grains, and the recipe scales easily if you are cooking for a crowd or planning freezer meals. My family usually asks for seconds, and I often share one of the filled peppers with a neighbor who stopped by unexpectedly and left with a recipe request.
Every time I pull the tray from the oven the kitchen fills with a classic tomato aroma that everyone recognizes. My kids love placing the pepper tops back on like little hats before we serve. One winter afternoon I brought a tray to a small book club and it disappeared fast, which convinced me to include it in my holiday make-ahead roster.

My favorite part of this preparation is how forgiving it is. I often build the filling a day ahead and refrigerate it, then assemble and bake when I am ready to eat. On a cold evening a tray of these peppers makes the whole house feel welcoming. Over the years readers told me they doubled the sauce to spoon over mashed potatoes which is a lovely variation that keeps the meal cozy and satisfying.
Store leftovers in an airtight container in the refrigerator for up to four days. For longer storage wrap each pepper individually in plastic wrap and place in a freezer safe container or bag and freeze up to three months. To reheat from chilled, place peppers in a 350 degrees Fahrenheit oven covered for 20 minutes until heated through. From frozen, thaw overnight in the refrigerator then reheat covered at 350 degrees Fahrenheit for 25 to 30 minutes. Avoid microwaving from frozen as it can make the pepper soggy and the filling unevenly heated.
If you need to swap ingredients swap the ground beef for ground turkey or chicken using the same amount. For a vegetarian option use cooked brown or green lentils and add a beaten egg or a spoonful of tomato paste to bind. If you prefer whole grain use two cups cooked quinoa instead of rice and expect a slightly nuttier texture. For lower sodium choose no salt added tomato sauce and increase herbs like oregano and basil to enhance flavor.
Serve the peppers with a crisp green salad dressed in a bright vinaigrette or roasted Brussels sprouts for a complete plate. A scoop of mashed potatoes or a slice of crusty bread is excellent to soak up extra sauce. Garnish with chopped fresh parsley or a sprinkle of grated Parmesan if you are not dairy free for a touch of richness and color.
Stuffed vegetables have a long history spanning many cuisines where grains and proteins are used to fill peppers, cabbage leaves, or grape leaves. The version presented here is a classic American adaptation of those traditions that emphasizes quick preparation and familiar pantry flavors. It borrows the comforting tomato base common to many Mediterranean and Eastern European stuffed vegetable dishes while keeping steps streamlined for modern home kitchens.
In summer use red or yellow bell peppers for sweeter notes and add chopped summer tomatoes to the sauce. In fall incorporate diced cooked butternut squash or small cubes of apple into the filling for a hint of sweetness. For winter months increase the dried herbs and consider adding a pinch of smoked paprika to the filling for warmth and depth.
Make the filling up to two days ahead and store it in the refrigerator. Par roast the peppers and store them separately so assembly is quick. If freezing, assemble and flash freeze the stuffed peppers on a sheet pan before transferring to a bag to prevent them from sticking together. Label packages with the date and reheat straight from frozen after thawing overnight for best texture.
These stuffed peppers are simple to make, easy to adapt, and perfect for sharing. Give them a try on a busy evening or double the batch and tuck extras into the freezer so a comforting dinner is always within reach.
Use day old rice to keep the filling from becoming gummy and to help it bind better.
Par roast the peppers so they finish tender without overcooking the filling.
Adjust salt after combining the filling because tomato sauce sodium varies widely.
Freeze individually on a sheet pan before bagging to prevent sticking.
This nourishing classic beef and rice stuffed peppers recipe is sure to be a staple in your kitchen. Enjoy every moist, high protein slice — it is perfect for breakfast or as a wholesome snack any time.
This Classic Beef and Rice Stuffed Peppers recipe makes perfectly juicy, tender, and flavorful steak every time! Serve with potatoes and a side salad for an unforgettable dinner in under 30 minutes.
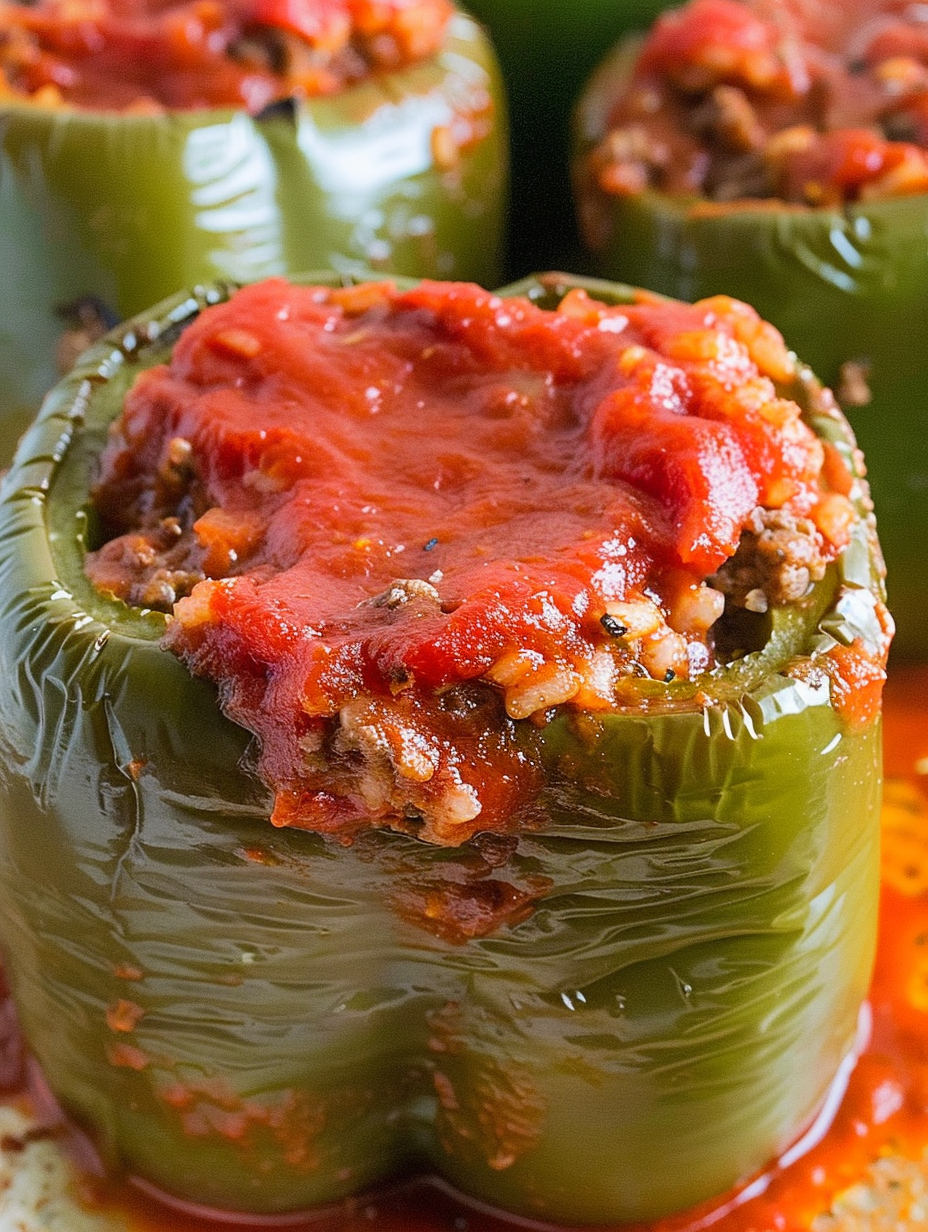
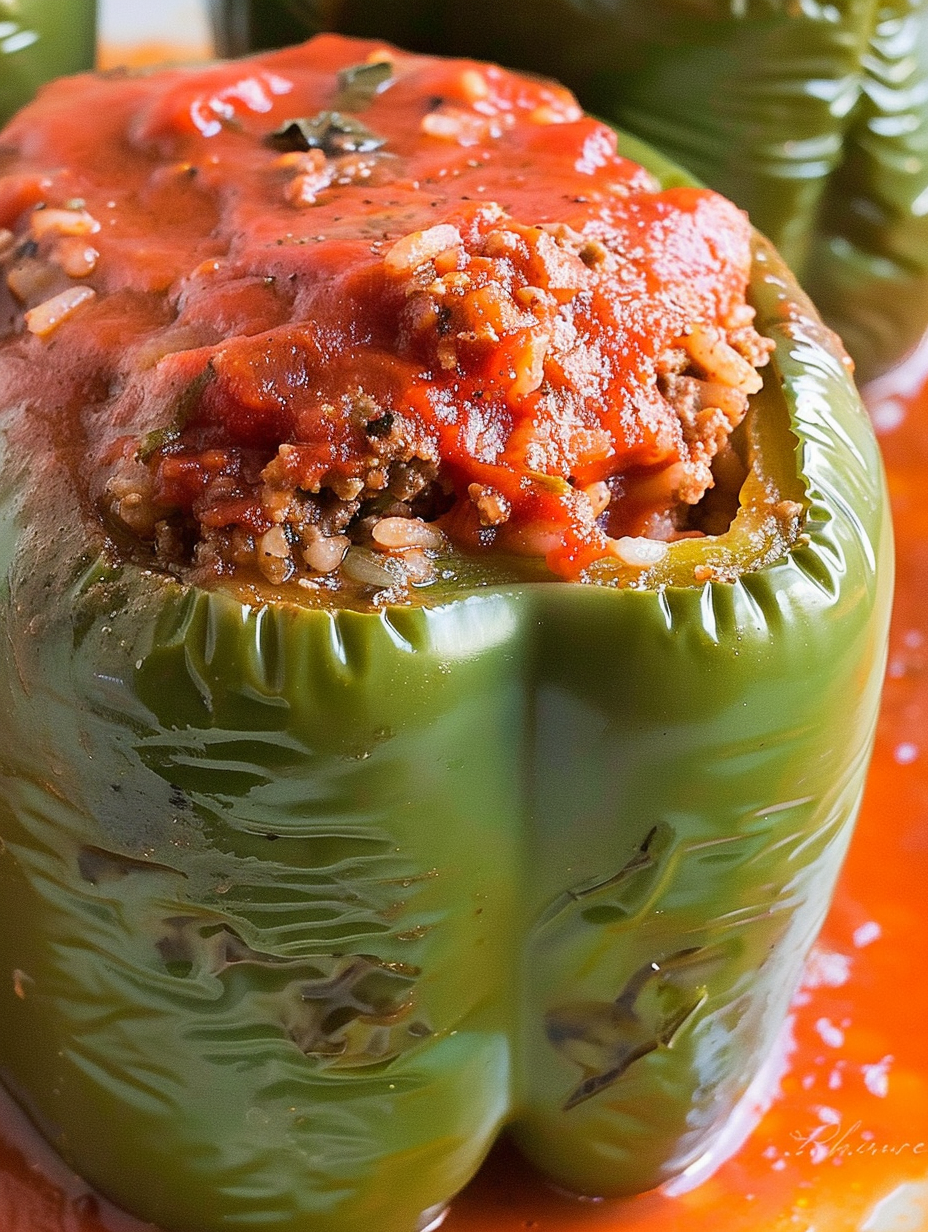
Slice the tops from each bell pepper, remove seeds and membranes, then place peppers upright in a casserole dish. Roast at 400 degrees Fahrenheit for 20 minutes to slightly soften and maintain shape.
Heat a skillet over medium high heat. Brown the ground beef with granulated garlic, dried parsley, kosher salt, and black pepper until no pink remains, about 7 to 9 minutes. Drain excess fat if desired.
Stir one cup tomato sauce and two cups cooked rice into the browned beef, mix until evenly combined and heated through. Taste and adjust seasoning as needed.
Carefully stuff each par roasted pepper with the beef and rice mixture. Replace the pepper tops and arrange peppers tightly in the dish to support each other.
Pour remaining tomato sauce over and around the peppers. Cover with foil and bake at 375 degrees Fahrenheit for 30 minutes. Uncover and bake 10 more minutes to brown the tops. Let rest 5 to 10 minutes before serving.
In a bowl combine the tomato sauce with granulated garlic and salt to taste. Use part for the filling and pour the rest over the peppers for baking.
Last Step: Please leave a rating and comment letting us know how you liked this recipe! This helps our business to thrive and continue providing free, high-quality recipes for you.
Leave a comment & rating below or tag
@platemint on social media!

Saucy, cheesy baked ziti with ricotta and basil tastes like lasagna in half the effort, perfect for weeknights or crowds.

Quick, crowd-pleasing cheeseburger sliders baked golden with melty cheddar and savory beef. Ready in 30 minutes, great for parties and easy meal prep.

Crispy air fryer sweet potato fries with tender centers, fast-food flavor without deep frying. Ready in minutes and irresistibly snackable.
Leave a comment & rating below or tag @platemint on social media!
Enjoyed this recipe? Share it with friends and family, and don't forget to leave a review!
This recipe looks amazing! Can't wait to try it.
Comments are stored locally in your browser. Server comments are displayed alongside your local comments.

Join to receive our email series which contains a round-up of some of our quick and easy family favorite recipes.
