
>>

An easy no-cook holiday treat that tastes like red velvet cake—layers of cake-batter flavored white chocolate fudge, topped with festive sprinkles. Ready in just over an hour.
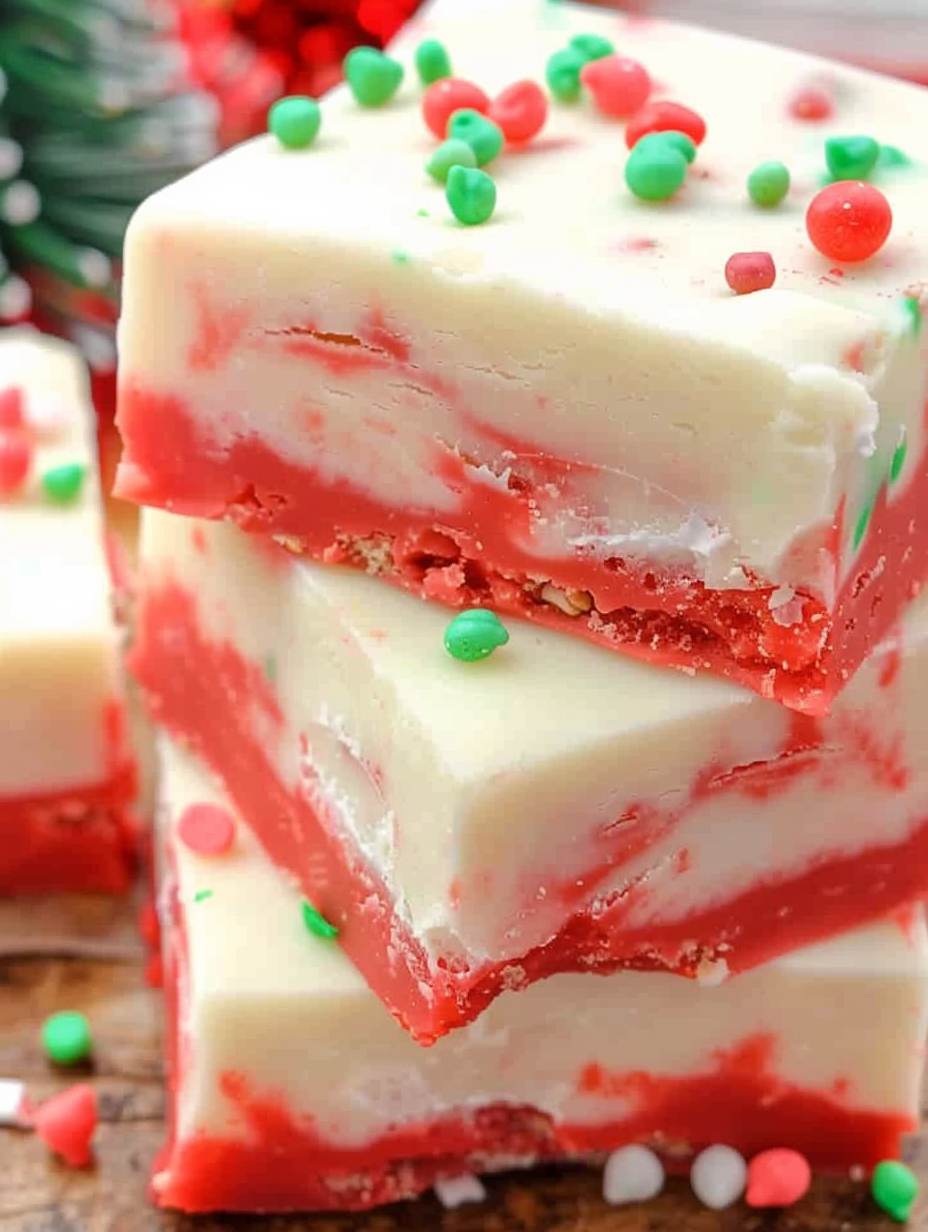
This Christmas Cake Batter Fudge has been my go-to no-fuss holiday treat for the past few years. I first made it the December after my youngest learned to open the pantry and taste-test every jar of sprinkles; I wanted something colorful and quick that would feel special without taking over the entire afternoon. The combination of smooth white chocolate, sweetened condensed milk, and cake mixes produces a texture and flavor that reminds me of red velvet cake batter—rich, slightly tangy, and impossibly creamy. It’s one of those recipes that guests assume took all day, but it actually comes together in minutes and chills into a party-ready tray.
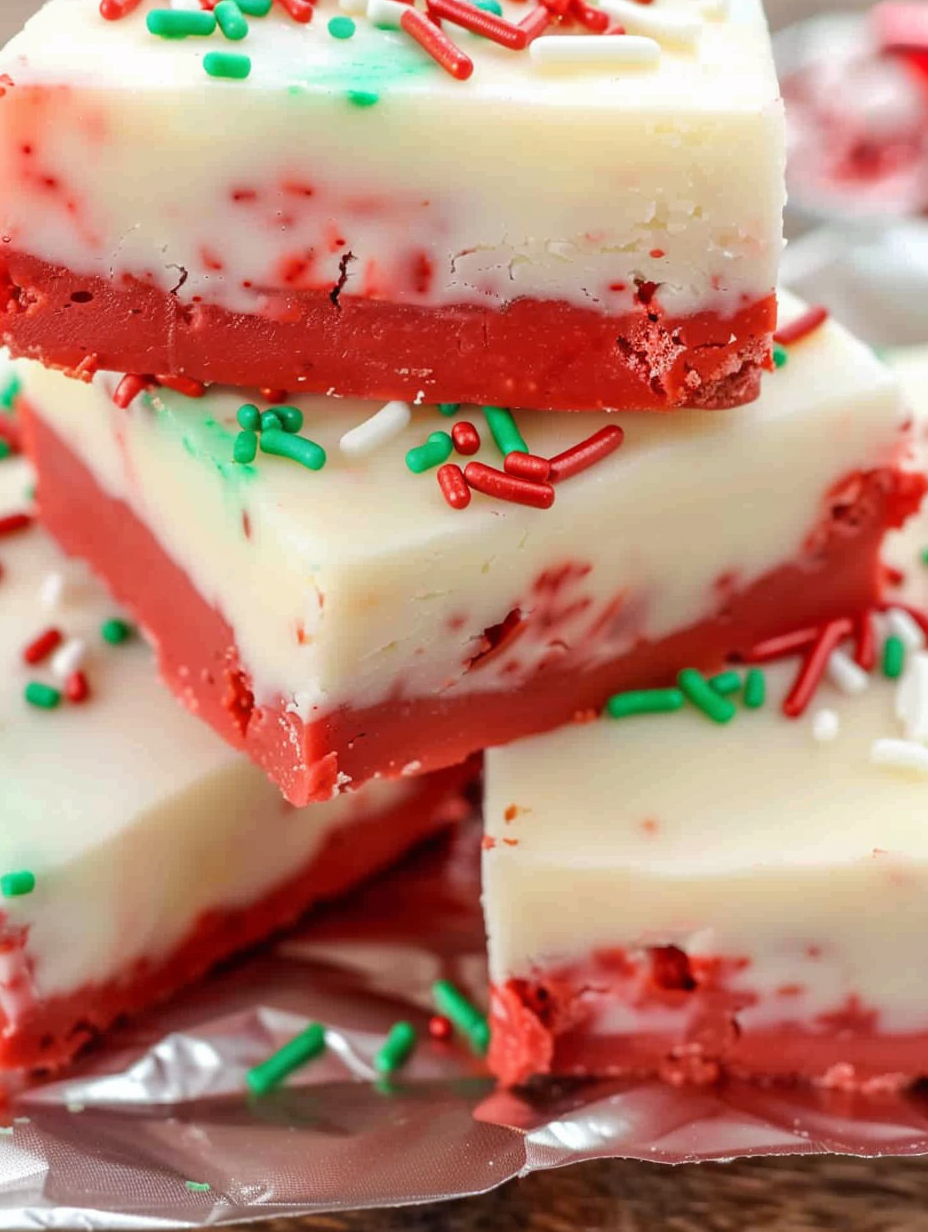
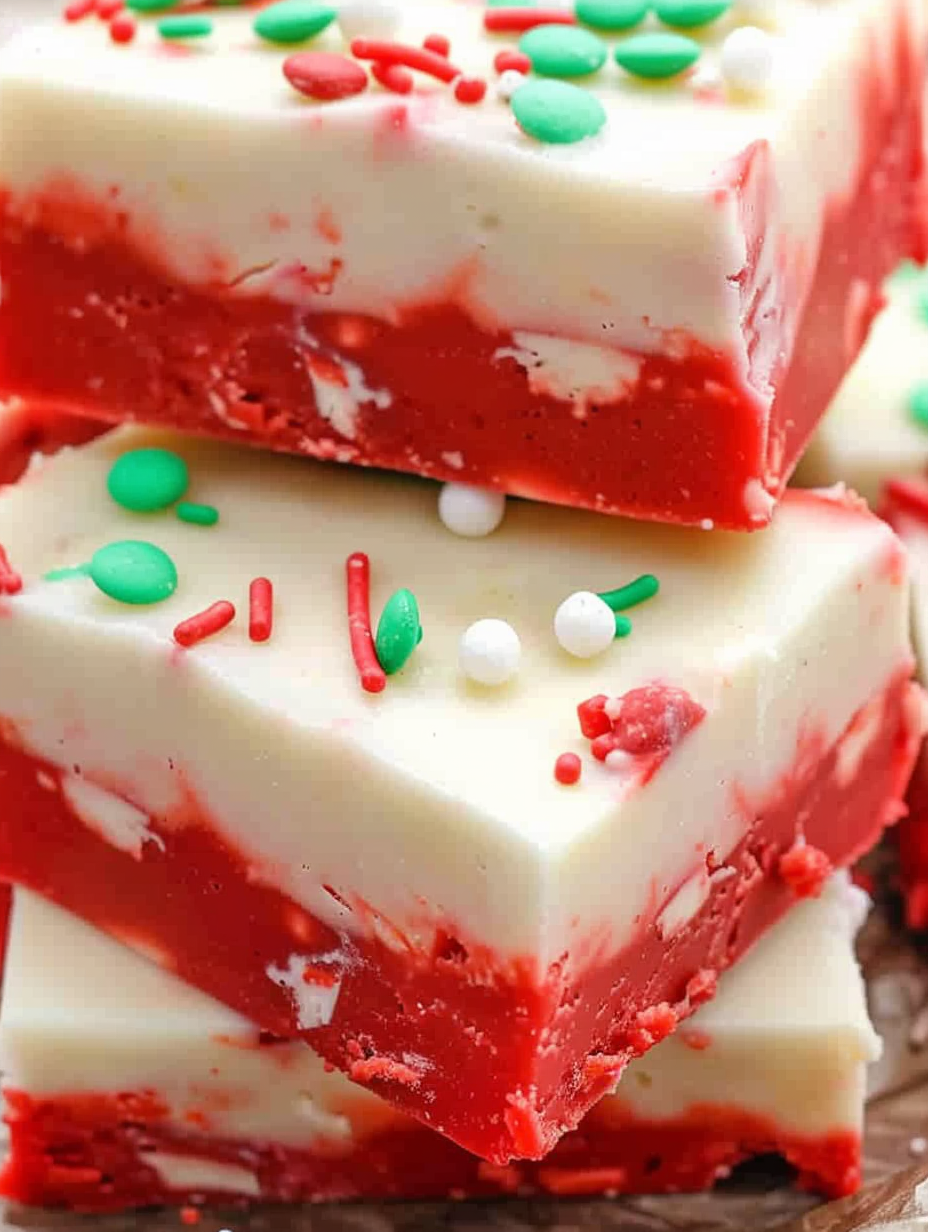
What makes this recipe special is its balance of show-stopping color and ultra-simple technique. No tempering, no baking—just gentle melting and folding. The two-layer approach (red velvet and white) creates a visual contrast that’s festive and elegant, and the sprinkles finish gives a nostalgic, childlike delight. I use a reliable brand of white chocolate chips and a standard 14-ounce can of sweetened condensed milk; these pantry items hold their own and yield consistent results. It’s a recipe I reach for when company is coming, when the kids want to help, or when I need a quick hostess gift that travels well.
My family’s reaction the first time I served this was priceless: my aunt took a bite, closed her eyes, and said it tasted like birthday cake in a candy form. That reaction made me a convert. Since then, I’ve prepared it for school parties, neighbor gifts, and last-minute holiday gatherings—each time it disappears quickly.
My favorite part of this dish is how effortlessly it elevates holidays: the kids love helping sprinkle, neighbors always ask for a box, and I appreciate that it frees up oven space when holiday roasts and cookies are on the schedule. Every year someone asks for the recipe and ends up making a variation with peppermint or citrus, which proves how adaptable the base is.
Store the fudge in an airtight container layered between sheets of parchment paper to prevent sticking. In the refrigerator it keeps at peak quality for about 10–14 days; if you need longer storage, freeze the cut squares in a single layer on a baking sheet for an hour, then transfer to a freezer-safe bag for up to 3 months. Thaw overnight in the refrigerator or for an hour at room temperature before serving. Avoid leaving the tray at room temperature for extended periods—the texture will soften and lose its clean slices.
If you need to avoid gluten, swap the boxed cake mixes for certified gluten-free cake mixes; note that textures can vary, and you may need to sift or stir more to fully incorporate. For a dairy-free version use dairy-free white chocolate (coconut-based chips) and a dairy-free sweetened condensed milk alternative; results will be slightly different in richness. To reduce sweetness, replace the white cake mix layer with a vanilla protein powder blend and reduce the sprinkles. For a more adult profile, fold in 1 teaspoon vanilla extract into the white layer and a pinch of espresso powder into the red layer for depth.
Serve small squares on a festive platter with other no-bake treats like chocolate truffles or peppermint bark. These are perfect alongside a mug of coffee or rich hot chocolate—pairing the fudge’s sweetness with a slightly bitter beverage balances the palate. For gifting, wrap 6–8 squares in parchment and tie with ribbon. Garnish with a light dusting of edible gold or a few larger holiday sprinkles for a grown-up presentation at a cocktail party.
Layered confections and candy-like trays are a long-standing part of American holiday culture, where colorful, shareable sweets often appear at family gatherings. This recipe blends classic fudge technique—using sweetened condensed milk as a shortcut to soft, creamy fudge—with boxed cake flavors that evoke bakery-style cake batter. The red-and-white motif nods to seasonal candy canes and holiday decorations; it’s not tied to a single regional tradition but reflects a broader North American preference for vibrant, communal confections during winter celebrations.
In winter, swap holiday sprinkles for crushed candy canes or a drizzle of dark chocolate to echo peppermint flavors. For spring or Easter, tint the white layer pastel blue or yellow with gel food coloring and add edible flowers. For a summer twist, replace red velvet with strawberry cake mix and top with freeze-dried fruit bits. The base is versatile: small additions like citrus zest, flavored extracts, or toasted nuts can tailor it to any season.
Make a double batch and freeze half for future events. Portion squares into smaller sizes for calorie control or larger squares for gifting. Label containers with the date and any allergen notes. When reheating slightly for softer bites, place squares in a warm (not hot) oven for a few minutes; avoid microwaving for prolonged periods, which can alter texture. Bring leftovers to room temperature for best mouthfeel.
Final word: this tray of cake batter fudge is simple, nostalgic, and endlessly adaptable—perfect for busy holidays when you want something pretty, delicious, and fast. Give it a try, and make it your own with a favorite sprinkle or a clever flavor swap.
Use high-quality white chocolate chips for a creamy texture; cheaper chips with stabilizers may not melt as smoothly.
Warm your knife under hot water and wipe it dry between cuts for clean, square pieces.
Chill the assembled pan on a level surface to ensure even setting and prevent thin spots.
If the chocolate begins to thicken in the bowl while you’re working, gently warm it for 5–10 seconds and stir to restore smoothness.
This nourishing christmas cake batter fudge recipe is sure to be a staple in your kitchen. Enjoy every moist, high protein slice — it is perfect for breakfast or as a wholesome snack any time.
Recipe data validation failed
Please check the recipe data format. See console for details.

Saucy, cheesy baked ziti with ricotta and basil tastes like lasagna in half the effort, perfect for weeknights or crowds.

Quick, crowd-pleasing cheeseburger sliders baked golden with melty cheddar and savory beef. Ready in 30 minutes, great for parties and easy meal prep.

Crispy air fryer sweet potato fries with tender centers, fast-food flavor without deep frying. Ready in minutes and irresistibly snackable.
Leave a comment & rating below or tag @platemint on social media!
Enjoyed this recipe? Share it with friends and family, and don't forget to leave a review!
This recipe looks amazing! Can't wait to try it.
Comments are stored locally in your browser. Server comments are displayed alongside your local comments.

Join to receive our email series which contains a round-up of some of our quick and easy family favorite recipes.
