
>>

Soft, chewy chocolate cookies filled with bright cherry pie filling and finished with a glossy chocolate glaze—easy to make and impossible to resist.

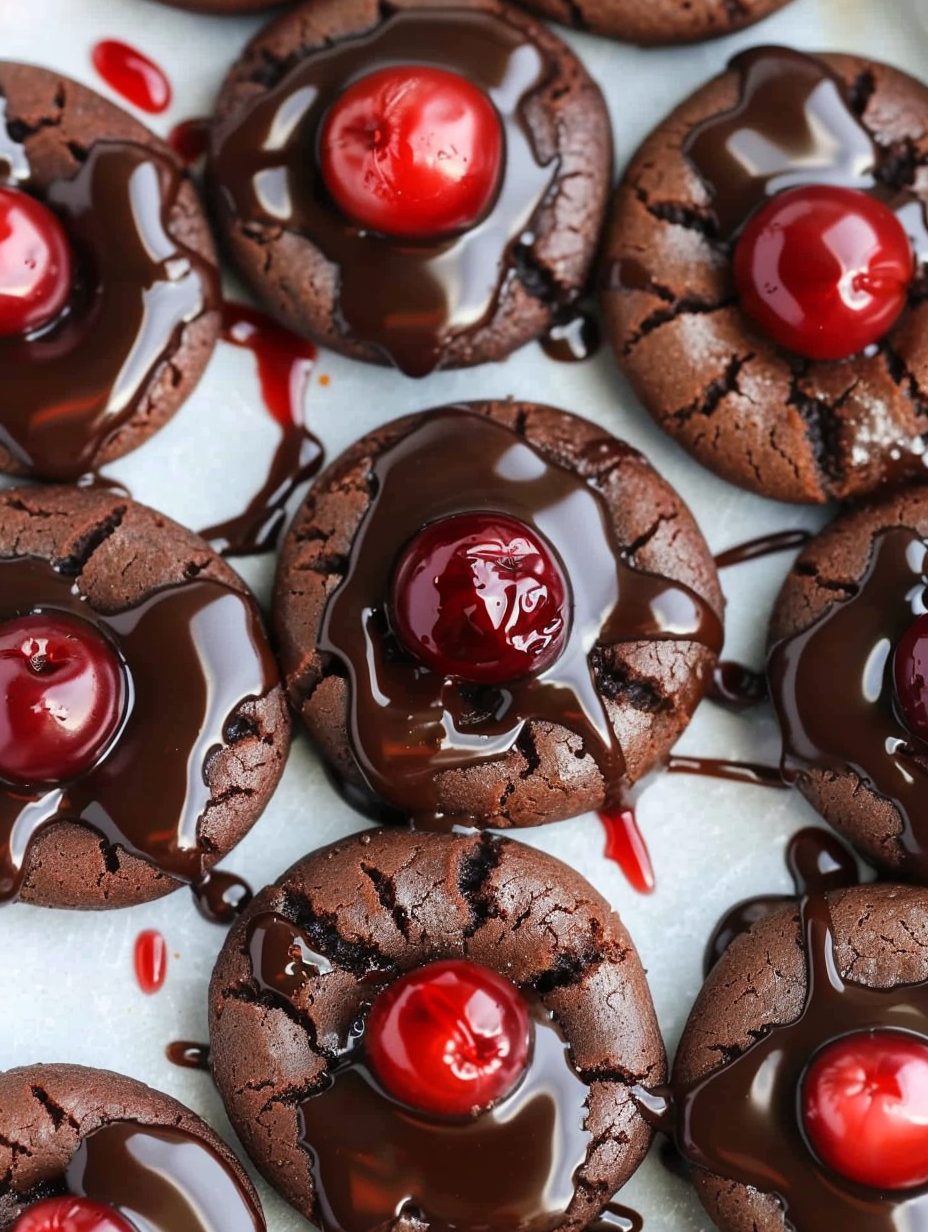
This batch of Chocolate Cherry Thumbprint Cookies has been a staple at my holiday gatherings for years. I first discovered the recipe while adapting a classic thumbprint cookie to use what was left in my pantry—unsweetened cocoa, a can of cherry pie filling, and a tub of semi-sweet chips. The result surprised me: a soft, chewy chocolate shell with a bright pocket of cherry in the center and a shiny chocolate glaze on top. It quickly became the cookie that disappears first at potlucks and family dinners. I love how the tart cherries punctuate each bite and how the little X-shaped thumbprints hold the filling perfectly.
What makes these so special is the contrast in textures and flavors. The dough stays tender because of the balance of butter and sugars, while the light press in the center creates a cradle for the cherries so they don't spread during baking. The glaze is intentionally glossy and just sweet enough to marry the bittersweet chocolate chips with the fruity filling. I always reach for good-quality semi-sweet chips—Ghirardelli or Nestlé work well—and a full-flavored cherry pie filling for the best results. These cookies bring back cozy kitchen memories and have a way of making guests relax and ask for the recipe.
In my experience, these cookies have been a crowd-pleaser at bake sales, family reunions, and Sunday coffee gatherings. My niece always asks for a second cookie because the cherry in the center feels like a little surprise in every bite. Over time I learned that pressing twice to form an X keeps the cherry filling neatly nested, so I always demonstrate that trick when friends help bake.
My favorite thing about these cookies is how adaptable they are—swap in different fillings or glaze flavors and you still have the same tender base. I remember bringing a tin to a winter potluck and being asked for the recipe repeatedly; the glaze gives such a professional look, and guests often assume they came from a bakery. Watching the glaze harden with that perfect sheen is oddly satisfying.
Store cooled cookies in an airtight container layered with parchment or wax paper to prevent sticking. At room temperature the texture stays soft for up to 48 hours; refrigeration extends life to about 5 days but can slightly firm the cookie—bring them back to room temperature before serving for the best mouthfeel. For freezing, arrange cookies in a single layer on a baking sheet to flash-freeze for an hour, then transfer to a zip-top bag or freezer-safe container with parchment between layers. Reheat briefly in a 300°F oven for 5 minutes to refresh the texture and revive the glaze’s sheen.

If you need to adjust ingredients, there are several successful swaps. For a dairy-free version, replace butter with 1/2 cup vegan margarine and use dairy-free chocolate chips plus a plant-based milk for the glaze; note the flavor will shift slightly. To reduce sweetness, choose a low-sugar cherry filling or drain excess syrup before spooning cherries into the thumbprints. For a more intense chocolate flavor, replace 1/4 cup of the flour with unsweetened dark cocoa and add a tablespoon of espresso powder to the dry mix. If you need gluten-free, use a 1:1 gluten-free flour blend and check that your baking powder is gluten-free; texture will be a touch more delicate.
Serve these cookies slightly warm with a cup of strong coffee or a glass of cold milk—the cherry centers pair nicely with dark roast or black tea. For holiday platters, alternate them with shortbread and nutty biscotti to balance textures. Garnish trays with fresh cherries or edible gold flakes for a festive touch. They also make charming gifts: stack six cookies in a clear box tied with ribbon or create mixed-cookie tins for neighbors and friends. The glossy glaze makes them look special without extra effort.
Thumbprint-style cookies trace their roots to Scandinavian baking traditions, where small jam-filled cookies were pressed with a thumb and baked for festive tables. The American adaptation often uses various fillings and cocoa to modernize the flavor. This chocolate-cherry version merges influences: the rich cocoa reflects American chocolate preferences while the thumbprint idea remains a simple European technique. Over the decades, bakers have embraced jam, curd, and pie fillings in the center, turning a humble pressed cookie into a canvas for seasonal flavors.
These cookies are flexible across seasons. In winter, use cherry filling spiced with a pinch of cinnamon and add a dusting of powdered sugar after glazing for a snowy look. In summer, swap cherry for apricot preserves and use white chocolate for the glaze to lighten the flavor. For autumn, fold a teaspoon of orange zest into the dough and use spiced apple butter instead of cherries. The same technique works year-round—simply change the filling and glaze to match seasonal fruit and celebrations.
For efficient batch baking, prepare the dough and portion it into rolled balls, then freeze the raw dough balls on a tray. When frozen, store them in a labeled bag and bake directly from frozen—add 1 to 2 minutes to baking time. You can also pre-make the glaze and keep it refrigerated; rewarm gently before using. Pack cookies in single-serving containers for grab-and-go snacks, or assemble gift boxes with parchment separators to avoid smudging the glaze.
These Chocolate Cherry Thumbprint Cookies are simple to make, friendly for bakers of all skill levels, and endlessly adaptable. Whether you’re baking for a party, gift-giving, or an afternoon treat, they deliver a balance of chocolatey comfort and bright fruit flavor that always gets compliments. Try them once and you’ll find new occasions to bake them again.
Press twice (forming an X) for a shallower cavity that keeps cherry filling from spilling during baking.
Use room-temperature butter and beat until just fluffy to trap air for a tender cookie.
Spoon only a small amount of filling (about 3 cherries) to avoid overflow and over-sweet centers.
Flash-freeze baked cookies on a tray before bagging to prevent sticking and preserve the glaze.
This nourishing chocolate cherry thumbprint cookies recipe is sure to be a staple in your kitchen. Enjoy every moist, high protein slice — it is perfect for breakfast or as a wholesome snack any time.
This Chocolate Cherry Thumbprint Cookies recipe makes perfectly juicy, tender, and flavorful steak every time! Serve with potatoes and a side salad for an unforgettable dinner in under 30 minutes.
Whisk together flour, baking soda, baking powder, salt, and cocoa powder until evenly distributed. Sifting is optional but recommended if cocoa is lumpy.
Cream softened butter with granulated and brown sugar until light and fluffy, about 2 to 3 minutes. Proper creaming improves texture.
Beat in the egg and vanilla until incorporated, scraping the bowl to ensure even mixing and avoiding overbeating.
Gradually add the dry mixture to the wet ingredients on low speed until just combined to prevent toughness.
Scoop rounded tablespoons of dough, roll into balls, and press centers to form wells by creating an X-shaped impression with your thumb.
Spoon about 3 cherries into each well. Bake at 350°F for 9 to 10 minutes until edges are set. Cool briefly on sheet then transfer to rack.
Melt chocolate chips with butter, corn syrup, and milk until glossy. Drizzle or dab over each cherry center and let set before serving.
Last Step: Please leave a rating and comment letting us know how you liked this recipe! This helps our business to thrive and continue providing free, high-quality recipes for you.
Leave a comment & rating below or tag
@platemint on social media!

Saucy, cheesy baked ziti with ricotta and basil tastes like lasagna in half the effort, perfect for weeknights or crowds.

Quick, crowd-pleasing cheeseburger sliders baked golden with melty cheddar and savory beef. Ready in 30 minutes, great for parties and easy meal prep.

Crispy air fryer sweet potato fries with tender centers, fast-food flavor without deep frying. Ready in minutes and irresistibly snackable.
Leave a comment & rating below or tag @platemint on social media!
Enjoyed this recipe? Share it with friends and family, and don't forget to leave a review!
This recipe looks amazing! Can't wait to try it.
Comments are stored locally in your browser. Server comments are displayed alongside your local comments.

Join to receive our email series which contains a round-up of some of our quick and easy family favorite recipes.
