
>>

All the cozy, savory flavors of classic chicken pot pie transformed into a simple casserole topped with flaky canned biscuits—perfect for busy weeknight dinners.

Personally, I started making this after many attempts at rolling pastry under time pressure; my family immediately loved the light, flaky canned biscuit top. My kids call it "chicken pie-bake" and ask for the buttery crisp edges first. Over time I've learned to tweak the herbs and add a splash more milk for creaminess. A quick sprinkle of fresh parsley at the end always makes it feel special—even on the busiest evenings.
My favorite thing about this casserole is how forgiving it is. I once doubled the herbs and swapped in leftover turkey after Thanksgiving—my guests couldn’t tell the difference and asked for the recipe. Another time I underestimated how many biscuits to place on top and the slightly airy gaps ended up with extra crisp edges that became a family favorite. These small discoveries are why this dish lives in my regular rotation.

Cool leftovers to room temperature (no more than two hours at room temp), then refrigerate in an airtight container for up to 3–4 days. For longer storage, freeze individual portions in freezer-safe containers for up to three months. When reheating from frozen, thaw overnight in the refrigerator, then reheat in a 350°F oven for 20–30 minutes covered with foil until bubbling. To refresh biscuit texture, remove foil for the last 5–8 minutes of reheating to re-crisp the top.
If you need dairy-free options, use a dairy-free cream soup alternative and unsweetened soy or oat milk; swap the biscuit topping for a gluten-free canned biscuit or a simple cornmeal dumpling if avoiding gluten. For a lighter version, replace half the whole milk with chicken broth and use reduced-fat biscuits. For a richer finish, fold in 1/2 cup of shredded sharp cheddar into the filling before topping with biscuits.
Serve slices with a crisp green salad dressed in tangy vinaigrette to cut the richness, or roasted Brussels sprouts and a bright cranberry relish for holiday flair. Garnish with chopped fresh parsley or chives for color; a squeeze of lemon on the side brightens the flavors. For family-style serving, place the casserole on a trivet and let guests spoon out portions into warmed plates.
The idea of a pie-like chicken and vegetable dish is rooted in classic American comfort cooking that evolved from European meat pies. This casserole simplifies the labor of pie crust and filling assembly, reflecting a modern preference for quick, reliable meals without sacrificing tradition. Using canned biscuits—an American pantry staple—makes this a nostalgic, practical adaptation embraced by busy households across the country.
Summer: swap frozen mixed vegetables for a fresh summer medley—sweet corn, diced zucchini, and fresh peas—added at the end so they remain bright. Autumn: use leftover roast turkey, add roasted root vegetables, and stir in a pinch of nutmeg or sage. Winter: increase the herbs and add pearl onions for extra depth. Spring: lighten the milk to 2% and finish with fresh lemon zest and green peas for brightness.
Assemble the casserole (without the biscuit topping) up to 24 hours ahead and refrigerate covered. When ready to bake, arrange the biscuits and proceed with baking times in the recipe—this saves active evening time. For single-serving meal prep, layer filling into individual ramekins and top each with a quartered biscuit; bake for 12–15 minutes until golden and bubbly, then cover and refrigerate for up to 3 days.
Comforting, forgiving, and delicious—this casserole is an easy way to bring people together around a warm, nostalgic meal. Whether you’re racing home from work or hosting friends, it’s a reliable crowd-pleaser that lets you spend less time in the kitchen and more time enjoying the table.
If the biscuit edges brown too quickly, loosely tent the casserole with foil for the remainder of baking to prevent over-browning.
Use rotisserie chicken for speed and deep flavor; shred while still slightly warm for easiest shredding.
Check biscuit centers with a toothpick—if it comes out with dough, bake a few minutes longer to ensure cooked-through biscuits.
This nourishing chicken pot pie casserole with biscuit topping recipe is sure to be a staple in your kitchen. Enjoy every moist, high protein slice — it is perfect for breakfast or as a wholesome snack any time.
Yes—if you prefer, use two 10.5-ounce cans of low-sodium cream of chicken soup and reduce added salt to 1/8 teaspoon to control sodium.
It freezes well. Cool completely, wrap tightly, and freeze up to 3 months. Thaw in the refrigerator before reheating in the oven.
This Chicken Pot Pie Casserole with Biscuit Topping recipe makes perfectly juicy, tender, and flavorful steak every time! Serve with potatoes and a side salad for an unforgettable dinner in under 30 minutes.
Preheat oven to 350°F and lightly grease a 9x13-inch casserole dish so the casserole releases easily after baking.
In the casserole dish combine 2 cans (10.5 oz each) cream of chicken soup, 1 cup whole milk, 2 teaspoons Chicken Better Than Bouillon, 1/2 teaspoon dried thyme, 1/2 teaspoon dried rosemary, 1/2 teaspoon black pepper, 1/2 teaspoon garlic powder, 1/2 teaspoon dried parsley, and 1/4 teaspoon salt if using. Stir until smooth.
Add 1 pound shredded chicken and a 12-ounce bag of frozen mixed vegetables. Fold gently to combine so chicken is evenly distributed.
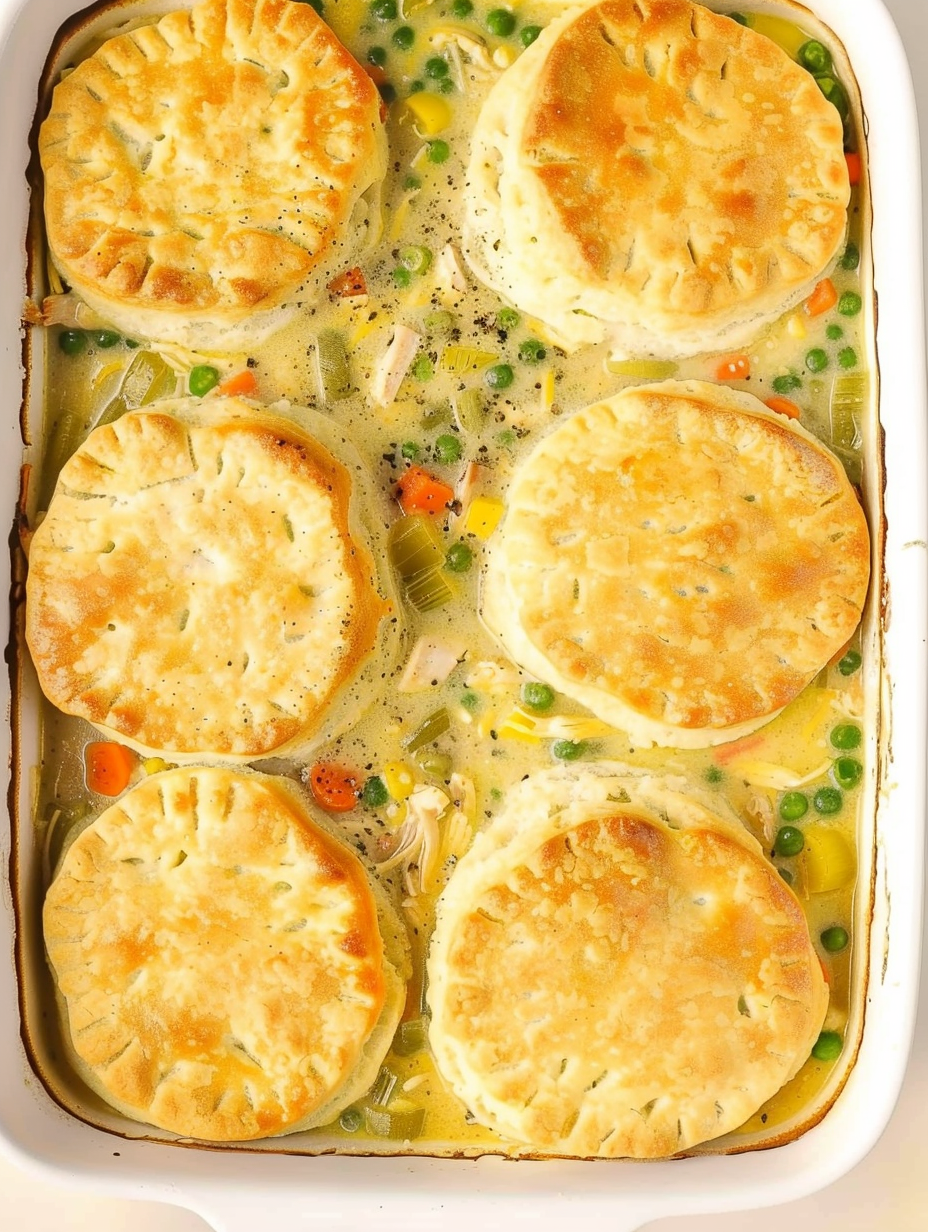
Arrange the 8 canned flaky biscuit pieces evenly across the filling, slightly pressing to make contact with the sauce for even baking.
Bake uncovered for 15–17 minutes until the biscuits are golden brown on top. Visual cues are important—look for a deep golden color.
Loosely tent with foil and bake an additional 10–15 minutes until the casserole is bubbling and biscuit centers are cooked through.
Let rest 5–10 minutes so the filling sets slightly, garnish with parsley, then serve warm.
Last Step: Please leave a rating and comment letting us know how you liked this recipe! This helps our business to thrive and continue providing free, high-quality recipes for you.
Leave a comment & rating below or tag
@platemint on social media!

Saucy, cheesy baked ziti with ricotta and basil tastes like lasagna in half the effort, perfect for weeknights or crowds.

Quick, crowd-pleasing cheeseburger sliders baked golden with melty cheddar and savory beef. Ready in 30 minutes, great for parties and easy meal prep.

Crispy air fryer sweet potato fries with tender centers, fast-food flavor without deep frying. Ready in minutes and irresistibly snackable.
Leave a comment & rating below or tag @platemint on social media!
Enjoyed this recipe? Share it with friends and family, and don't forget to leave a review!
This recipe looks amazing! Can't wait to try it.
Comments are stored locally in your browser. Server comments are displayed alongside your local comments.

Join to receive our email series which contains a round-up of some of our quick and easy family favorite recipes.
