
>>

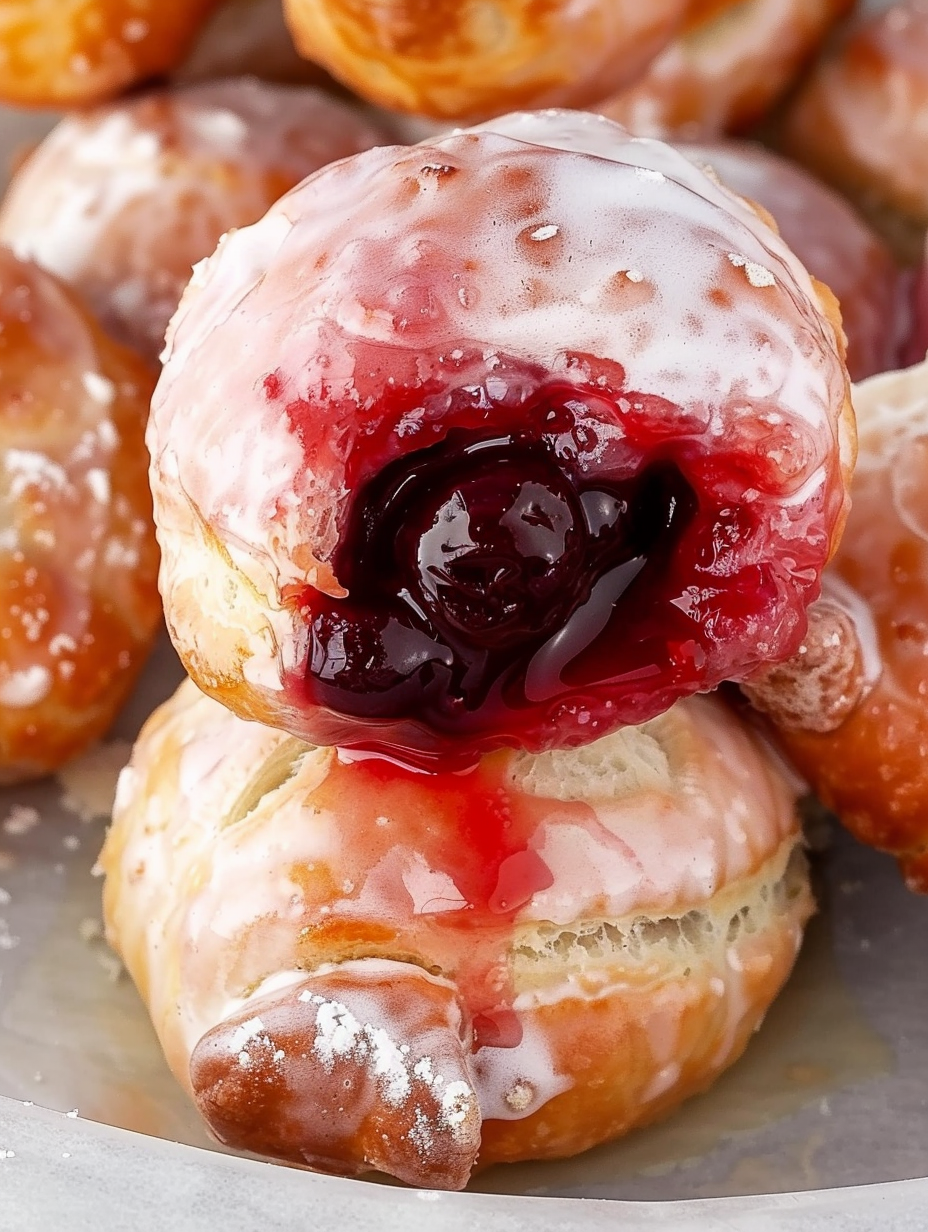
Bite-sized fried dough pockets filled with sweet cherry pie filling, glazed in a glossy sugar icing—quicker and just as satisfying as a classic cherry pie.

This recipe is all about joy in small, explosive packages: cherry pie bombs are bite-sized, fried dough pockets filled with bright cherry pie filling and coated in a glossy sugar glaze. I first made these on a rainy Saturday when I wanted the warmth of pie but not the time or fuss of rolling a full crust. The result was instant comfort—golden, slightly crisp exteriors giving way to warm, syrupy cherry centers. They taste like summer preserves and cozy kitchens, and they have a way of making guests grin with every bite.
What makes these treats special is the contrast between textures and the ease of assembly. Using canned flaky biscuits keeps the work light—no pie dough required—while the deep frying gives a quick, even golden crust that holds a spoonful of cherry filling inside. They are playful to make with kids, perfect for potlucks, and they satisfy the same cravings as a traditional cherry pie in a fraction of the time.
My family reacts like clockwork: when they see the platter, the race is on. One Thanksgiving I brought a tray to the living room, and my niece declared them “magical pie blips.” Little moments like that are why I keep this recipe in rotation—easy, fast, and full of smiles.
I love that these bite-sized pockets evoke childhood fairs and home kitchens at once. One winter I made a double batch and handed them out to neighbors; the feedback was immediate and unanimous—“make more.” They are one of those rare desserts that feel indulgent but are forgiving and fast to prepare, so I reach for them when I want a homemade touch without a long commitment.

Store cooled bombs in an airtight container at room temperature for up to 48 hours—longer refrigeration will dry the dough. For longer storage, freeze assembled, un-fried bombs on a tray until solid, then transfer to a resealable freezer bag for up to 3 months. When ready to eat, fry from frozen and allow a minute or two extra cook time. Reheat fried bombs in a 325°F oven for 5–6 minutes to refresh the exterior if needed, and always glaze just before serving if you want the glossy finish.
If you don’t have flaky biscuits, use regular canned biscuits (one whole biscuit per bomb) but reduce frying time slightly as they are denser. Pie dough works beautifully for a flakier, more authentic crust—roll into 3-inch circles and fry at 350°F for a slightly faster cook. For a dairy-free glaze, swap milk for almond milk and omit corn syrup or substitute with a small amount of agave for shine. Swap cherry filling for apple, blueberry, or peach pie filling for seasonal variations.
Serve warm on a platter dusted lightly with powdered sugar, or arrange them with a scoop of vanilla ice cream for contrast. Garnish with a sprig of mint or a few fresh cherries for color. They work equally well as bite-sized party nibbles or plated desserts—pair with strong coffee or a late-afternoon tea to balance sweetness. For a brunch twist, offer alongside lemon curd or whipped cream as dipping options.
These little fried pockets draw from two traditions: the American love of handheld pies and deep-fried fair food. Similar concepts appear in many cultures—fruit-filled fried dough is common at fairs and festivals because it delivers portable sweetness with a satisfying crunch. Using canned biscuits is a modern shortcut that keeps the spirit of classic American pie alive while making the technique accessible to busy home cooks.
Switch the filling to match the season—sour cherry in summer for bright acidity, spiced apple or pear in fall with a pinch of cinnamon, or cranberry-apple for winter holidays. In warmer months, top with a citrus glaze (add a teaspoon of lemon zest to the sugar glaze) for brightness. During holidays, drizzle with a maple glaze and sprinkle toasted pecans for a festive finish.
For make-ahead convenience, assemble and freeze bombs on a tray until solid, then bag them. When hosting, fry batches straight from frozen for consistent results and save time in the kitchen. Keep frying small batches of 2–3 to maintain oil temperature and even browning. Have glaze ready in a wide bowl so you can quickly coat each fresh batch and allow them to set while you cook the rest.
These little wonders combine speed, nostalgia, and flexible presentation—perfect for busy cooks who want a crowd-pleasing dessert with minimal fuss. Make them, share them, and adjust fillings and glazes until you find your favorite family version.
Maintain oil at 325°F for even browning; use a candy or deep-fry thermometer for accuracy.
Seal each bomb carefully by pinching and rolling the seam under to prevent filling leaks while frying.
Only fry 2–3 at a time to avoid overcrowding and temperature drops; turn often for even color.
Glaze while the bombs are still slightly warm for best adhesion; let excess drip off on a rack.
This nourishing cherry pie bombs recipe is sure to be a staple in your kitchen. Enjoy every moist, high protein slice — it is perfect for breakfast or as a wholesome snack any time.
Yes. Assemble and freeze bombs on a tray until solid, then freeze in a bag for up to 3 months. Fry from frozen, adding 1–2 minutes to the cooking time.
Keep fried bombs at room temperature in an airtight container for up to 48 hours. Reheat briefly in a 325°F oven to refresh.
This Cherry Pie Bombs recipe makes perfectly juicy, tender, and flavorful steak every time! Serve with potatoes and a side salad for an unforgettable dinner in under 30 minutes.
Fill a 2–3 quart heavy-bottomed saucepan a little over halfway with vegetable oil to create 2–3 inches depth. Attach a thermometer and heat to 325°F, maintaining this throughout frying for even cooking.
Open the biscuit can and split each biscuit into layers. Flatten each half gently with your fingers or a rolling pin into a 3–4 inch disc; do not roll too thin to avoid tearing.
Place 1 tablespoon of cherry pie filling in the center of each flattened dough round. Pinch the edges completely closed and roll the seam under to form a smooth ball; ensure the seam is sealed to prevent leakage.
Lower 2–3 bombs at a time into 325°F oil with a slotted spoon. Turn frequently to brown evenly, frying until deep golden, about 4–6 minutes total. Use small batches to maintain oil temperature.
Remove bombs with a slotted spoon and drain on paper towels. Whisk powdered sugar, milk, and corn syrup to a smooth glaze. Toss or drizzle each warm bomb in the glaze and set on a rack to let excess drip off and glaze set.
Serve warm for best flavor and texture. Allow glaze to set about 10 minutes if you need to plate them; they are excellent with a scoop of vanilla ice cream or a dusting of extra powdered sugar.
Last Step: Please leave a rating and comment letting us know how you liked this recipe! This helps our business to thrive and continue providing free, high-quality recipes for you.
Leave a comment & rating below or tag
@platemint on social media!

Saucy, cheesy baked ziti with ricotta and basil tastes like lasagna in half the effort, perfect for weeknights or crowds.

Quick, crowd-pleasing cheeseburger sliders baked golden with melty cheddar and savory beef. Ready in 30 minutes, great for parties and easy meal prep.

Crispy air fryer sweet potato fries with tender centers, fast-food flavor without deep frying. Ready in minutes and irresistibly snackable.
Leave a comment & rating below or tag @platemint on social media!
Enjoyed this recipe? Share it with friends and family, and don't forget to leave a review!
This recipe looks amazing! Can't wait to try it.
Comments are stored locally in your browser. Server comments are displayed alongside your local comments.

Join to receive our email series which contains a round-up of some of our quick and easy family favorite recipes.
