
>>

A stunning no-bake layered cherry cheesecake lush — creamy cheesecake, fluffy whipped layers, and bright cherry topping in every bite. Ready with minimal hands-on time.
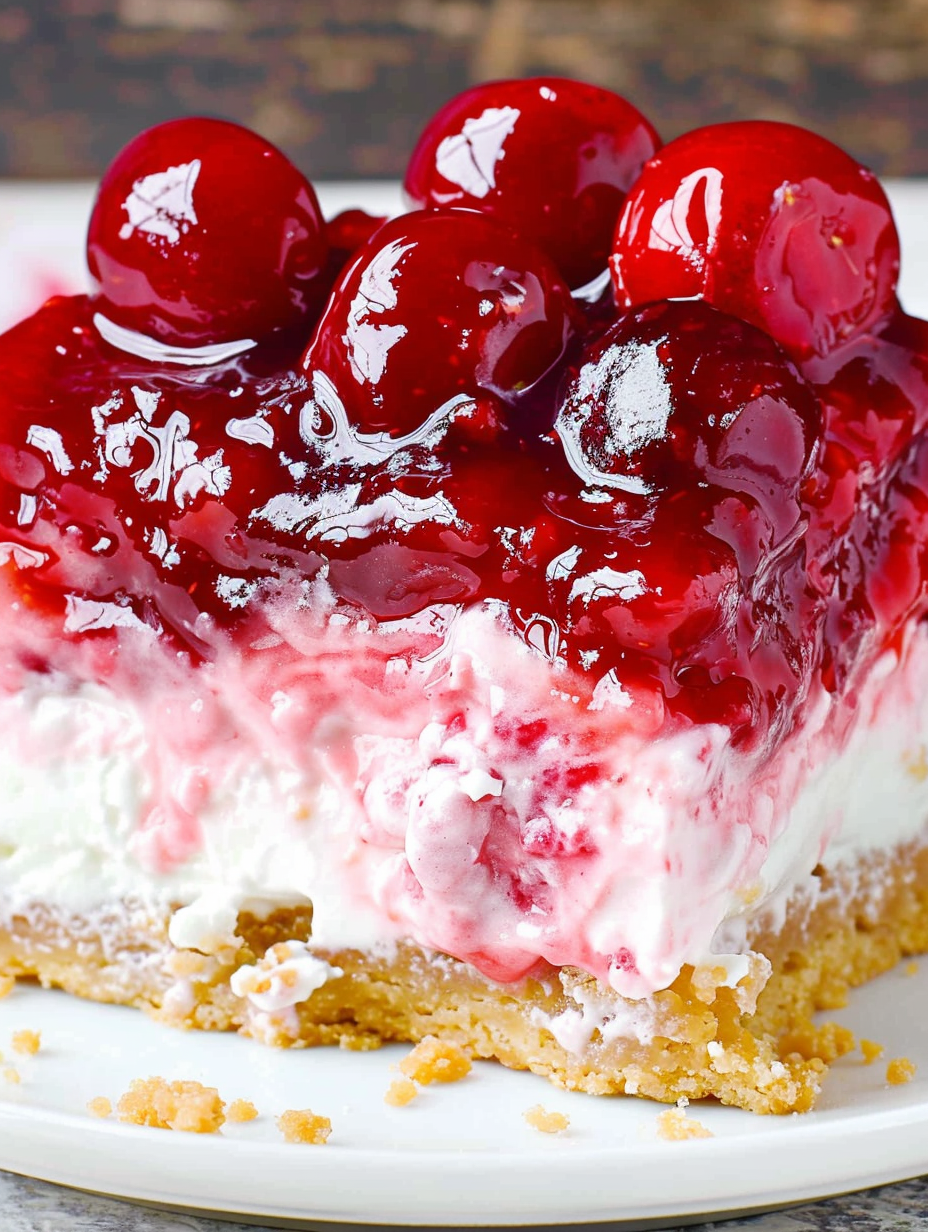
This Cherry Cheesecake Lush is one of those desserts that always makes an entrance. I discovered this layered treat at a summer potluck years ago and immediately tracked down the combination of crunchy graham crust, tangy cream cheese layer, whipped cloud-like filling, and bright cherry topping. From the first forkful I knew it would become a staple when I needed something that looks impressive but requires very little oven time — in fact, none. The contrast of textures is what makes it special: a crisp, buttery base, a velvety cream cheese middle, and a light, fruity top that cuts through the richness.
I first made it for a family gathering on a hot July weekend when baking felt impossible. People kept coming back for second and third pieces; my aunt asked for the recipe, and my neighbor begged for leftovers. Over time I've refined the method — pressing the crust firmly, ensuring the cream cheese is completely softened, and chilling the layers so they set cleanly when sliced. The result is a dessert that is as satisfying to slice as it is to eat: neat squares that hold their layers beautifully and deliver a perfect balance of buttery, sweet, and slightly tart notes.
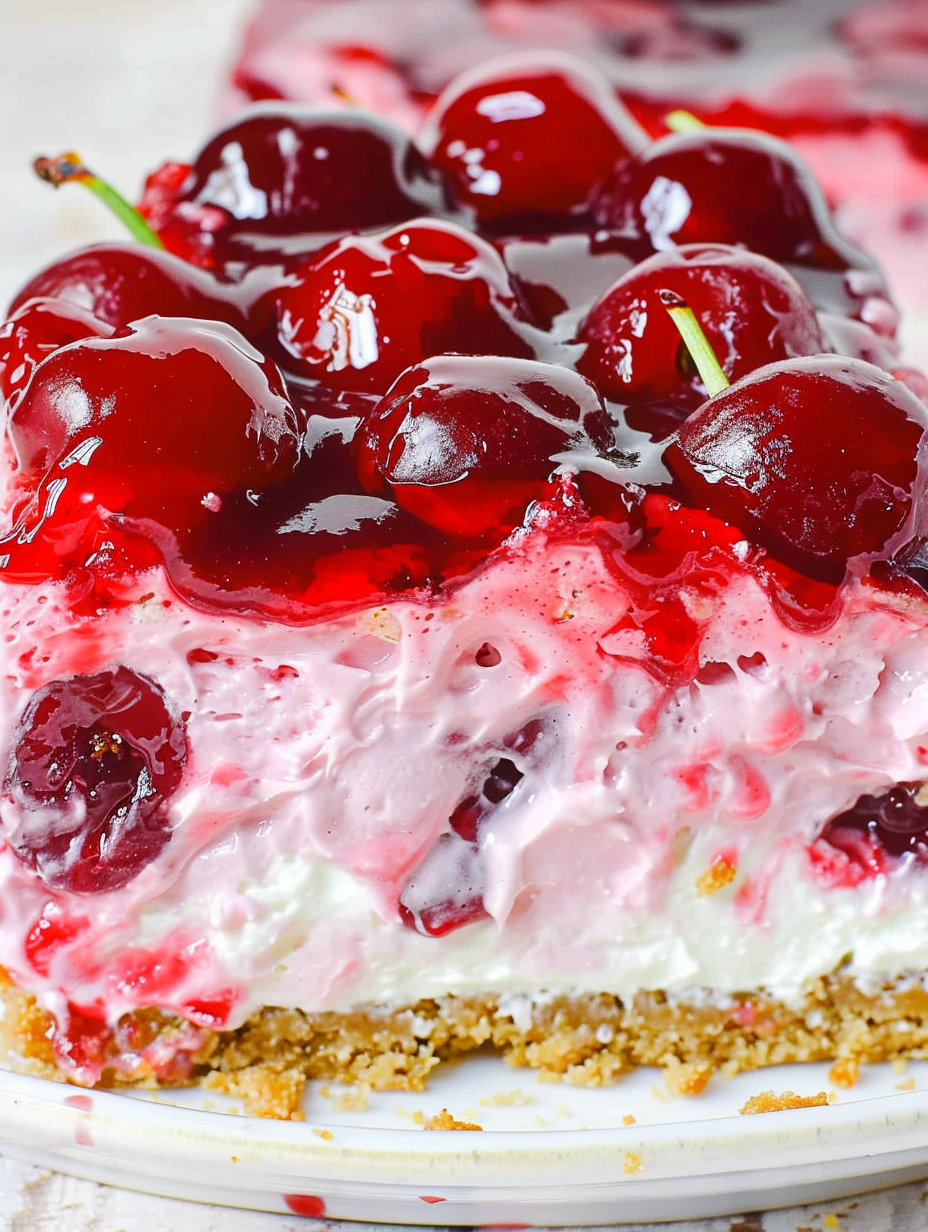
My family loves how little hands-on time this takes; it’s the sort of dish you can assemble between errands and still bring out that evening. I always get compliments about the balance of flavors — the crust’s toastiness, the cream cheese’s tang tempered by powdered sugar, and the bright cherries that cut through. It’s become my go-to when I want something that reads “made with love” without spending hours in the kitchen.
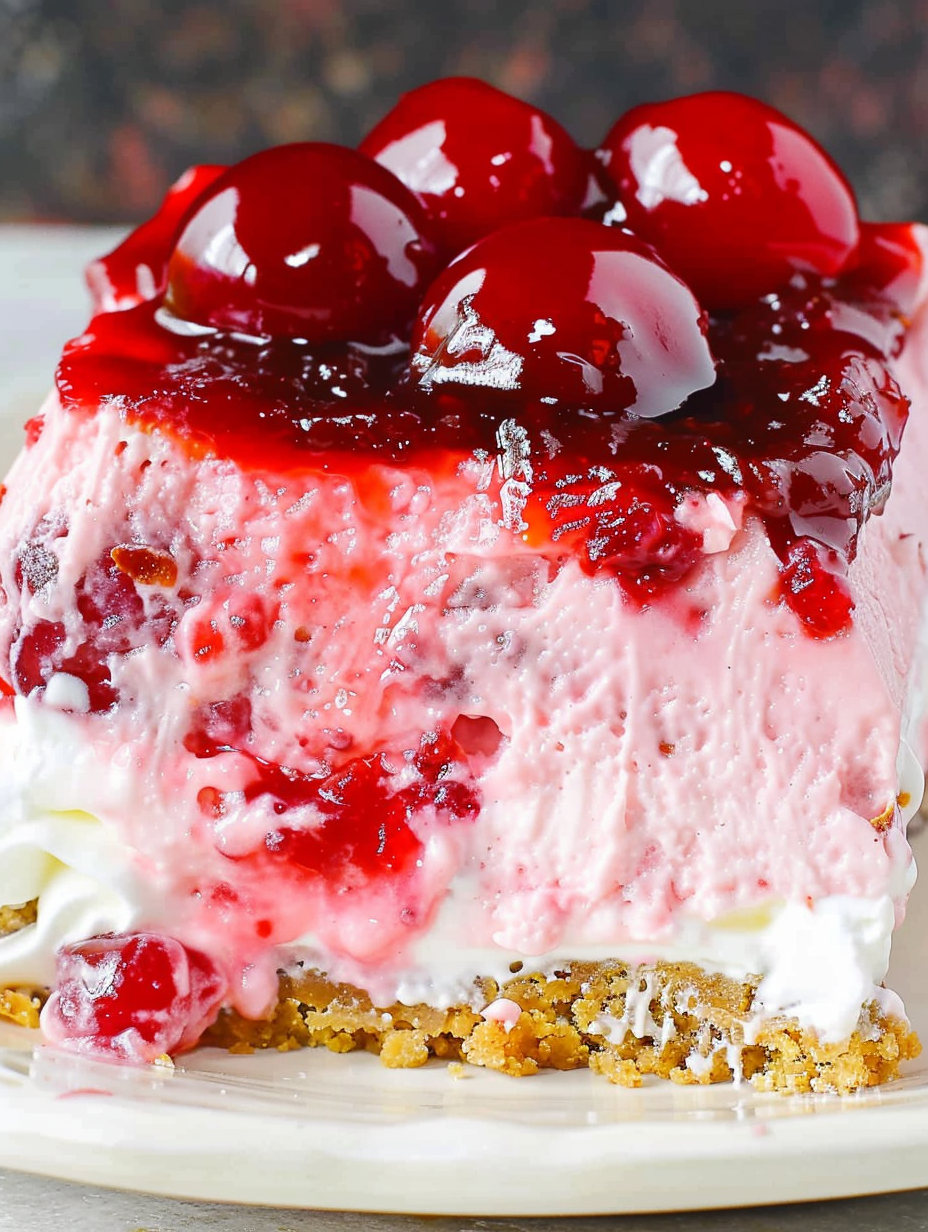
One of my favorite parts is how reliably it disappears at gatherings. The bright cherry topping makes it feel celebratory, but the straightforward technique means you can prepare it the night before a holiday rather than rushing the morning of. My niece once asked to take a corner piece home and declared it the best thing she’d ever eaten — the kind of compliment that turns this dish into an instant favorite.
Store the dessert covered with plastic wrap or an airtight lid in the refrigerator for up to four days. If you plan to freeze, cut into serving squares and arrange in a single layer on a tray to flash-freeze for one hour, then stack with parchment between layers in a freezer-safe container for up to three months. To serve from frozen, transfer to the refrigerator to thaw overnight to preserve texture; avoid microwaving to defrost, as the whipped layers will collapse and the crust can become soggy.
For a gluten-free option, use certified gluten-free graham crumbs or finely crushed gluten-free cookies. To replace Cool Whip with a fresher option, whip 2 cups heavy cream to stiff peaks and stabilize with 1 tablespoon powdered sugar and 1 teaspoon cornstarch per cup if you need extra hold. For a lower-sugar version, use a reduced-sugar pie filling and cut powdered sugar by 25 percent, but expect the flavor to be less sweet and slightly more tang-forward.
Serve chilled squares on a platter garnished with a few fresh cherries, a sprig of mint, or a light dusting of powdered sugar for contrast. Pair with black coffee or lightly sweetened iced tea to balance richness. For a brunch or tea service, place each square on a small doily and serve on dessert plates with a fork and a short, sharp palate cleanser like lemon sorbet.
Swap cherry pie filling for blueberry in summer for a lighter, brighter finish, or use apple-cinnamon pie filling in autumn for a warming twist — in that case, add a pinch of ground cinnamon to the cream cheese layer. For holidays, top with toasted almond slivers or crushed amaretti cookies for texture contrast. You can also layer in a thin spread of raspberry jam between the cream cheese and cherry layers for a more complex fruit profile.
Prepare the crust and cream cheese layer the night before, cover, and keep chilled. Assemble the whipped cherry layer the morning of serving to keep the top glossy. Use a 9x9-inch pan to make 12 generous squares; for convenient grab-and-go portions, spoon into individual mason jars and refrigerate — they keep well for 3 days and are excellent for packed picnics.
However you serve it, this layered cherry cheesecake lush is a deceptively simple way to present a dessert that looks and tastes like you spent hours in the kitchen. It’s forgiving, adaptable, and endlessly crowd-pleasing — try it once and you’ll see why it’s become a favorite in my home.
Let the cream cheese come fully to room temperature to avoid lumps when mixing.
Press the crust firmly into the pan so it holds when cutting portions.
Chill the assembled layers at least 4 hours for clean slices; overnight is best.
Warm a knife under hot water and wipe it clean between cuts for neat squares.
This nourishing cherry cheesecake lush recipe is sure to be a staple in your kitchen. Enjoy every moist, high protein slice — it is perfect for breakfast or as a wholesome snack any time.
This Cherry Cheesecake Lush recipe makes perfectly juicy, tender, and flavorful steak every time! Serve with potatoes and a side salad for an unforgettable dinner in under 30 minutes.
Combine 2 cups graham cracker crumbs with 1/2 cup melted butter until the mixture resembles wet sand. Press firmly into the bottom of a 9x9-inch pan using the back of a measuring cup to compact. Chill while preparing other layers.
Beat 8 ounces softened cream cheese with 1 cup powdered sugar and 1 teaspoon vanilla until smooth. Ensure the cream cheese is fully softened to avoid lumps and achieve a silky texture.
Gently fold 8 ounces thawed Cool Whip into the cream cheese mixture with a rubber spatula until light and uniform. Spread evenly over the chilled crust and smooth the surface.
Stir half of the 21-ounce can of cherry pie filling with 2 cups Cool Whip, 1/4 cup powdered sugar, and 1 teaspoon vanilla. Spoon this mixture over the cream cheese layer and smooth carefully.
Freeze the pan for 30 minutes to help the middle layer set. Remove and spoon the remaining cherry pie filling on top for a glossy finish.
Cover and refrigerate for at least 4 hours or overnight. For neat slices, chill longer and use a warm, wiped knife between cuts. Cut into 12 squares and serve chilled.
Last Step: Please leave a rating and comment letting us know how you liked this recipe! This helps our business to thrive and continue providing free, high-quality recipes for you.
Leave a comment & rating below or tag
@platemint on social media!

Saucy, cheesy baked ziti with ricotta and basil tastes like lasagna in half the effort, perfect for weeknights or crowds.

Quick, crowd-pleasing cheeseburger sliders baked golden with melty cheddar and savory beef. Ready in 30 minutes, great for parties and easy meal prep.

Crispy air fryer sweet potato fries with tender centers, fast-food flavor without deep frying. Ready in minutes and irresistibly snackable.
Leave a comment & rating below or tag @platemint on social media!
Enjoyed this recipe? Share it with friends and family, and don't forget to leave a review!
This recipe looks amazing! Can't wait to try it.
Comments are stored locally in your browser. Server comments are displayed alongside your local comments.

Join to receive our email series which contains a round-up of some of our quick and easy family favorite recipes.
