
Cheesecake Brownies – Chocolate & Cream Cheese Delight

Juicy, fudgy chocolate squares with a creamy cream cheese swirl. Rich texture, beautiful marbling, and perfect for sharing.
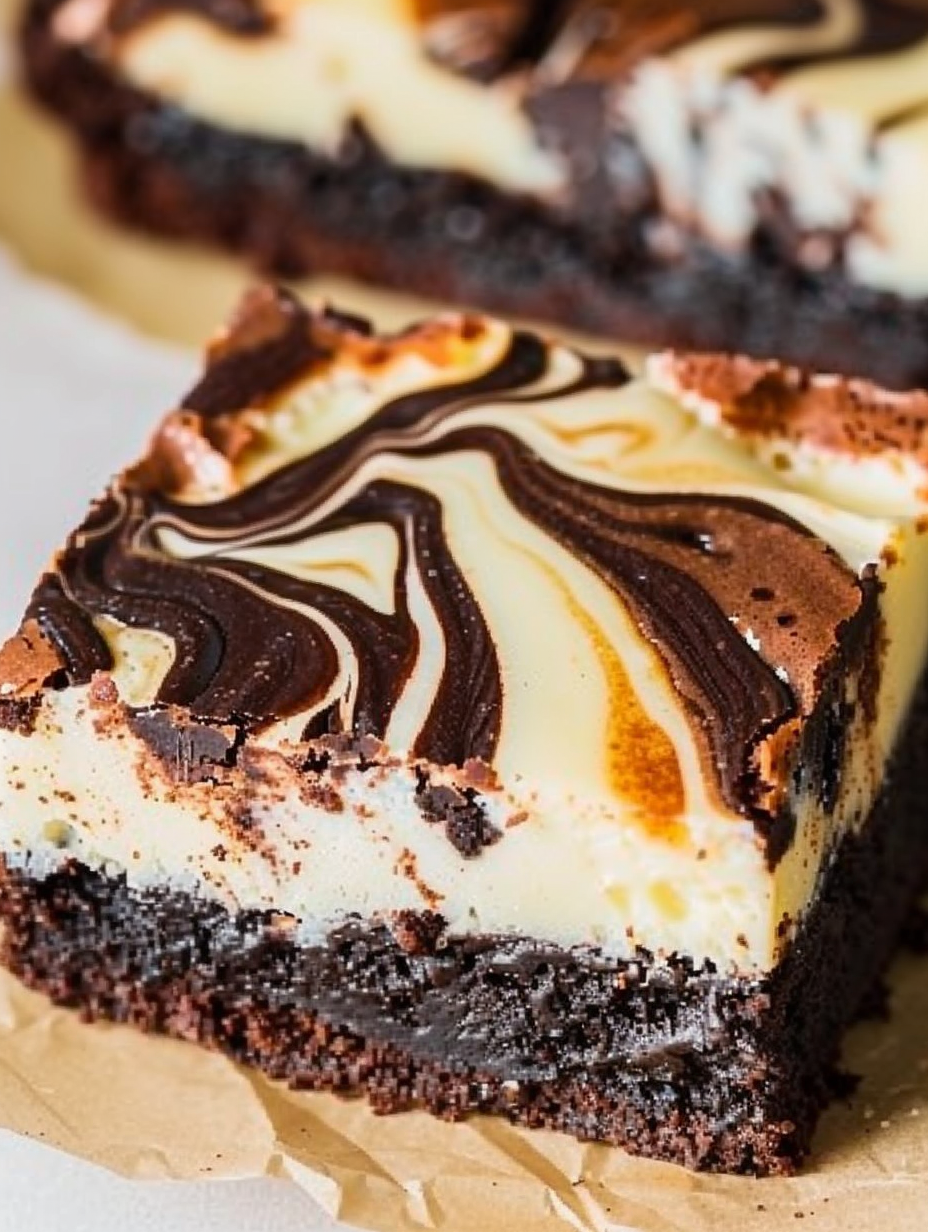
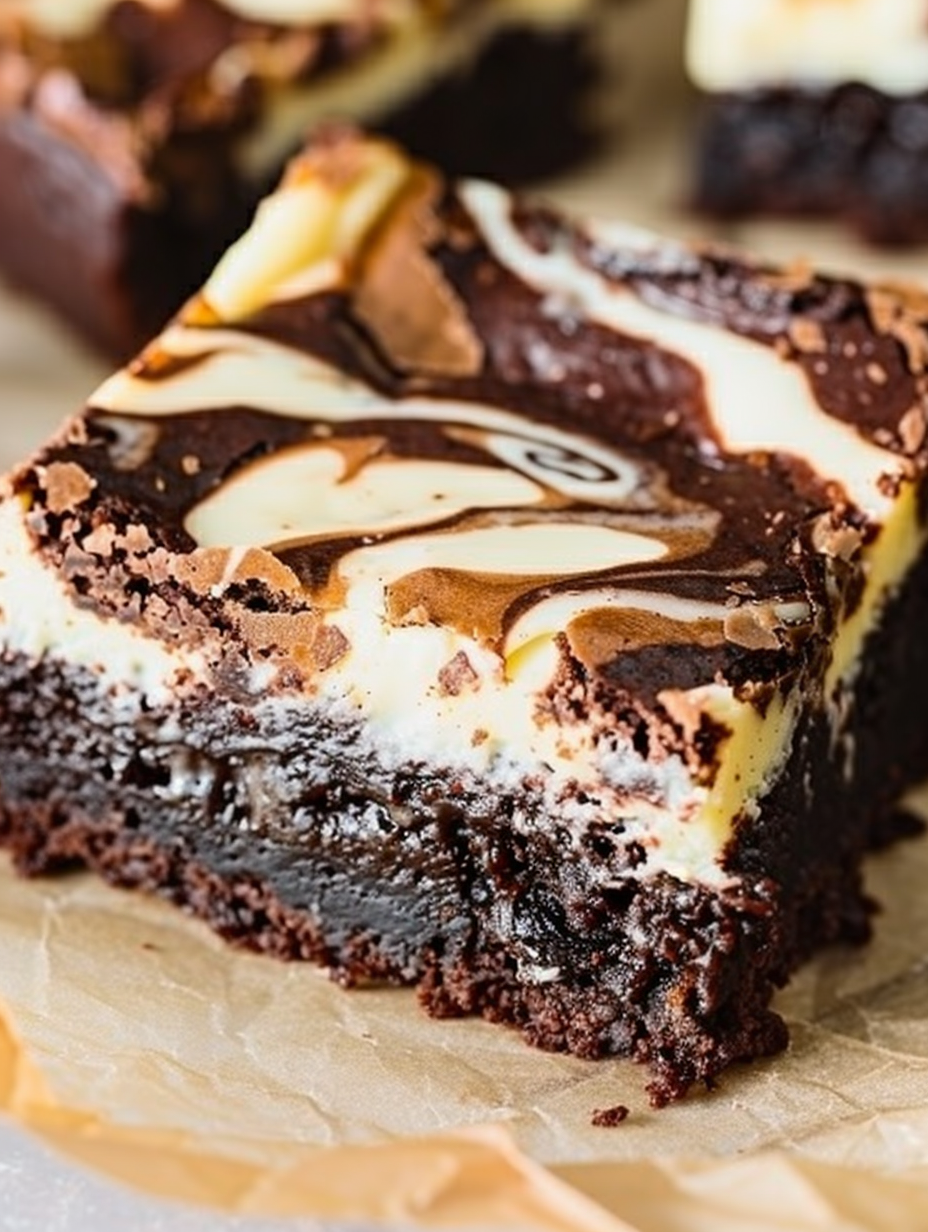
This recipe for cheesecake brownies has been a reliable crowd pleaser in my kitchen for years. I first stumbled on the idea during a weekend baking session when I wanted something that combined two favorite desserts. The result was so irresistible that I started making it for weekend get togethers and small celebrations. The top is glossy and slightly crackled, the interior is dense and fudgy, and the cream cheese layer adds a velvety tang that balances the chocolate. Every time I take the pan out of the oven the room fills with warm chocolate aroma and conversations immediately stop while everyone reaches for a slice.
I remember preparing these for a family reunion and watching the platter disappear in under ten minutes. What makes this version special is the balance between the deep cocoa in the base and the light, slightly tart cream cheese swirl. The marbling looks professional even when made by hand, and it is forgiving for home bakers. Use a good quality dark chocolate and full fat cream cheese for the best texture and flavor. These bars travel well, keep their shape, and taste great at room temperature or lightly chilled.
Why You'll Love This Recipe
- This comes together quickly, about 20 minutes of prep time and 30 minutes of baking time, making it ideal for last minute guests.
- It uses pantry friendly ingredients and a simple technique, so you rarely need special shopping runs.
- The final texture is fudgy and indulgent, while the cream cheese swirl adds a tangy lift that keeps each square from feeling too heavy.
- It is easily customizable, add chocolate chips or fresh berries for a seasonal twist or leave it classic for broad appeal.
- It stores well in the refrigerator and freezes beautifully, so it works for make ahead entertaining and meal prep alike.
- The marbled top looks impressive without complicated piping or decorating techniques, perfect for bakers of every level.
I have served these at potlucks and small dinner parties and each time someone asks for the recipe. My brother always takes the first slice and declares it the best brownie he has had. I learned that a gentle swirl creates the prettiest pattern, and over stirring the cheesecake layer makes it less dramatic. These little discoveries have made this a weekly repeat in colder months when comfort baking feels essential.
Ingredients
- Dark chocolate: Use about 3.5 ounces, roughly two thirds cup chopped. Choose a 60 to 70 percent cacao bar or good quality dark chocolate chips for a deep chocolate flavor.
- Butter: Half a cup plus 1 tablespoon, softened and measured precisely. Real butter gives the best mouthfeel, stick brands such as Kerry Gold or another high quality butter work very well.
- Sugar: Use 1/2 cup plus 2 tablespoons granulated sugar for a balanced sweetness that does not overpower the cocoa.
- Eggs: Two medium eggs for the brownie base and one medium egg for the cream cheese layer. Room temperature eggs incorporate more smoothly into batters.
- Flour: About 3/4 cup plus 1 tablespoon all purpose flour. Spoon into the measuring cup and level off for accuracy to avoid a cakier texture.
- Cocoa powder: Two to three tablespoons unsweetened cocoa powder. Dutch processed gives a darker color and deeper flavor, natural cocoa will work and make the top slightly lighter.
- Salt: One pinch to awaken the chocolate flavors.
- Cream cheese: Seven ounces full fat cream cheese, softened to room temperature for a smooth filling. Philadelphia or similar brands provide a reliable texture.
- Powdered sugar: About one third cup for the cheesecake layer to keep it lightly sweet and silky.
- Vanilla: One teaspoon vanilla extract or one packet of vanilla sugar if available, to round the tang of the cream cheese.
- Pan treatment: Butter for greasing the pan or parchment paper for easy removal.
Instructions
Prepare oven and pan: Preheat to 350 degrees Fahrenheit using conventional heat, or 320 degrees if using a fan assisted oven. Grease an 11 by 9 inch pan or line with parchment paper, leaving an overhang for easy lifting. Proper preheating ensures an even bake and predictable timing. Make the chocolate base: Chop the dark chocolate into small pieces and melt together with the butter using a double boiler or a heat proof bowl set over simmering water. Stir until smooth then remove from heat and allow the mixture to cool until just warm. Stir in the granulated sugar, then add the two eggs one at a time, whisking until glossy. Sift and fold in the flour, cocoa powder and a pinch of salt until just combined. Avoid over mixing to keep the base fudgy and dense. Prepare the cream cheese layer: In a separate bowl, beat the softened cream cheese with the single egg, powdered sugar and vanilla until smooth and without lumps. Use a rubber spatula to scrape down the sides often. The filling should be pourable but thick so it sits on the brownie base without sinking entirely. Assemble and swirl: Spread roughly two thirds of the chocolate batter evenly into the prepared pan. Pour the cream cheese mixture over the chocolate base and level gently. Drop the remaining chocolate batter by spoonfuls across the cream cheese layer. Using a skewer or fork, swirl the chocolate through the cream cheese with gentle figure eight motions to create an attractive marbled pattern. Less is more here; too much swirling blends the colors together. Bake and test for doneness: Bake for approximately 30 minutes. A thin knife inserted near the center should come out with moist crumbs rather than raw batter. The cheesecake portion will still look slightly jiggly but not liquid. Remove from oven and let the pan cool on a wire rack until completely set before cutting to maintain clean squares. Cool and serve: Cool to room temperature then refrigerate for 30 minutes to firm the cream cheese layer for cleaner slices. Use a sharp knife warmed under hot water and wiped dry between cuts to create neat edges. Store leftovers covered in the refrigerator for up to five days.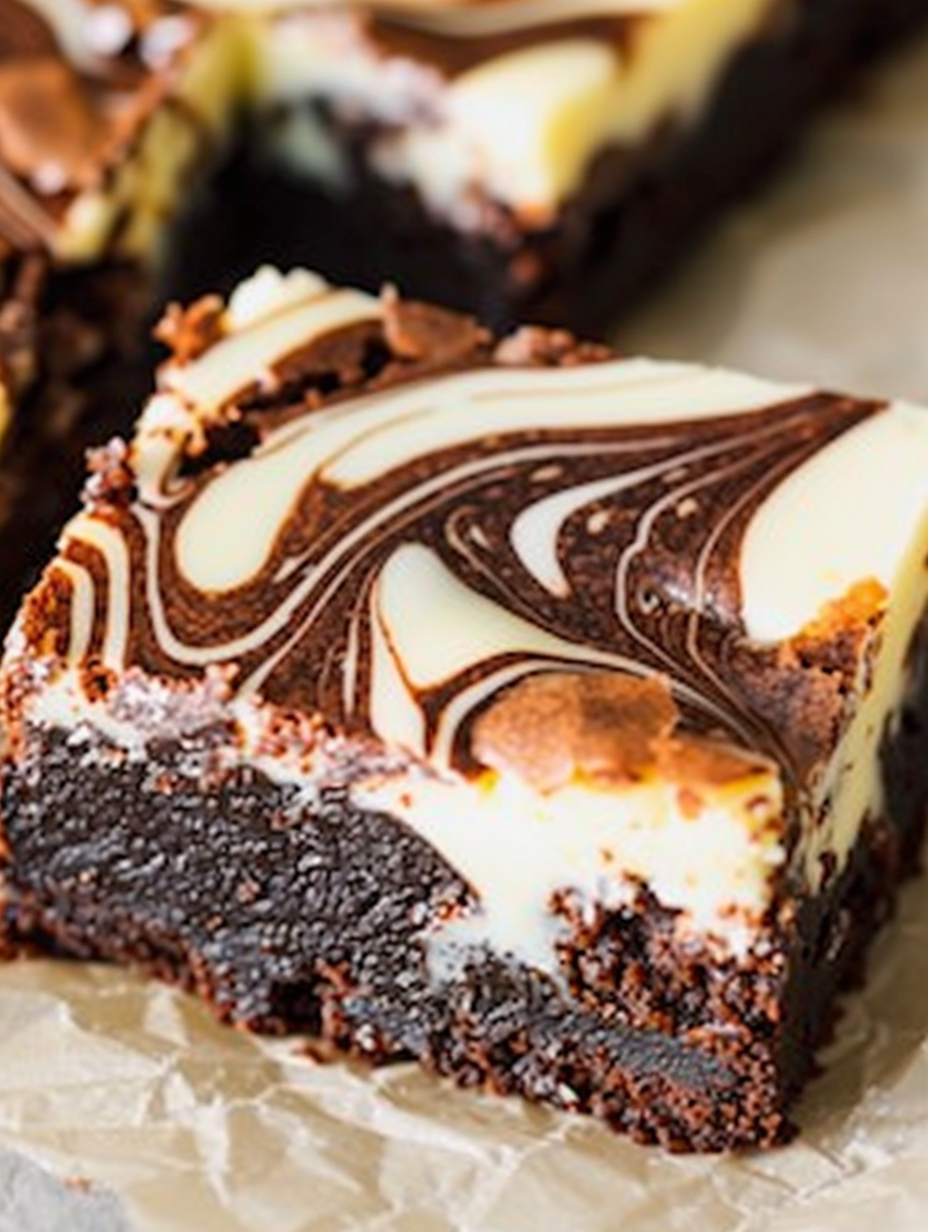
You Must Know
- These bars are best stored in the refrigerator and will keep for up to five days. They freeze well for up to three months wrapped tightly.
- Approximate calories per piece are about 300 kilocalories, depending on portion size and exact ingredients.
- Avoid over baking to preserve a fudgy interior. The center should appear set but slightly glossy when done.
- Room temperature ingredients ensure smooth, lump free mixing and an even texture.
- For softer slices, bring refrigerated brownies to room temperature for 20 minutes before serving.
My favorite aspect is the versatility. On busy afternoons I will add a handful of chocolate chips to the batter for extra texture or sprinkle flaky sea salt on top before baking. At a recent gathering a friend brought raspberries and the tart fruit paired beautifully with the dense chocolate and tangy cream cheese. Every time I make these I experiment a little and learn a new small tweak that improves the final result.
Storage Tips
Store cooled squares in an airtight container in the refrigerator for up to five days. If you plan to freeze, place the cooled slices on a baking sheet until firm, then wrap each piece individually in plastic wrap followed by foil and freeze in a resealable bag for up to three months. Thaw overnight in the refrigerator and bring to room temperature for 20 to 30 minutes before serving. For travel, pack in a shallow cooler with an ice pack to keep the cream cheese layer stable and avoid sliding.
Ingredient Substitutions
If dark chocolate is not available, use a high quality semisweet chocolate for a slightly sweeter result. Swap all purpose flour for a gluten free 1 to 1 blend to make a gluten free version, noting that texture will vary. Replace granulated sugar with coconut sugar for a subtle caramel note and a darker crumb. For vanilla sugar packets, use one teaspoon vanilla extract as a direct substitute. Low fat cream cheese will yield a less rich filling, and I recommend using full fat for the classic creamy mouthfeel.
Serving Suggestions
Serve slices plain or with a dusting of powdered sugar. Fresh berries, a spoonful of whipped cream, or a drizzle of warm chocolate sauce work nicely. For a party platter, alternate plain squares with versions that have chocolate chips or a scattering of chopped toasted nuts for textural contrast. These squares pair well with coffee, black tea, or a glass of milk. For an adult twist, a few drops of orange liqueur added to the batter complements the dark chocolate.
Cultural Background
The combination of dense chocolate squares with a cream cheese layer is an evolution of classic American baking where brownies and cheesecake meet. This hybrid likely emerged from home bakers seeking to add creaminess to the familiar brownie format. Variations appear across cookbooks and family tables, each with unique marbling techniques and flavor add ins. It reflects a larger tradition of combining textures and layers in desserts to achieve balance between richness and brightness.
Meal Prep Tips
Make a double batch and freeze half for later, which saves time on future busy weeks. Bake a day ahead and refrigerate overnight to allow flavors to meld and slicing to be neater. Portion into single servings and keep chilled for grab and go snacks. For office treats, place pieces on parchment in a shallow box and keep cool with a small gel pack to protect the cream cheese layer during transport.
These cheesecake brownies are satisfying comfort baking that still look elegant on the plate. Try them once and you will find your own go to additions and presentation style. Share with friends and watch how quickly they disappear.
Pro Tips
Use room temperature eggs and cream cheese for a smooth batter and even texture.
Do not over mix the brownie batter after adding flour to keep the interior fudgy.
Warm the knife between cuts to create cleaner slices without crumbling.
This nourishing cheesecake brownies – chocolate & cream cheese delight recipe is sure to be a staple in your kitchen. Enjoy every moist, high protein slice — it is perfect for breakfast or as a wholesome snack any time.
Tags
Cheesecake Brownies – Chocolate & Cream Cheese Delight
This Cheesecake Brownies – Chocolate & Cream Cheese Delight recipe makes perfectly juicy, tender, and flavorful steak every time! Serve with potatoes and a side salad for an unforgettable dinner in under 30 minutes.
Ingredients
Brownie Base
Cheesecake Layer
Instructions
Prepare oven and pan
Preheat oven to 350 degrees Fahrenheit for conventional ovens or 320 degrees for fan assisted ovens. Grease an 11 by 9 inch pan or line with parchment paper with an overhang for easy removal.
Make the chocolate base
Melt chopped dark chocolate and butter over a double boiler until smooth. Cool slightly, stir in granulated sugar, then whisk in two eggs. Fold in flour, cocoa powder and a pinch of salt until just combined, avoiding over mixing.
Prepare the cream cheese layer
Beat softened cream cheese with one egg, powdered sugar and vanilla until smooth and pourable. Scrape the bowl often to prevent lumps and ensure even texture.
Assemble and swirl
Spread two thirds of the brownie batter into the pan, pour the cream cheese mixture on top, then dollop remaining brownie batter and swirl gently with a skewer to create marbling.
Bake and cool
Bake about 30 minutes until the center is set with moist crumbs on a skewer. Cool completely in the pan, then chill for cleaner cuts and serve.
Last Step: Please leave a rating and comment letting us know how you liked this recipe! This helps our business to thrive and continue providing free, high-quality recipes for you.
Nutrition
Did You Make This?
Leave a comment & rating below or tag
@platemint on social media!
Categories:
You might also like...

Cheesy Baked Ziti Casserole
Saucy, cheesy baked ziti with ricotta and basil tastes like lasagna in half the effort, perfect for weeknights or crowds.

Juicy Cheeseburger Sliders Bake
Quick, crowd-pleasing cheeseburger sliders baked golden with melty cheddar and savory beef. Ready in 30 minutes, great for parties and easy meal prep.

Air Fryer Sweet Potato Fries
Crispy air fryer sweet potato fries with tender centers, fast-food flavor without deep frying. Ready in minutes and irresistibly snackable.
Did You Make This?
Leave a comment & rating below or tag @platemint on social media!
Rate This Recipe
Share This Recipe
Enjoyed this recipe? Share it with friends and family, and don't forget to leave a review!
Comments (1)
This recipe looks amazing! Can't wait to try it.
Comments are stored locally in your browser. Server comments are displayed alongside your local comments.

Hi, I'm Wendie!
What's Popular

30-Minute Meals!
Join to receive our email series which contains a round-up of some of our quick and easy family favorite recipes.