
>>

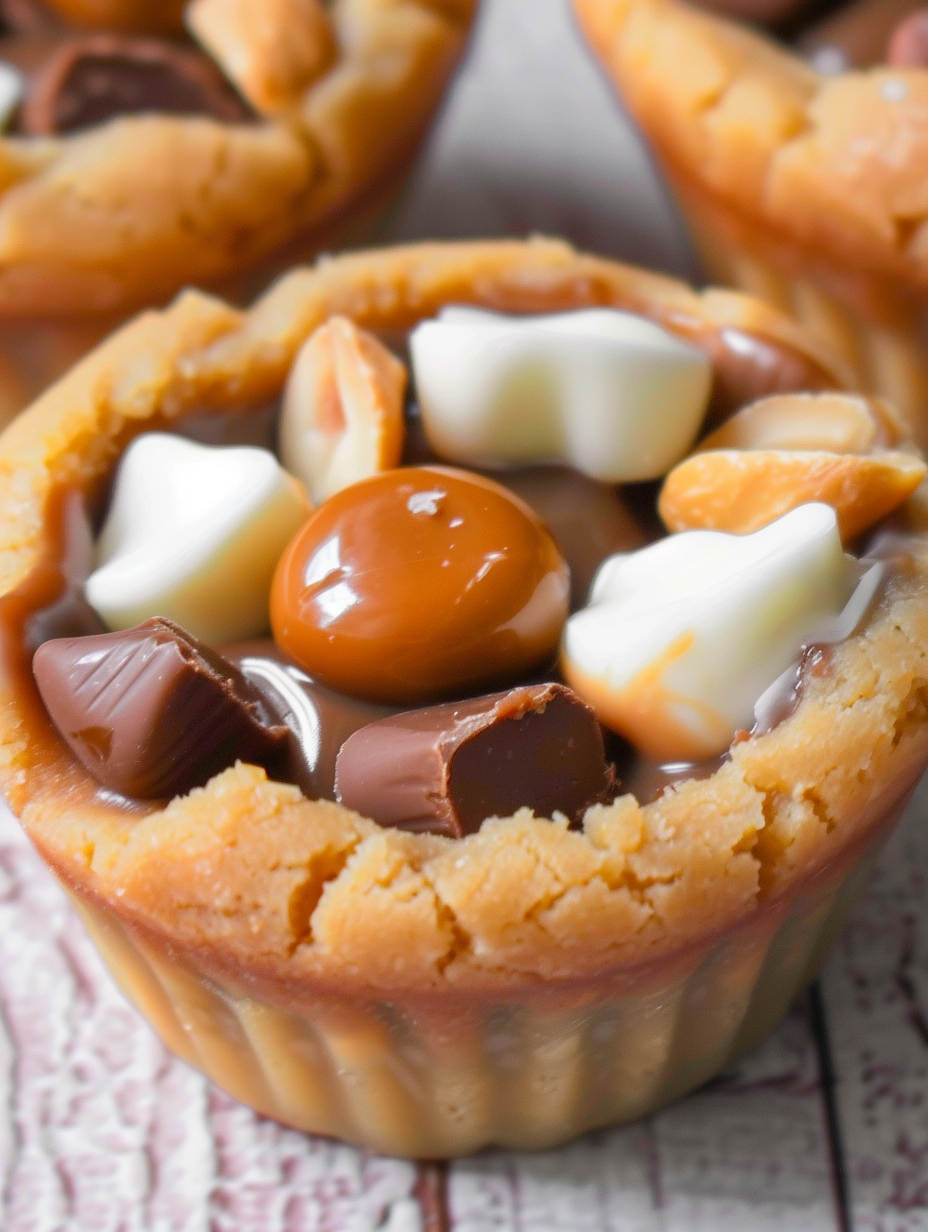
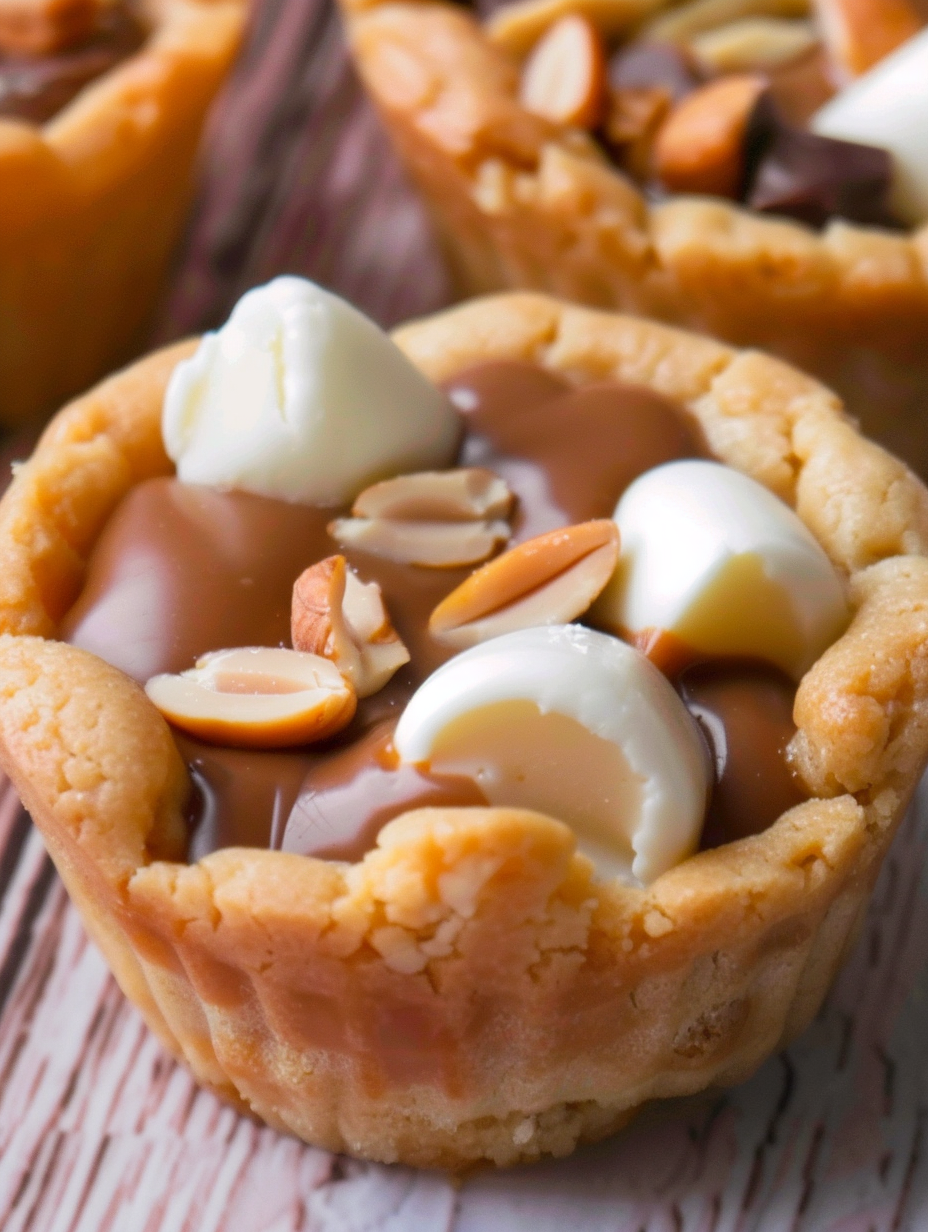
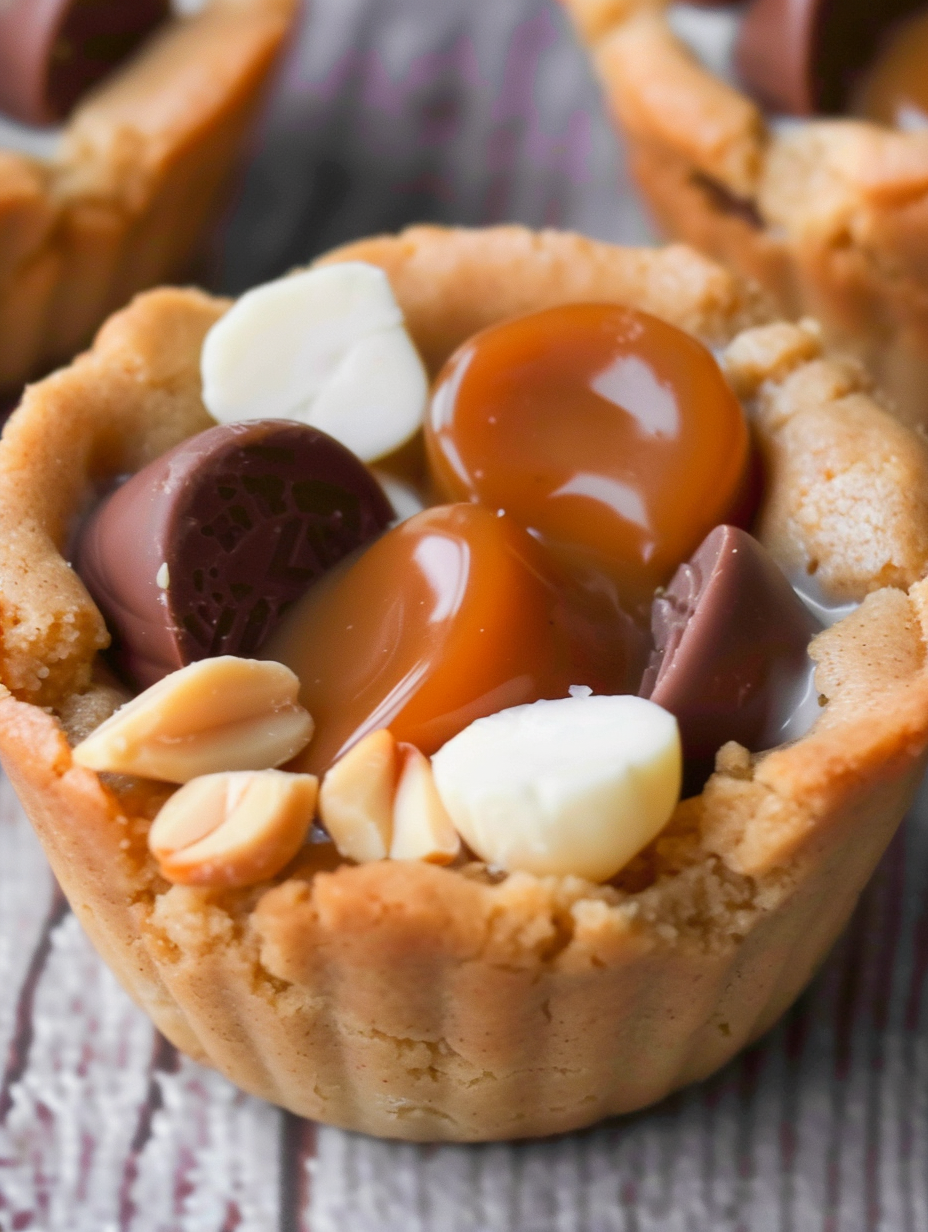
Buttery peanut butter cookie cups filled with gooey caramel, mini peanut butter cups, white chocolate peanut butter cups and crunchy roasted peanuts — a nostalgic, crowd-pleasing treat.
This recipe for Caramel Peanut Butter Cookie Cups has become my go-to dessert for parties, potlucks and lazy weekend baking sessions. I first assembled this combination on a rainy afternoon while looking for something that combined three of my favorite things: peanut butter, a soft chewy cookie, and a molten caramel center. The result was better than I imagined — the cookies held their shape like a little edible bowl, the caramel melted into a sweet, chewy heart, and the mix of milk and white chocolate with roasted peanuts created a textural contrast that made everyone reach for seconds. They taste like everything nostalgic about childhood candy, but elevated by homemade dough and a perfectly baked edge.
I discovered this formula after experimenting with pressed cookie dough in a muffin tin and using candy bits as the filling. What makes these cookie cups special is how the peanut butter dough provides both flavor and structure: it browns slightly at the edges while remaining tender inside so the cups stay intact when you remove them from the pan. These are indulgent, shareable, and simple enough to make with kids. They pair beautifully with coffee or milk and are sturdy enough to travel, which is why I always bring a batch to family gatherings.
My family’s reaction the first time I served these was immediate applause: kids loved the candy surprise, and adults appreciated the balanced sweetness. Over time I've learned to press the dough gently to create uniform cups and to add the candy near the end so the chocolate melts but the shape remains. These tiny discoveries make all the difference.
My favorite aspect is watching the caramel turn glossy as it melts and tucks into the chocolate — that moment always gets a cheer from the kids. Over the years I’ve learned to time the second bake carefully so the chocolate softens without losing its shape, which preserves the signature look of these cups while ensuring the center is meltingly good.
Proper storage keeps the cookie cups tasting fresh: once completely cooled, place them in a single layer in an airtight container with parchment between layers. At room temperature they remain soft and tender for about 2–3 days. For longer storage, refrigerate up to 7 days, though refrigeration firms the chocolate slightly — warm them for 10 minutes at 300°F to restore a softer center. To freeze, flash-freeze on a tray until solid, then pack into a freezer-safe container for up to 3 months. Thaw at room temperature for 30–45 minutes before serving.
If you want to adjust for availability or taste, try swapping crunchy peanut butter for smooth to add texture (use the same volume). For a chocolate-forward version, substitute the white chocolate minis for dark chocolate minis. To reduce sweetness slightly, replace half the golden brown sugar with granulated sugar or use light brown sugar. For a peanut-free option, use almond butter and pick allergy-safe candies, but note the flavor shifts and the dough may be slightly drier — add 1 tablespoon honey or milk to compensate.
Serve warm or at room temperature with a glass of cold milk or a bold coffee to cut through the sweetness. Garnish with a light drizzle of melted chocolate or a sprinkle of flaky sea salt for contrast. These are great on dessert platters alongside fruit, or packaged in cellophane bags with a ribbon for gifting. For parties, place on tiered trays so the glossy centers catch the light and invite guests to grab one.
These cups are a playful spin on American candy and cookie traditions — combining the classic pressed cookie technique (think peanut butter blossoms) with candy-filled surprises typical of holiday baking. They echo regional tendencies to combine chocolate and caramel, a pairing popularized by confectionery brands throughout the 20th century. The mix of milky and white chocolate mirrors modern dessert plating trends that value contrast in sweetness and appearance.
In autumn, swap the roasted peanuts for toasted pecans and use caramel candies flavored with cinnamon for a warming spiced version. For spring celebrations, top with pastel-colored chocolate minis or swap white chocolate for strawberry-flavored candies. During the holidays, sprinkle crushed peppermint or use salted caramel for a festive twist. Small changes keep the basic method fresh year-round.
To make these for a week of treats, bake two pans and cool completely. Store one pan for immediate enjoyment and freeze the other. Reheat frozen cups in a 325°F oven for 6–8 minutes to revive the gooey center and crisp the edges. For packed lunches, wrap individually in parchment to prevent sticking and keep in a lunchbox compartment to avoid crushing.
These Caramel Peanut Butter Cookie Cups are a dependable, joyful dessert that invites creativity and sharing. Whether you make them for a crowd or a cozy night in, they reward a little care with a lot of smiles.
If the dough is too soft to shape, chill it 10 minutes to firm up for easier pressing into muffin cups.
Press the dough so the walls are about 1/4 inch thick to prevent tearing when removing from the pan.
Cool cookie cups in the pan for 15 minutes before removing; removing too early makes them fall apart.
Freeze assembled, unbaked cups on a tray then store in bags; bake from frozen adding 2–4 minutes to initial bake.
Use single-layer storage with parchment between layers to prevent sticking and preserve glossy toppings.
This nourishing caramel peanut butter cookie cups recipe is sure to be a staple in your kitchen. Enjoy every moist, high protein slice — it is perfect for breakfast or as a wholesome snack any time.
This Caramel Peanut Butter Cookie Cups recipe makes perfectly juicy, tender, and flavorful steak every time! Serve with potatoes and a side salad for an unforgettable dinner in under 30 minutes.
Preheat oven to 350°F and grease a 12-cup muffin tin (or two tins) with nonstick spray or softened butter.
Cream together the softened butter, smooth peanut butter, golden brown sugar and granulated sugar until light and fluffy. Add eggs one at a time and stir in vanilla.
Slowly mix in the flour, baking powder and salt until a soft dough forms. Chill 10 minutes if dough is too soft to shape.
Divide dough into 24 portions and press each into the bottom and up the sides of greased muffin cups, creating 1/4 inch thick walls.
Bake at 350°F for 11–13 minutes until edges begin to brown and centers look set. Remove from oven but keep oven on.
Press one unwrapped caramel into each cup, top with two milk chocolate minis and two white chocolate minis, sprinkle peanuts, then return to oven for 5 minutes.
Cool in the pan for about 15 minutes before removing. Use an offset spatula if necessary and serve warm or at room temperature.
Last Step: Please leave a rating and comment letting us know how you liked this recipe! This helps our business to thrive and continue providing free, high-quality recipes for you.
Leave a comment & rating below or tag
@platemint on social media!

Saucy, cheesy baked ziti with ricotta and basil tastes like lasagna in half the effort, perfect for weeknights or crowds.

Quick, crowd-pleasing cheeseburger sliders baked golden with melty cheddar and savory beef. Ready in 30 minutes, great for parties and easy meal prep.

Crispy air fryer sweet potato fries with tender centers, fast-food flavor without deep frying. Ready in minutes and irresistibly snackable.
Leave a comment & rating below or tag @platemint on social media!
Enjoyed this recipe? Share it with friends and family, and don't forget to leave a review!
This recipe looks amazing! Can't wait to try it.
Comments are stored locally in your browser. Server comments are displayed alongside your local comments.

Join to receive our email series which contains a round-up of some of our quick and easy family favorite recipes.
