
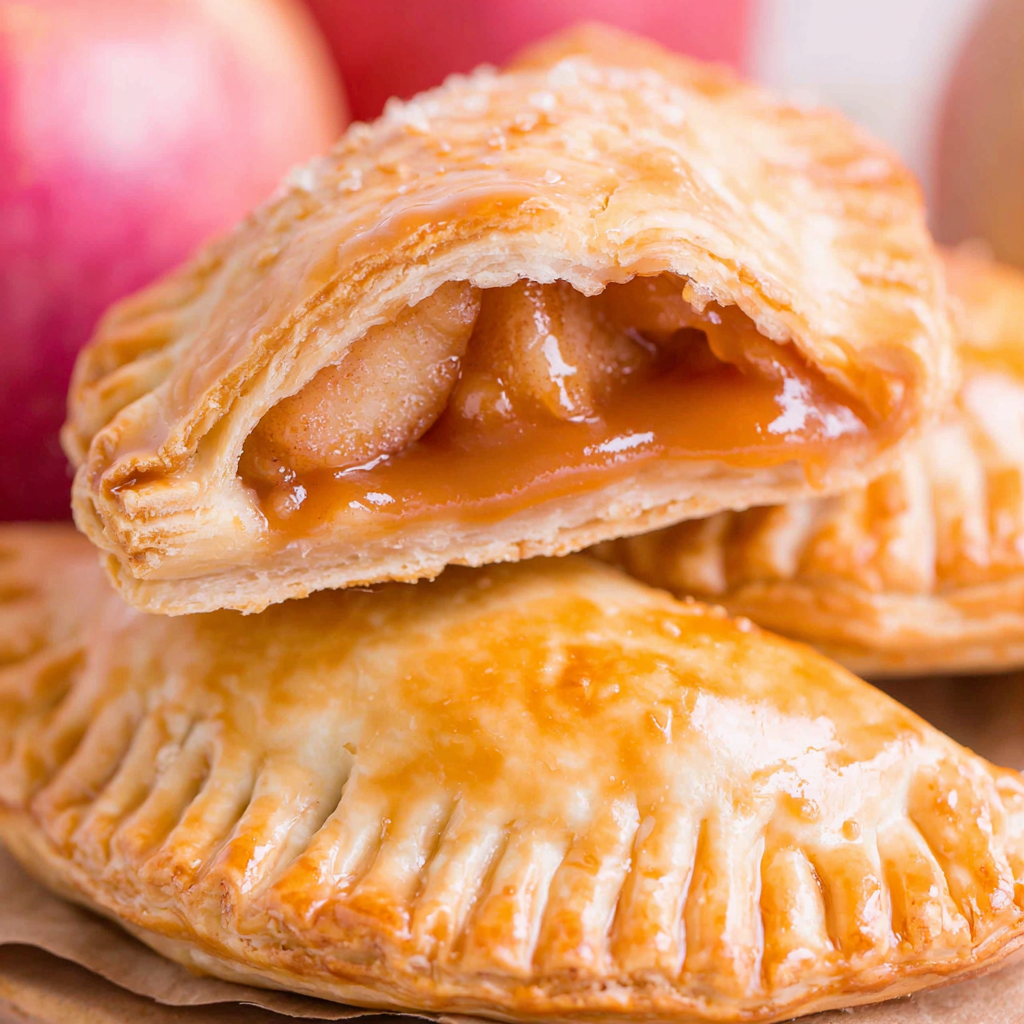
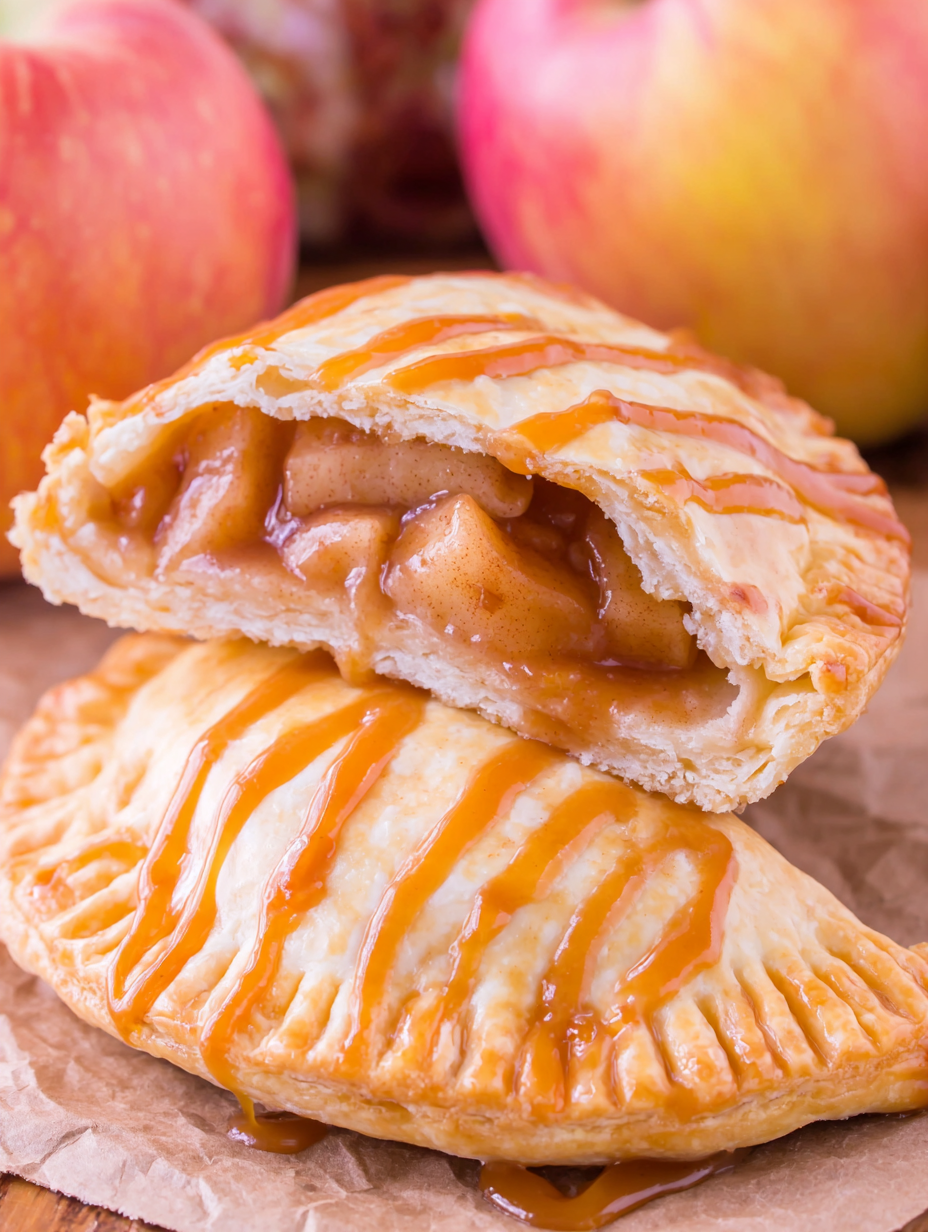
Caramel Apple Hand Pies

Perfectly portioned caramel apple hand pies — buttery pastry pockets filled with warm apple-caramel filling, ideal for fall gatherings and easy weeknight baking.
This recipe for Caramel Apple Hand Pies has been my go-to dessert for crisp autumn afternoons and casual holiday gatherings. I first developed the idea when I wanted all the comforting flavors of a classic apple pie without the fuss of slicing and serving a whole pie. These mini pie pouches are wallet-friendly in effort and abundant in nostalgia: a buttery crust, warm cinnamon-laced apples, and a ribbon of caramel that seeps into the pastry as it bakes. I remember handing one to my neighbor through the fence on a rainy October evening — the steam and buttery scent made us both pause and smile.
I fell in love with the contrast of textures the first time I made them: the golden, flaky exterior yielding to tender, fork-friendly apple pieces wrapped in a glossy caramel sauce. The recipe is forgiving and adaptable — use your favorite baking apples, or tweak sugar and spice levels for your crowd. These hand pies travel well, are portable for school lunches or picnics, and deliver the pleasure of a slice of pie in a single, satisfying bite. For busy bakers, they’re fast: about 20 minutes active prep and 20 minutes in the oven.
Why You'll Love This Recipe
- Ready in roughly 40 minutes from start to finish — ideal for last-minute desserts or an after-dinner treat when you crave something homemade without a long bake time.
- Portable, individually portioned pockets of flavor: no slicing or forks required, perfect for picnics, potlucks, and gifting.
- Uses pantry-friendly ingredients and a single store-bought refrigerated pie crust to save time while still delivering authentic flaky pastry texture.
- Customizable sweetness and spice: reduce the caramel or brown sugar for a less sweet option, or add a splash of lemon for brightness — adaptable to dietary needs and preferences.
- Make-ahead friendly: filling can be prepared a day in advance and assembled just before baking, which is a great strategy for hosting.
My family’s reaction the first time I swapped a whole pie for these was immediate: everyone went for seconds. The easy prep and consistent results make these a concentrated comfort-food moment — the caramel mellows the apple’s acidity while the crust provides that craveable snap. I’ve tested these with different apple varieties and found Honeycrisp gives the best balance of sweetness and structural integrity for dicing and quick cooking.
Ingredients
- Honeycrisp apples (2 small): Peel, core, and dice to yield about 1 1/2 cups. Choose firm, not mealy, apples so the pieces hold shape when cooked; Honeycrisp or Fuji work especially well.
- Caramel syrup (1/3 cup): I use a thick, pourable caramel sauce rather than runny syrup — it reduces and coats the apples beautifully. Brands like Smucker's or local bakery caramel work fine.
- Dark brown sugar (1/3 cup, lightly packed): Adds depth and molasses notes that complement the caramel; pack lightly so the filling isn't overly dense.
- Salted butter (1/4 cup / 1/2 stick): Butter delivers flavor and helps the apples soften quickly; use unsalted if you prefer and add a pinch of salt.
- Allspice (1/2 teaspoon): A warm, aromatic spice that pairs with caramel — you can substitute with ground cinnamon if desired.
- Pre-made refrigerated pie crust (14.1 oz package): Contains two crusts; use both. Look for a sturdy crust that rolls easily without tearing.
- Large egg (1) + heavy cream (1 tablespoon): Whisk together for an egg wash that promotes even browning and shine on the pastry tops.
- Optional finishing: A sprinkle of coarse sugar or flaky sea salt after baking elevates texture and flavor.
Instructions
Preheat and prepare: Preheat your oven to 400 degrees Fahrenheit and line two sheet pans with parchment paper. Using parchment prevents sticking and makes transferring easier; set the racks to the center and lower-middle positions to encourage even browning. Cook the apple filling: In a medium skillet over medium-high heat, combine the diced Honeycrisp apples, 1/3 cup caramel syrup, 1/3 cup dark brown sugar (lightly packed), 1/4 cup (1/2 stick) salted butter, and 1/2 teaspoon allspice. Stir to coat, then cook, stirring occasionally, until the apples are fork tender, about 4–6 minutes. You want the apples to soften but not disintegrate — they should hold some shape. Cool slightly: Remove the skillet from the heat and let the mixture cool for about 10 minutes so it thickens slightly and is safe to scoop. If the filling is too hot, it can make the dough soggy and be difficult to seal. Roll and mark the dough: On a lightly floured surface, lay out both pie crusts and use a rolling pin to flatten them very slightly so they’re easier to cut. Use a 3–4 inch round cookie cutter or a sandwich sealer to mark eight circles in each crust (you should be able to fit eight on each sheet). Press gently into the bottom crust to create indents where you will place the filling. Fill and seal: Scoop about 1 1/2 tablespoons of the warm apple filling into each indent. Place the second crust over the top, aligning it so you have enough extra dough to seal each pocket. Press around each filled circle to close, then cut and seal each hand pie with a sandwich sealer. If you don’t have one, cut each pie with the cookie cutter and crimp edges using a fork, ensuring a tight seal to avoid leaks. Vent and egg wash: Cut three small slits in the center of each top crust circle to allow steam to escape while baking. Whisk the egg with 1 tablespoon heavy cream for a glaze and brush the tops evenly; this gives a golden sheen and helps sprinkle adhesion if you add coarse sugar. Bake and cool: Bake the hand pies on the prepared pans for 13–16 minutes or until the tops are a deep golden brown. Remove from the oven and allow them to rest for at least 10 minutes on the pan — this lets the filling set so you can move them without spilling warm caramel.
You Must Know
- These hold well at room temperature for a few hours, but refrigerate if you plan to keep them longer than 24 hours; they also freeze well for up to three months when individually wrapped.
- High in energy and comfort — roughly 500 calories per hand pie — they are best enjoyed as a treat, balanced with lighter sides if serving multiple courses.
- The filling can be made ahead and refrigerated; assemble and bake just before serving to retain crisp pastry texture.
- Allergies to dairy and gluten apply: these contain butter, cream, and wheat-based crust unless substitutions are made.
What I love most is how reliably these please a group: at a neighborhood bake sale, they disappeared first. The caramel tucks into the apples, adding silkiness without drowning the fruit; the result is concentrated pie flavor in every hand-sized parcel. My tip: let them rest after baking — slicing too soon invites molten caramel to escape.
Storage Tips
Store baked hand pies at room temperature in an airtight container for up to 48 hours. For longer storage, arrange cooled pies in a single layer in a freezer-safe container or bag with parchment between layers to prevent sticking; freeze for up to three months. To reheat, warm in a 325°F oven for 8–12 minutes from refrigerated or 15–18 minutes from frozen, until heated through and the crust crisps. Avoid microwaving for extended periods — the crust will become soggy. If you plan to make these ahead for an event, bake the day before and refresh in the oven for 5–7 minutes before serving to revive the flake.
Ingredient Substitutions
If Honeycrisp is unavailable, substitute Fuji, Gala, or Braeburn; firmer varieties hold their shape during quick sautéing. For a dairy-free version, use plant-based butter and a non-dairy cream alternative for the wash, and check that the pie crust is vegan. Swap caramel syrup for homemade salted caramel (reduce slightly) or use chopped soft caramels melted with a tablespoon of cream. Replace allspice with 1/4 teaspoon ground cinnamon plus a pinch of nutmeg if desired. For gluten-free, choose a certified gluten-free refrigerated crust and note that baking times may vary slightly.
Serving Suggestions
Serve warm with a scoop of vanilla ice cream or a dollop of lightly sweetened whipped cream. For a simple café-style presentation, dust tops with powdered sugar or drizzle with extra caramel and a sprinkle of flaky sea salt. Pair these with hot coffee, spiced cider, or a robust black tea for contrast. For a brunch spread, place alongside savory frittatas and roasted nuts for textural balance. Garnish with thin apple slices or a small sprig of rosemary for visual interest at gatherings.
Cultural Background
Hand pies echo a long tradition of portable pastries found in many cuisines, from British turnovers to American fruit-filled pockets. They became popular in the United States when home bakers sought convenient individual desserts that could be transported and shared at fairs and picnics. Using caramel and apples is a nod to autumn harvest traditions where preserving and concentrating seasonal fruit into sweet fillings was key. This version blends classic American apple pie flavors with the convenience of a small, handheld format that’s perfect for modern entertaining.
Seasonal Adaptations
In fall, enhance the filling with a tablespoon of bourbon or apple brandy for depth; in winter, fold in chopped toasted pecans for crunch. For summer versions, swap apples for peaches or berries and reduce cooking time to keep fruit bright and slightly saucy. During the holidays, roll the crust thin and use decorative lattice or pastry cutouts for a festive look. For a Thanksgiving twist, add a pinch of ground ginger and replace caramel with brown butter for a nuttier profile.
Meal Prep Tips
Make the apple-caramel filling up to two days in advance and refrigerate in an airtight container; bring to room temperature or gently warm before assembly to make scooping easier. Keep the crust chilled until you are ready to cut and assemble — cold dough seals better and bakes flakier. If preparing many at once, place assembled but unbaked pies on a baking sheet in the refrigerator for 20–30 minutes to firm, then bake in batches. For large events, freeze sealed, unbaked pies on a tray, then transfer to bags and bake from frozen with an additional 4–6 minutes of time.
These Caramel Apple Hand Pies represent cozy, portable comfort that’s easy to make and share. Whether packed for a picnic, served warm at a family gathering, or left on the counter for a weekday treat, they invite small moments of joy. Tweak them to your taste, and don’t be surprised when they become a requested staple at your table.
Pro Tips
Cool the filling for at least 10 minutes before filling the dough to prevent a soggy bottom.
Use a 3–4 inch cutter for consistent sizing; 1 1/2 tablespoons filling gives a balanced pocket without overfilling.
Brush with egg wash for even browning and a glossy finish; add coarse sugar after the wash for texture.
Let the pies rest 10 minutes after baking so the caramel sets and doesn’t spill when handled.
This nourishing caramel apple hand pies recipe is sure to be a staple in your kitchen. Enjoy every moist, high protein slice — it is perfect for breakfast or as a wholesome snack any time.
FAQs about Recipes
Can I prepare the filling in advance?
Yes — the filling can be made a day ahead and refrigerated; bring it to room temperature or warm slightly before filling the dough.
How do I freeze and bake these later?
Freeze assembled unbaked pies on a tray, then transfer to a freezer bag; bake from frozen adding 4–6 minutes to the bake time.
Tags
Caramel Apple Hand Pies
This Caramel Apple Hand Pies recipe makes perfectly juicy, tender, and flavorful steak every time! Serve with potatoes and a side salad for an unforgettable dinner in under 30 minutes.
Ingredients
Filling
Pastry
Egg Wash
Instructions
Preheat and prepare
Preheat oven to 400°F and line two sheet pans with parchment paper. Position racks to center and lower-middle for even browning.
Cook the apples
In a medium skillet over medium-high heat, combine apples, caramel syrup, brown sugar, butter, and allspice. Cook until apples are fork tender, about 4–6 minutes, stirring occasionally.
Cool the filling
Remove from heat and let cool for about 10 minutes so the mixture thickens slightly and is safe to handle.
Roll and mark
On a floured surface, slightly flatten pie crusts and use a 3–4 inch cutter to mark 8 circles per crust. Make indents in the bottom crust to guide filling placement.
Fill and seal
Place 1 1/2 tablespoons of filling into each bottom circle. Cover with the second crust, align, press to seal, and cut/seal each pie with a sandwich sealer or fork-crimp.
Vent, egg wash and bake
Cut three small slits in each top, whisk egg with heavy cream and brush tops, then bake 13–16 minutes until golden brown. Cool 10 minutes before serving.
Last Step: Please leave a rating and comment letting us know how you liked this recipe! This helps our business to thrive and continue providing free, high-quality recipes for you.
Nutrition
Did You Make This?
Leave a comment & rating below or tag
@platemint on social media!
Categories:
You might also like...

Cheesy Baked Ziti Casserole
Saucy, cheesy baked ziti with ricotta and basil tastes like lasagna in half the effort, perfect for weeknights or crowds.

Juicy Cheeseburger Sliders Bake
Quick, crowd-pleasing cheeseburger sliders baked golden with melty cheddar and savory beef. Ready in 30 minutes, great for parties and easy meal prep.

Air Fryer Sweet Potato Fries
Crispy air fryer sweet potato fries with tender centers, fast-food flavor without deep frying. Ready in minutes and irresistibly snackable.
Did You Make This?
Leave a comment & rating below or tag @platemint on social media!
Rate This Recipe
Share This Recipe
Enjoyed this recipe? Share it with friends and family, and don't forget to leave a review!
Comments (1)
This recipe looks amazing! Can't wait to try it.
Comments are stored locally in your browser. Server comments are displayed alongside your local comments.

Hi, I'm Wendie!
What's Popular

30-Minute Meals!
Join to receive our email series which contains a round-up of some of our quick and easy family favorite recipes.