
>>

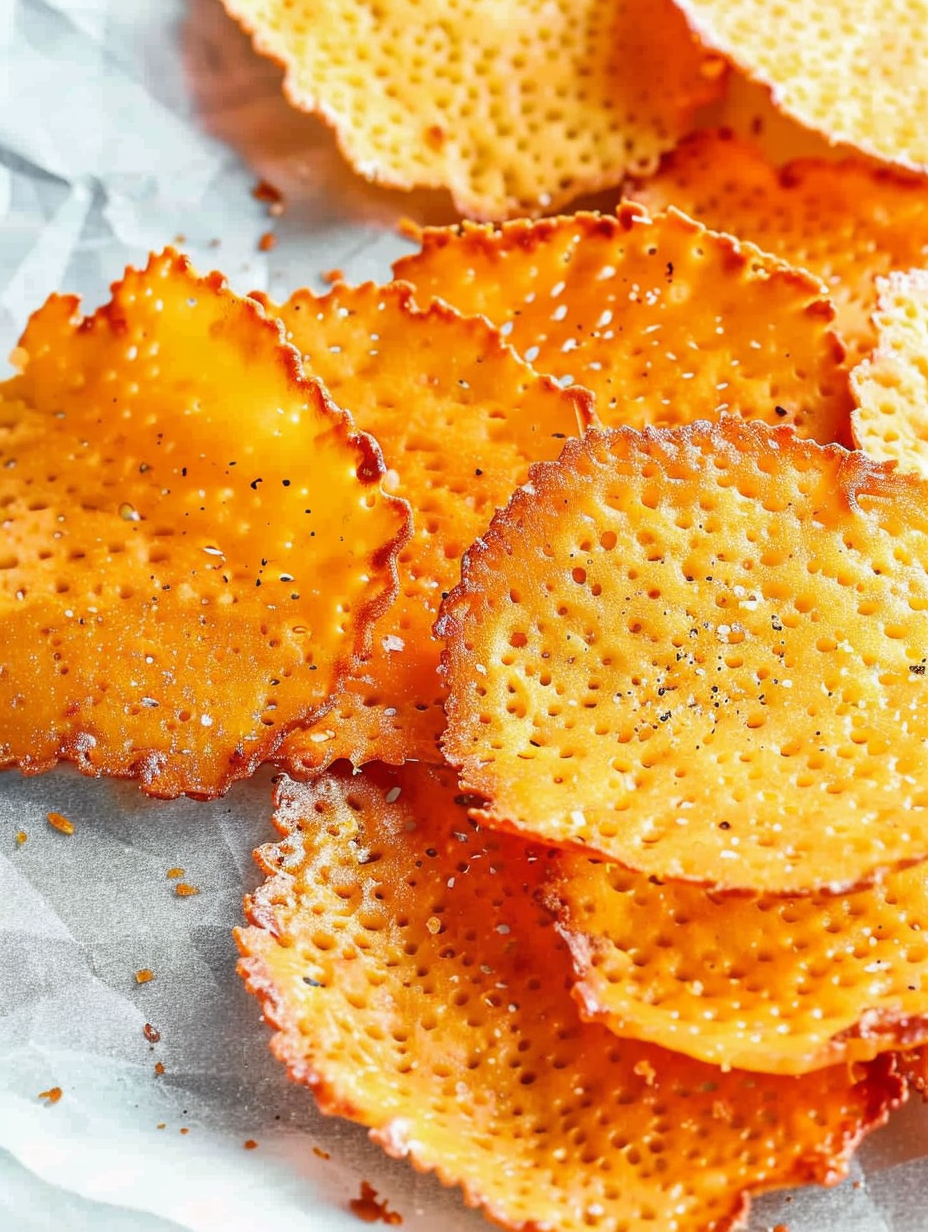
Crispy, cheesy, and ready in 10 minutes — these baked cheese crisps are an addictive low-carb snack that’s customizable and budget-friendly.

This recipe for baked cheese crisps is my go-to when I want a crunchy, satisfying snack without a lot of fuss. I first discovered this method on a weeknight when I had leftover shredded cheddar and a craving for something salty and crisp. Within ten minutes a tray of golden, lacy crisps appeared and disappeared just as quickly — everyone loved them. They have a deep cheddar flavor, a lacy, brittle texture at the edges, and a slightly chewier center when you pull them straight from the oven. As they cool, they snap into perfect wedges that are ideal for dipping or nibbling by the handful.
What makes these special is their simplicity and reliability. With only two ingredients and minimal hands-on time, they come together in a flash. They are also wonderfully customizable: swap in different cheeses, add spices, or shape them differently for parties. They are a great last-minute appetizer or an afternoon pick-me-up. I keep a jar of shredded cheddar in the fridge specifically for this purpose now, and when friends stop by, a fresh batch is always welcomed.
My family reaction has been predictably enthusiastic: they vanish faster than I can set them on the counter. I remember one movie night when I made three trays and the bowl was empty before the opening credits. These crisps were also a hit with my neighbor’s kids, who loved that they could pick them up like chips and dip them. Over time I learned small tricks that reliably produce perfectly crisp results, which I included below so you won’t be left with limp chews.

My favorite part of making these is how flexible the outcome is. For gatherings I often make several flavor variations on one tray — plain sharp cheddar, a smoked-cheddar batch with paprika, and a herb batch with dried oregano. Kids love the plain ones, while adults often get adventurous with flavoured crisps for dipping into soft cheeses or hummus. Over the years I’ve used these as low-carb croutons on salads and as crunchy garnish on creamy soups.
Proper storage is vital to maintain crispness. Allow crisps to cool completely on a rack before storing. Place layers separated by parchment paper in an airtight container and refrigerate. At room temperature they can soften from humidity; if you expect to store for longer than three days, keep them in the refrigerator. To re-crisp, place on a baking sheet and warm at 300 degrees F for 3 to 4 minutes. Avoid the microwave for reheating since it encourages steam and sogginess. For long-term storage, freeze in a single layer on a tray, then transfer to a freezer bag; defrost briefly and re-crisp in the oven.
Swap cheddar for Parmesan for an extra-lacy, nutty crisp, or use a 50/50 mix of cheddar and Gruyere for a richer, more complex flavor. For a lower-sodium option, choose a reduced-sodium cheddar and increase herbs for flavor. If you need dairy-free alternatives, use a plant-based shredded cheese labeled for melting — results vary, so test a small batch first. To add texture and flavor, stir in ground flaxseed or finely chopped nuts into each mound before baking; this changes the melting behavior slightly and will require close attention to browning.
Serve the crisps as a stand-alone snack or as part of a spread. For parties arrange them on a board with dips like guacamole, tzatziki, or whipped goat cheese. They make a crunchy garnish on tomato soup, a salad topper replacing croutons, or a low-carb plate with sliced meats and pickles. Garnish with a tiny sprig of thyme or a small sprinkle of flaky sea salt for an elevated presentation. For family snacks, stack them in a bowl and place a small ramekin of salsa for dipping — everyone enjoys the satisfying crunch.
Thin baked cheese wafers have roots in multiple culinary traditions where cheese is celebrated as both ingredient and garnish. In Italian cuisine, crisped grated cheese resembles frico or Parmesan crisps used as tuiles or bowl-shaped garnishes. The simplicity of melting and crisping cheese in an oven or pan is timeless, adapted in home kitchens for modern dietary shifts like low-carb lifestyles. These baked crisps are an Americanized, quick-to-prepare version inspired by those classic cheese wafers, scaled for convenience and everyday snacking.
Adjust the flavor to match the season: in autumn add a pinch of smoked paprika and a dusting of ground coriander to echo fall spices. For the holidays, incorporate a little freshly grated nutmeg into a Gruyere-cheddar mix for a warm, festive note. In summer, highlight bright flavors with lemon zest and cracked black pepper, or top with a tiny dollop of herb-infused ricotta right before serving. These small changes keep the snack feeling timely and special throughout the year.
Make multiple trays at once and store them in portioned containers for the week. Assemble 10-crisp snack packs in small airtight containers or resealable bags with parchment separators so you can grab-and-go. If you’re prepping for lunches, include a small dip pot to pair with the crisps. Because they are compact and shelf-stable when refrigerated, they are perfect for batch cooking and quick snacks during busy weeks.
These baked cheese crisps are simple, versatile, and reliably delicious. Whether you make one tray for yourself or several for a crowd, they bring a satisfying crunch and bold cheese flavor to snacks, soups, and salads. Give them a try the next time you need something quick, and make them your own with favorite spices and cheeses.
Use freshly shredded cheese from a block for better melting and crisper texture; pre-shredded cheese contains additives that can affect crisping.
Dab excess grease with a paper towel while crisps are warm to prevent sogginess and maintain crunch.
Watch the oven closely in the final minute; cheese can go from golden to burnt quickly.
Space mounds at least 2 inches apart because cheese spreads significantly while melting.
This nourishing baked cheese crisps recipe is sure to be a staple in your kitchen. Enjoy every moist, high protein slice — it is perfect for breakfast or as a wholesome snack any time.
This Baked Cheese Crisps recipe makes perfectly juicy, tender, and flavorful steak every time! Serve with potatoes and a side salad for an unforgettable dinner in under 30 minutes.
Preheat the oven to 350 degrees F to ensure even melting and consistent browning before you start portioning the cheese.
Line a baking sheet with parchment paper. Parchment prevents sticking and allows the crisps to slide off once cooled.
Drop 1 tablespoon mounds of shredded cheddar onto the parchment, spacing them about 2 inches apart so they have room to spread.
Sprinkle a pinch of garlic powder over each mound, roughly 1/8 teaspoon per crisp, and press lightly so the powder adheres.
Bake for 5 to 8 minutes, watching closely. When edges turn golden brown and the surface looks lacy, remove immediately to avoid burning.
Lift the parchment and place on a cooling rack. Dab the tops lightly with a paper towel if excess grease is present to preserve crispness.
Once completely cooled, store in an airtight container layered with parchment paper in the refrigerator for up to one week, or freeze for longer storage.
Last Step: Please leave a rating and comment letting us know how you liked this recipe! This helps our business to thrive and continue providing free, high-quality recipes for you.
Leave a comment & rating below or tag
@platemint on social media!

Saucy, cheesy baked ziti with ricotta and basil tastes like lasagna in half the effort, perfect for weeknights or crowds.

Quick, crowd-pleasing cheeseburger sliders baked golden with melty cheddar and savory beef. Ready in 30 minutes, great for parties and easy meal prep.

Crispy air fryer sweet potato fries with tender centers, fast-food flavor without deep frying. Ready in minutes and irresistibly snackable.
Leave a comment & rating below or tag @platemint on social media!
Enjoyed this recipe? Share it with friends and family, and don't forget to leave a review!
This recipe looks amazing! Can't wait to try it.
Comments are stored locally in your browser. Server comments are displayed alongside your local comments.

Join to receive our email series which contains a round-up of some of our quick and easy family favorite recipes.
